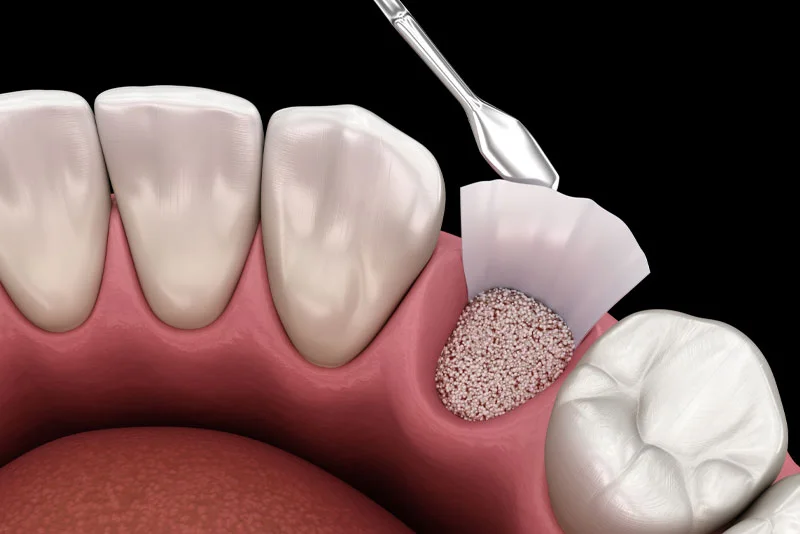
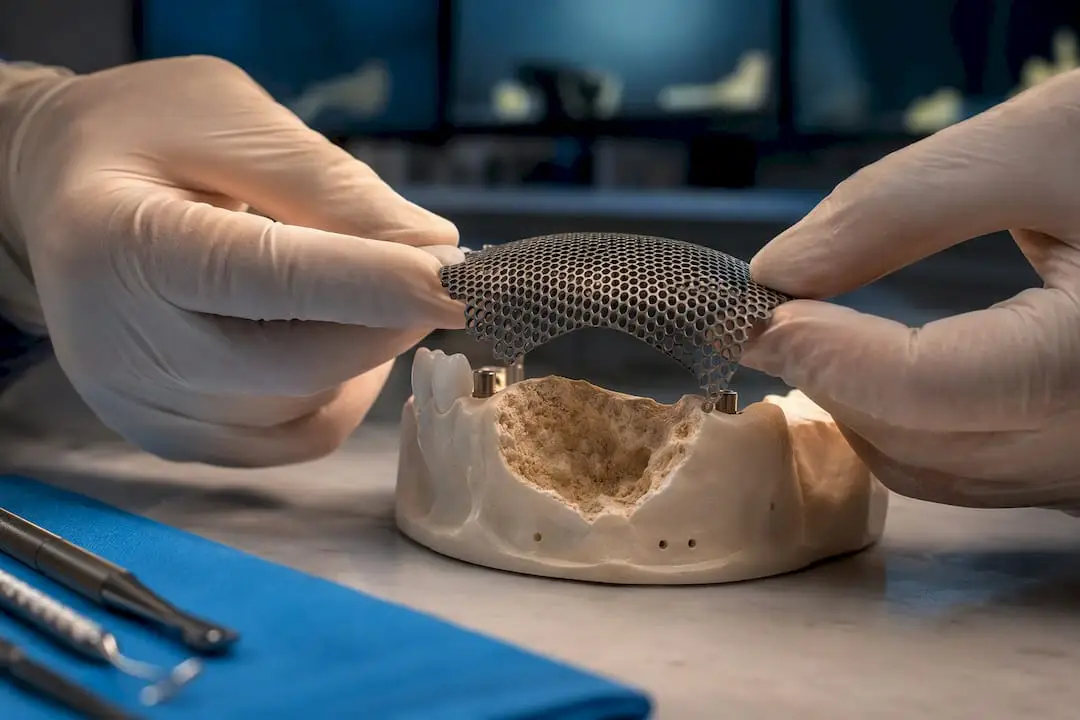
Perform socket preservation when the buccal plate is ≤1 mm thick, the horizontal defect dimension exceeds ~2 mm, the site is in the esthetic zone, or an infected socket requires staged implant placement. The preferred operative approach is to pack a slow-resorbing bone substitute such as Geistlich Bio-Oss, seal the socket with a collagen plug (CollaPlug) or resorbable membrane (Geistlich Bio-Gide), and use a flapless socket-plug technique whenever the soft-tissue envelope allows it. Pooled RCT data show alveolar ridge preservation (ARP) prevents approximately 1.99 mm of horizontal and 1.72 mm of mid-buccal vertical bone loss compared with extraction alone — a clinically meaningful margin when you are planning an implant in a narrow ridge.
Three decisions to make at the chair before you close:
- Preserve vs. observe: Preserve when HDD >2 mm, buccal plate ≤1 mm, or esthetic zone; observe when all walls are intact and HDD ≤2 mm.
- Immediate implant vs. staged ARP: Immediate (Type 1) when bone support and primary stability are achievable; staged when the buccal plate is compromised or infection is present.
- Membrane vs. socket seal: Use a resorbable collagen membrane or collagen plug for most cases; reserve non-resorbable dPTFE for large defects requiring prolonged space maintenance.
Pro Tip: Before you decide on a technique, probe all four socket walls immediately after extraction. A buccal plate that feels thin on probing but intact on CBCT can still collapse during healing — treat it as compromised.
Key Takeaways
Socket preservation techniques reduce horizontal and vertical mid-buccal ridge loss compared with extraction alone, making ARP the standard of care when the buccal plate is ≤1 mm or the horizontal defect exceeds 2 mm.
| Point |
Details |
| Core indication threshold |
Perform ARP when buccal plate is ≤1 mm or horizontal defect dimension exceeds ~2 mm post-extraction. |
| Preferred technique |
Flapless socket-plug with a slow-resorbing xenograft (Bio-Oss) and collagen plug or Bio-Gide seal for most anterior and premolar sites. |
| Healing interval |
Plan implant placement at 3–6 months; xenograft sites typically ready at ~4 months per clinical review recommendations. |
| Evidence ceiling |
ARP reduces dimensional loss and downstream augmentation need but does not guarantee improved implant survival in all cases. |
| Onewd training |
Hands-on masterclasses at Onewd cover the full ARP operative workflow with live-patient modules and accredited CE credits. |
Which sockets actually need preservation?
The short answer: not every extraction site. Spontaneous healing produces acceptable ridge dimensions when all four socket walls are intact and the horizontal defect dimension is ≤2 mm. Once that threshold is crossed, dimensional loss accelerates and the downstream cost in augmentation time and materials rises sharply.
Anatomic thresholds that tip the decision toward ARP:
- Buccal plate thickness ≤1.0 mm (a reliable predictor of post-extraction collapse)
- Horizontal defect dimension >2 mm after extraction, per the ITI consensus on implant placement in extraction sockets
- Esthetic anterior sites where even 1 mm of buccal contour loss is visible
- Fenestrations or dehiscences present before extraction
- Multi-rooted teeth with inter-radicular bone loss
Local anatomic factors that modify the decision:
- Single-rooted sockets with intact walls: lower risk, ARP optional
- Molar sockets: larger volume, higher graft demand, and more variable healing
- Active periapical or periodontal pathology: debride thoroughly; ARP is still appropriate when the infection is controlled at extraction, but monitor closely
- Thin biotype: higher collapse risk regardless of plate thickness measurement
Patient-level factors that increase ARP priority:
- Smokers: impaired angiogenesis slows graft integration; ARP is still indicated but counsel on elevated failure risk
- Uncontrolled diabetes (HbA1c >8%): delay elective ARP until metabolic control improves
- Antiresorptive or antiangiogenic medications: assess medication-related osteonecrosis risk before any bone grafting; consult with the prescribing physician
- Head and neck radiation history: staged approach with specialist co-management
Chairside decision tree:
- Evaluate all socket walls immediately post-extraction (probe + visual).
- Estimate HDD and buccal plate thickness (CBCT pre-op or tactile assessment).
- If HDD ≤2 mm and all walls intact → observation acceptable; consider collagen plug for hemostasis only.
- If HDD >2 mm or buccal plate ≤1 mm → ARP indicated; proceed to technique selection.
- If buccal plate is absent or infection present → staged ARP; no immediate implant.
- If systemic red flags present → medical clearance before proceeding.
Contraindications and referral triggers:
- Active, uncontrolled infection extending beyond the socket
- Bisphosphonate or denosumab use with high cumulative dose: refer to oral surgery or periodontology
- Uncontrolled systemic disease (uncontrolled diabetes, bleeding disorders)
- Insufficient keratinized tissue for any closure: consider soft-tissue augmentation first or concurrent with ARP
How the main socket preservation techniques compare
Every socket preservation technique starts here. Use periotomes or thin-bladed elevators to sever the periodontal ligament before applying extraction force. Section multi-rooted teeth to remove each root individually rather than luxating the whole tooth. The goal is to exit the socket without fracturing the buccal plate — once that plate is gone, your technique options narrow considerably.
A practical checklist:
- Confirm CBCT anatomy before sectioning (root proximity, plate thickness).
- Use periotomes circumferentially before any rotational force.
- Section molars mesiodistally; remove each root with a straight elevator.
- After extraction, probe all walls before committing to a technique.
Pro Tip: When sectioning a lower molar, keep your bur angled slightly toward the palatal/lingual root to avoid inadvertently scoring the buccal plate. The tactile feedback changes the moment you hit the furcation — stop there.
Flapless socket-plug technique
The flapless socket-plug approach places a collagen plug or sponge (CollaPlug) directly into the socket orifice after graft packing, without raising a mucoperiosteal flap. This preserves the keratinized gingival architecture, maintains blood supply to the buccal plate, and produces less postoperative morbidity than flap elevation. It is the preferred technique for most single-rooted anterior and premolar sockets with an intact or near-intact buccal plate.
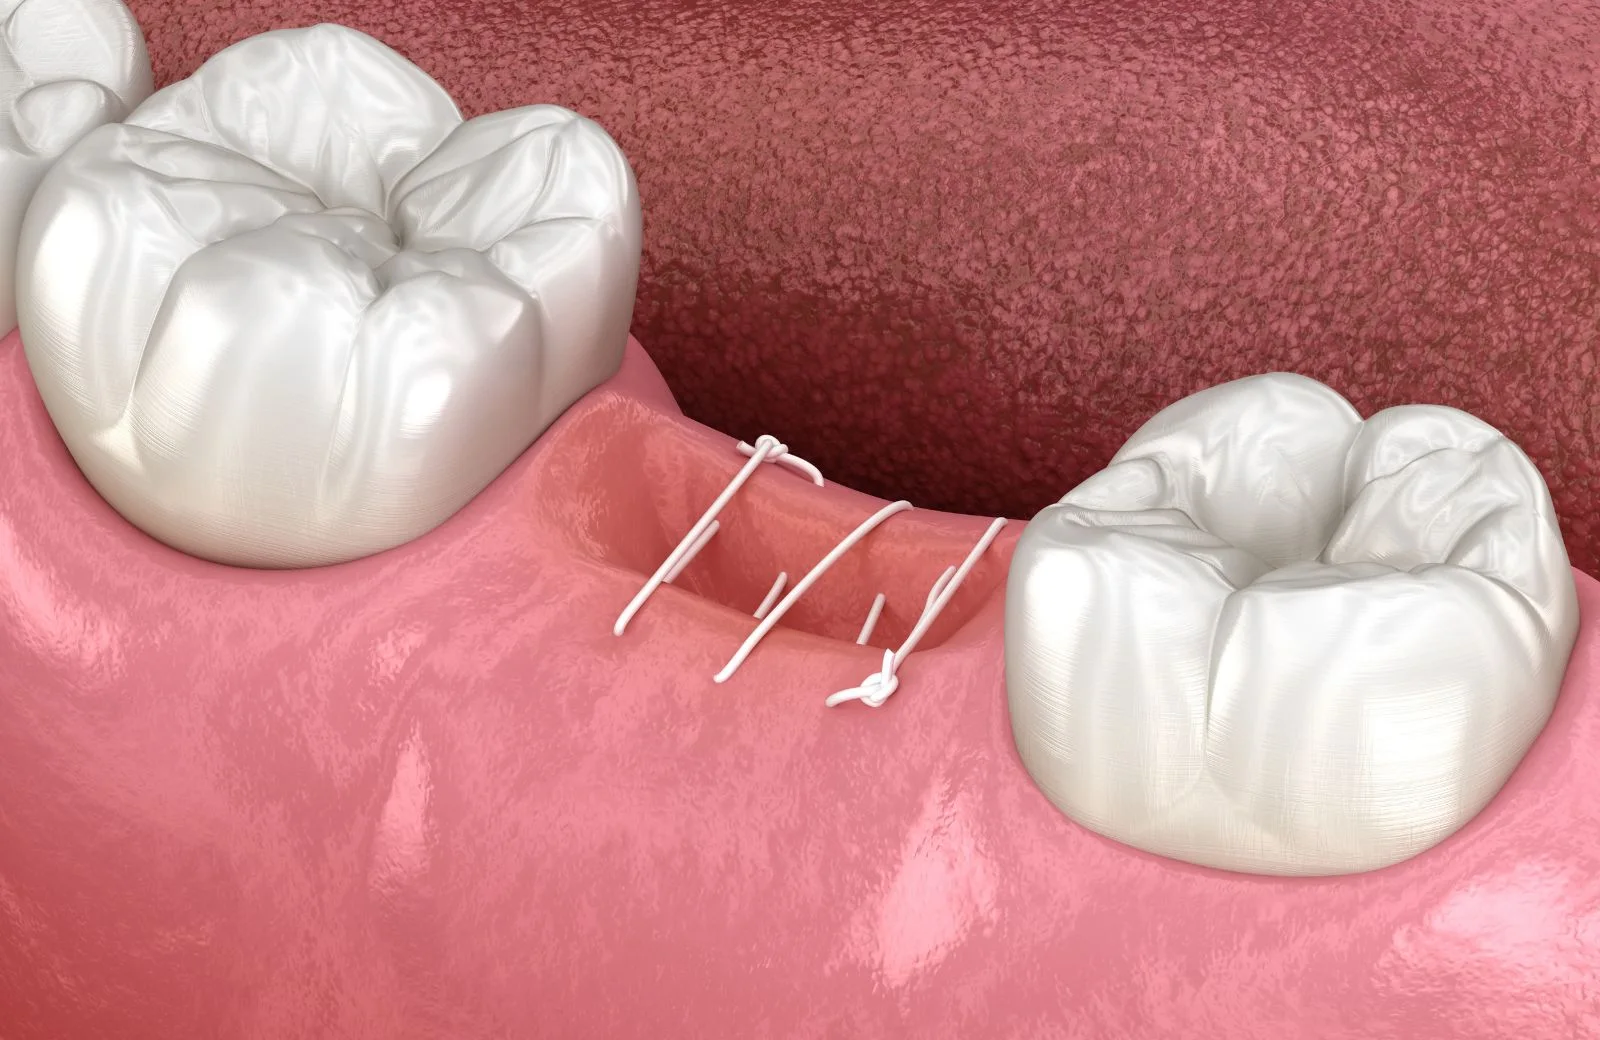
Steps in brief: atraumatic extraction → debridement and marrow bleeding induction → graft packing to ~2 mm below the gingival margin → collagen plug trimmed to fit the socket orifice → cross-mattress or figure-8 suture to stabilize the plug.
The limitation is closure reliability. If the socket orifice is wide (common in molar sites) or the soft-tissue envelope is thin, the plug can dislodge. In those cases, a free gingival graft or acellular dermal matrix (AlloDerm) over the plug improves stability.
Flap elevation with primary closure
Raising a full-thickness flap and achieving primary closure over the graft gives you the most controlled healing environment, particularly for large defects, multi-wall deficiencies, or cases where a non-resorbable membrane requires complete coverage. The tradeoff: periosteal releasing incisions reduce blood supply to the buccal plate, vestibular depth can decrease, and postoperative swelling is greater.
Reserve this approach for:
- Horizontal defects >4 mm with absent buccal wall
- Non-resorbable dPTFE membrane placement
- Simultaneous soft-tissue augmentation
| Parameter |
Flapless socket-plug |
Flap + primary closure |
Immediate implant (Type 1) |
Staged ARP (Types 2–4) |
| Soft-tissue outcome |
Preserves keratinized gingiva |
Risk of vestibular reduction |
Depends on gap management |
Mature soft tissue at implant stage |
| Bone preservation |
Good for intact/near-intact sockets |
Best for large defects |
Requires ≥3–4 mm apical bone |
ARP reduces need for later augmentation |
| Morbidity |
Low |
Moderate to high |
Low if primary stability achieved |
Moderate (two-stage procedure) |
| Need for later grafting |
Low to moderate |
Low |
Possible gap graft needed |
Reduced by ARP |
Immediate implant placement is appropriate when you can achieve primary stability (≥35 Ncm insertion torque), the buccal gap is ≤2 mm, and the buccal plate is present. When the plate is absent or the gap exceeds 2 mm, staged ARP followed by implant placement at 3–6 months is the safer path.
Choosing the right graft material for socket preservation
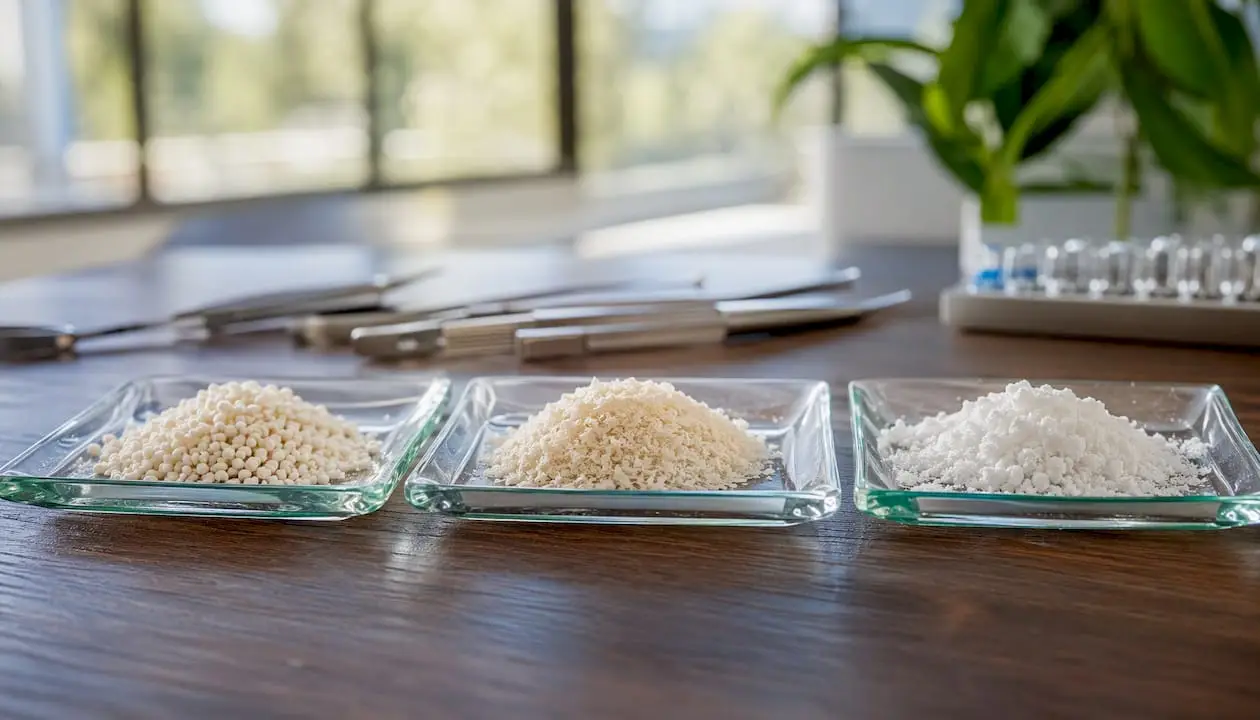
No single material wins every case. The decision turns on resorption profile, handling, evidence base, and what you have on the shelf. Here is how the four main classes break down.
Autogenous bone (intraoral)
Collected from the retromolar pad, maxillary tuberosity, or chin, autogenous bone carries living osteogenic cells and growth factors. It integrates quickly and has no disease-transmission risk. The drawbacks are donor-site morbidity, limited volume from intraoral sites, and faster resorption compared with xenografts. Most clinicians use it as a 50:50 mix with a slow-resorbing carrier rather than as a standalone socket filler.
Freeze-dried bone allograft (FDBA)
FDBA from human cadaveric bone is widely available in the United States, cost-effective, and comes in particulate or putty form. Demineralized FDBA (DFDBA) retains bone morphogenetic proteins and has osteoinductive potential; mineralized FDBA is primarily osteoconductive. Handling is straightforward: hydrate the particulate in saline or PRF liquid, pack, and seal. Resorption is faster than xenograft, which means earlier implant placement is possible but volume stability over time is slightly lower. For a detailed breakdown of how allograft compares with xenograft across handling and clinical outcomes, the xenograft vs. allograft comparison at Onewd is worth reviewing.
Xenograft: Geistlich Bio-Oss
Deproteinized bovine bone mineral (DBBM), most commonly Geistlich Bio-Oss, is the most extensively studied socket graft material in the literature. Its slow resorption rate (years, not months) maintains ridge volume long-term, which is why clinical reviews recommend it as a first-line material for ARP, typically covered with a resorbable collagen membrane or collagen sponge. The tradeoff: because it resorbs slowly, it may delay full replacement by vital bone, and implant placement is generally recommended around 4 months post-ARP. Handling is easy — the granules pack well and resist displacement when mixed with blood or PRF.
Alloplasts (BCP, HA, bioactive glass)
Synthetic calcium phosphate ceramics (biphasic calcium phosphate, hydroxyapatite) and bioactive glass are fully synthetic, carry no disease-transmission risk, and are available in multiple forms including injectable pastes and putties. Resorption rates vary widely by formulation: pure HA resorbs very slowly; bioactive glass resorbs faster and bonds chemically to bone. Evidence for dimensional preservation is generally positive but thinner than for xenograft. They are a reasonable choice when xenograft is contraindicated (patient preference, religious objection) or when an injectable form is needed for irregular socket anatomy.
Practical selection summary:
- Esthetic anterior socket, intact walls: Geistlich Bio-Oss + Bio-Gide or collagen plug; plan implant at ~4 months
- Posterior socket, cost-sensitive: FDBA + collagen plug; implant at 3–4 months
- Patient declines animal or human products: alloplast (BCP or bioactive glass) + collagen plug
- Large defect requiring volume: autogenous bone mixed 1:1 with xenograft + resorbable membrane
- Need for fast integration: DFDBA or autogenous bone; accept slightly lower volume stability
Cost and availability in the United States: Geistlich Bio-Oss and Bio-Gide are widely stocked by major dental distributors (Henry Schein, Patterson Dental) and carry a premium price. FDBA allografts from tissue banks such as MinerOss or Puros are moderately priced. Alloplasts vary widely. Coding and reimbursement guidance for ARP procedures, including D7953, is covered in the ADA codes and billing resource at Onewd.
Membranes and socket sealing: what goes on top matters
The graft material fills the socket; the seal is what keeps it there and guides tissue ingrowth. Choosing the wrong seal is one of the most common reasons for partial graft loss.
Resorbable collagen membranes
Geistlich Bio-Gide is the reference standard for resorbable barrier membranes in ARP. Its bilayer structure (rough side toward bone, smooth side toward soft tissue) supports cell occlusion while resorbing over 4–6 months. Membrane use correlates with improved horizontal and vertical ridge preservation in multiple studies. Cross-linked collagen membranes (e.g., OsseoGuard, BioMend Extend) resorb more slowly (up to 6 months) and may be preferred when longer barrier function is needed, though cross-linking slightly increases exposure risk.
Non-resorbable dPTFE membranes
Dense PTFE membranes (e.g., Cytoplast) do not require primary closure because their tight pore structure resists bacterial ingrowth. They are the membrane of choice for large defects where prolonged space maintenance is critical. They must be removed at 4–6 weeks, which adds a second procedure. Reserve them for cases where primary closure is not achievable and the defect size justifies the added complexity.
Collagen plugs and sponges: CollaPlug
CollaPlug (and similar collagen sponges) serves as both a hemostatic agent and a socket seal. Trimmed to fit the socket orifice and stabilized with a cross-mattress suture, it provides a scaffold for soft-tissue ingrowth without requiring flap elevation. This is the workhorse seal for flapless ARP in most anterior and premolar sockets.
Acellular dermal matrix: AlloDerm
AlloDerm, an acellular dermal matrix derived from human dermis, functions as a soft-tissue graft when placed over the socket orifice. It provides greater thickness and mechanical strength than a collagen plug alone, making it useful when the existing soft-tissue envelope is thin or when simultaneous soft-tissue augmentation is desired. It is sutured over the graft like a free gingival graft but without a palatal donor site.
Free gingival and connective tissue grafts
Autogenous soft-tissue grafts from the palate remain the gold standard for socket sealing when keratinized tissue volume is critically low. They are technique-sensitive and add donor-site morbidity, but they provide the most predictable long-term soft-tissue thickness.
Suturing and closure strategies:
- Cross-mattress suture: the standard for stabilizing a collagen plug or membrane over the socket orifice
- Figure-8 suture: simpler, useful for smaller sockets; less reliable for large orifices
- Horizontal mattress: preferred when primary closure is attempted over a membrane
- Suture material: 4-0 or 5-0 chromic gut for resorbable; 4-0 PTFE for non-resorbable when membrane removal is planned
Reducing membrane exposure risk:
- Avoid tension at the closure line; release periosteum if needed for primary closure
- Ensure adequate soft-tissue thickness (≥2 mm) over the membrane
- Use chlorhexidine rinse 0.12% twice daily for the first 2 weeks
- Avoid removable prosthetics that load the surgical site during healing
- If early exposure occurs (<2 mm), conservative management with chlorhexidine gel and close monitoring is often sufficient before surgical intervention is needed
PRF, A-PRF, and other biologic adjuncts
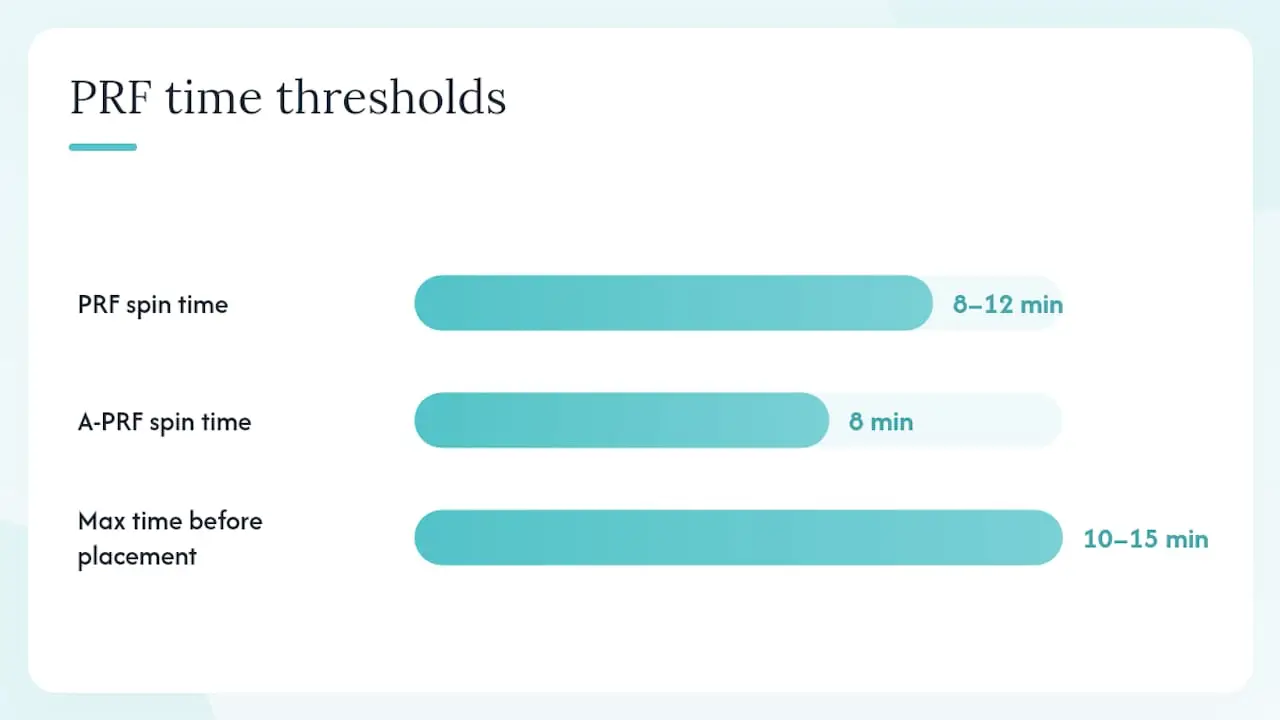
Platelet-rich fibrin (PRF) has moved from niche adjunct to routine addition in many ARP workflows, and for good reason. Prepared by centrifuging autologous whole blood (typically 400–700 rpm for 8–12 minutes depending on the A-PRF protocol), PRF produces a fibrin membrane or clot rich in growth factors including PDGF, TGF-β, and VEGF. It costs nothing beyond the centrifuge and a blood draw kit, and it adds no disease-transmission risk.
What the evidence supports:
PRF combined with bone grafts can improve soft-tissue healing and may increase bone density at the site. Current evidence supports cautious use: PRF as an adjunct reduces postoperative discomfort in several studies, but higher-quality RCTs are still needed to define effect sizes and standardized protocols. The soft-tissue healing benefit is the most consistent finding; the bone volume benefit is promising but not yet definitive.
A-PRF (Advanced PRF) uses a lower centrifugation speed and longer spin time to concentrate more monocytes and lymphocytes in the clot, theoretically improving the angiogenic and osteogenic response. The clinical difference between PRF and A-PRF in socket preservation is not yet established by large RCTs.
Practical protocol for combining PRF with particulate grafts:
- Draw 2–4 tubes of whole blood immediately before or during extraction.
- Centrifuge per A-PRF protocol (e.g., 1,300 rpm for 8 minutes).
- Separate the PRF clot; express excess serum to create a membrane or chop into fragments.
- Mix PRF fragments with particulate graft at roughly 1:1 by volume.
- Pack the PRF-graft mixture into the socket; place a PRF membrane over the orifice before the collagen plug or Bio-Gide.
- Suture as usual.
Pro Tip: Do not let PRF sit exposed for more than 10–15 minutes before placement. Growth factor activity degrades quickly once the clot is separated from the tube. Have your socket ready before you open the centrifuge.
Other adjuncts:
rhBMP-2 (Infuse) has strong evidence for ridge augmentation in larger defects but is not routinely used for single-tooth socket preservation due to cost, regulatory requirements, and the risk of postoperative edema. Injectable hydrogels and 3D-printed scaffolds are emerging, with narrative reviews noting the trend toward biologic and patient-centered materials, but they remain investigational for routine ARP.
What the clinical evidence actually shows
ARP via socket grafting consistently reduces dimensional loss compared with extraction alone. The most reliable pooled figures come from a systematic review and meta-analysis of RCTs: mean horizontal bone preservation of approximately 1.99 mm and mean mid-buccal vertical preservation of approximately 1.72 mm.
| Outcome |
ARP vs. extraction alone |
Typical healing interval |
| Horizontal ridge preservation |
~1.99 mm less loss |
3–6 months before implant |
| Vertical mid-buccal preservation |
~1.72 mm less loss |
3–6 months before implant |
| Reduction in need for major augmentation |
Clinically meaningful reduction |
Assessed at implant stage |
The pragmatic value for most clinicians is not a guaranteed implant survival advantage. Meta-analysis commentary is consistent: ARP reduces dimensional loss and lowers the probability of needing a major ridge augmentation at implant placement, but long-term implant survival differences between preserved and unpreserved sites are not conclusively established. That is a meaningful distinction when counseling patients on the cost-benefit of the procedure.
Evidence limitations to acknowledge:
- High heterogeneity across trials: different materials, sealing techniques, measurement methods, and follow-up periods make direct comparisons difficult
- Most RCTs report outcomes at 3–6 months; long-term data (>5 years post-implant) are sparse
- Patient-reported outcome measures (PROMs) are inconsistently reported, making it hard to quantify the patient-centered benefit
- No single graft-membrane combination has been shown superior across all socket types and anatomic locations
For clinicians who want to review the full evidence base on ARP as a clinical standard, Onewd’s clinical resource library covers the systematic review landscape in detail.
Step-by-step operative protocol
Pre-op checklist
- CBCT reviewed: buccal plate thickness, root proximity, sinus/nerve clearance confirmed
- Medical history screened: antiresorptives, anticoagulants, diabetes, smoking status
- Antibiotic policy: amoxicillin 500 mg TID for 5–7 days (or clindamycin 300 mg TID if penicillin-allergic) when grafting infected or high-risk sites; prophylactic use is clinician- and patient-dependent
- Antiseptic rinse: 0.12% chlorhexidine gluconate pre-operatively
- Instrument tray: periotomes (thin and standard), surgical handpiece + burs for sectioning, periosteal elevator (if flap planned), bone graft instruments (plugger, condenser), membrane scissors, suture (4-0 chromic gut or PTFE), collagen plug/sponge, graft material, PRF centrifuge if using
Operative workflow
- Administer local anesthesia with vasoconstrictor; wait full onset (minimum 5 minutes after injection).
- Atraumatic extraction: periotomes circumferentially, section multi-rooted teeth, remove with controlled force. Confirm all roots removed.
- Debridement: curette all granulation tissue from socket walls. This step is non-negotiable. Inadequate debridement is a common, avoidable cause of ARP failure regardless of graft material choice.
- Induce marrow bleeding: use a small round bur or bone scraper to perforate the cortical walls at the socket base and lateral walls. This releases endogenous growth factors and improves graft integration.
- Prepare PRF (if using): centrifuge blood drawn before or during extraction; separate clot and mix with particulate graft.
- Pack the graft: fill the socket to approximately 1–2 mm below the gingival margin. Overpacking above the gingival crest impedes soft-tissue closure and can compress the clot, impairing revascularization. For Bio-Col type techniques, fill to roughly 1/2–2/3 of socket depth with the graft, then top with a collagen sponge layer.
- Place membrane or plug: trim Geistlich Bio-Gide or CollaPlug to cover the socket orifice with 1–2 mm overlap onto the surrounding bone. For flapless cases, tuck the membrane edges under the gingival margin.
- Suture: cross-mattress or figure-8 with 4-0 chromic gut to stabilize the plug/membrane. Confirm no tension at the closure line.
- Post-op instructions: written and verbal (see postoperative care section below).
Graft volume guidance: a standard maxillary central incisor socket requires approximately 0.25–0.5 cc of particulate graft. Premolar sockets are similar. Molar sockets may require 0.5–1.0 cc. These are estimates; fill to the clinical endpoint (1–2 mm below gingival margin) rather than a fixed volume.
Healing timeline: plan implant placement at 3–6 months depending on material. Xenograft (Bio-Oss) sites are typically ready at 4 months; FDBA sites may allow placement at 3 months; alloplast timing varies by formulation. The extraction-to-implant timeline resource at Onewd provides a detailed interval guide by material and defect class.
Pro Tip: When packing particulate graft, use a moist plugger rather than a dry one. Dry instruments pull granules back out of the socket on withdrawal. A light moistening with saline or PRF liquid makes the graft cohere and pack more predictably.
Complications and how to manage them
Early wound dehiscence and plug/membrane exposure
The most common complication, typically presenting within the first 2 weeks. Small exposures (<2 mm) often resolve with conservative management: 0.12% chlorhexidine gel applied directly to the exposed area twice daily, soft diet, and weekly monitoring. Larger exposures or those with signs of infection require trimming of exposed membrane, irrigation, and possible soft-tissue graft if the underlying graft is at risk.
Infection and graft loss
Presents as increasing pain, swelling, and purulent discharge after day 3–4. Management:
- Irrigate the socket with 0.12% chlorhexidine or saline
- Prescribe antibiotics (amoxicillin-clavulanate or clindamycin) if systemic signs are present
- If the graft is mobile or the socket is frankly infected, remove the graft, debride, and allow secondary healing before re-grafting at a later date
Socket shield complications
Internal or external shield exposure is the characteristic complication of partial extraction therapy. External exposure (shield visible through the gingiva) requires reduction of the shield to below the gingival margin. Internal exposure (shield visible through the implant sulcus) may require shield removal. Socket shield therapy demands meticulous technique: reduce the labial fragment to crest level, confirm immobility, and maintain 1.5–2.0 mm shield thickness.
Soft-tissue volume loss
Thin biotype patients may show buccal contour depression even after successful ARP. Address at implant placement with a connective tissue graft or at the time of ARP with AlloDerm over the socket seal.
Prevention strategies:
- Atraumatic extraction technique above all else
- Avoid tension at the closure line; release periosteum if needed
- Maintain adequate soft-tissue thickness (≥2 mm) over any membrane
- Use chlorhexidine rinse for the first 2 weeks
- Avoid removable prosthetics loading the surgical site during healing
- Counsel smokers on elevated complication risk before proceeding
Red flags requiring urgent review or referral:
- Progressive pain beyond day 5 with no improvement
- Spreading cellulitis or lymphadenopathy
- Unstable socket shield with mobility
- Suspected osteonecrosis in antiresorptive-medicated patients
For a structured guide to red flags and referral criteria in ridge preservation, Onewd’s clinical resource covers the triage decision in detail.
What the evidence still does not resolve
The socket preservation literature has grown substantially over the past decade, but several questions remain genuinely open.
No material combination proven universally superior. Meta-analyses show dimensional benefit across multiple graft types, but no single graft-membrane pairing has demonstrated superiority across all socket anatomies, patient populations, and follow-up periods. Clinicians choosing between xenograft, allograft, and alloplast are working with evidence that supports all three rather than evidence that ranks them.
The socket shield debate. Partial extraction therapy (socket shield) is conceptually compelling for esthetic sites: preserving the buccal root fragment maintains the periodontal ligament and buccal bone. Short-term case series show promising contour preservation. But large-scale RCT data with long-term follow-up are absent, and the complication profile (internal and external shield exposure) is distinct from conventional ARP. The technique is sensitive enough that most consensus bodies recommend it only for experienced clinicians with hands-on training.
Implant survival: the inconvenient nuance. ARP reduces dimensional loss and lowers the probability of needing major augmentation at implant placement. What it does not reliably demonstrate is a statistically significant improvement in long-term implant survival rates compared with unpreserved sites. Systematic review commentary is consistent on this point. The benefit is real and clinically meaningful; the framing matters when discussing the procedure with patients.
Evidence gaps worth noting:
- Standardized RCTs comparing modern biologics (A-PRF, injectable scaffolds) with conventional xenograft-membrane protocols, with cost-effectiveness data, are lacking
- PROMs (pain, function, patient satisfaction) are inconsistently reported across trials
- Most studies measure outcomes at 3–6 months; data beyond 5 years post-implant are sparse
- Heterogeneity in measurement methods (CBCT vs. clinical probing vs. cast analysis) limits cross-study comparisons
A clinician’s perspective on what actually transfers from course to chair
The gap between reading a technique paper and executing it predictably on a live patient is where most clinicians lose confidence. After working through the ARP evidence and watching how it translates in hands-on teaching environments, a few patterns stand out.
The first is that atraumatic extraction is underweighted in most curricula relative to graft material selection. Clinicians spend considerable time debating Bio-Oss versus FDBA, then fracture the buccal plate during extraction and render the material choice largely irrelevant. The extraction itself is the highest-leverage step, and it deserves proportional practice time.
The second is that socket-plug sizing is a tactile skill that reads poorly in text. A plug that is 0.5 mm too small falls into the socket; one that is 0.5 mm too large tents the tissue and creates tension at the suture line. The only way to develop that feel is repetition on extracted teeth or simulation models before moving to live cases.
The third is that PRF preparation timing is consistently mismanaged by clinicians new to the technique. Drawing blood after the extraction is complete means the PRF clot has been sitting for 15–20 minutes by the time the socket is ready. Draw the blood before you start, or at minimum during the extraction, and have the centrifuge running in parallel.
Clinical pearls worth carrying into practice:
- Size your collagen plug by trimming to the socket orifice diameter, then add 1 mm on each side for tuck-under margin
- Test socket shield stability by applying lateral pressure with a probe tip before proceeding to implant placement; any mobility is a stop signal
- When packing particulate graft, condense gently in 1–2 mm increments rather than bulk-filling; this reduces voids and improves graft-to-wall contact
- Induce marrow bleeding at the socket base and lateral walls before packing; skipping this step is the single most common technical error seen in early-stage learners
- Use a PRF membrane as the first layer over the graft before placing Bio-Gide; the fibrin matrix stabilizes the particulate and adds growth factor concentration at the healing interface
Build the clinical skills to execute these techniques confidently
Knowing the evidence is the starting point. Executing socket preservation techniques predictably under pressure is a different skill set, and it requires supervised repetition on real cases.

Onewd’s hands-on implant training programs are built specifically for this gap. The Surgical Site Development and Ridge Preservation Masterclass covers the full ARP workflow: atraumatic extraction mechanics, socket-plug sizing and placement, PRF preparation and integration, membrane handling, and suturing strategies, all on live patients with direct faculty oversight. The Extraction and Socket Preservation online lecture series provides the evidence foundation before you step into the operatory. Both courses carry accredited CE credits and are designed around the tiered learning path that takes clinicians from foundational understanding to confident surgical execution. Browse the full training course catalog to find the format and level that fits your current practice.
Recommended