Effective tooth whitening protocols start with a screening exam and shade documentation, then move to either in-office bleaching with moderate hydrogen peroxide concentrations within the concentration range supported by clinical evidence, or dentist-supervised carbamide peroxide trays at home, paired with potassium nitrate or fluoride to blunt sensitivity. That sequence, grounded in ADA guidance and a 2026 umbrella review of systematic reviews and meta-analyses, outperforms higher-concentration shortcuts on both comfort and predictability. The rest of this guide walks through each stage in the order you would actually perform it in the chair or hand it to a patient for home use.
Pre-Treatment Assessment and Hygiene Before Whitening
Skipping the exam is the single most common reason whitening cases go sideways. A comprehensive oral exam and a professional hygiene visit have to come before any peroxide touches enamel, both to confirm the case is appropriate and to strip away the plaque and calculus film that would otherwise block even gel penetration, according to a 2024 systematic review on professional whitening effectiveness.
Medical and dental history review should flag anything that changes your plan. Pregnancy and breastfeeding are standard deferrals. A documented allergy to peroxide compounds rules out the treatment outright. Untreated caries, active periodontal disease, and exposed root surfaces all need resolution first, since bleach on compromised tissue causes pain disproportionate to any cosmetic gain.
The clinical exam itself should cover more than “do the teeth look yellow.” Check every existing restoration in the esthetic zone, because composite, porcelain, and crowns do not lighten with peroxide the way natural enamel does. A patient who bleaches around an unmatched anterior crown ends up with a two-tone smile and a legitimate complaint. Radiographs, if not current, should confirm there is no periapical pathology hiding under a discolored tooth, especially with single dark teeth that suggest prior trauma or pulp necrosis.
Before you scale and polish, walk through this checklist:
- Confirm no active caries, exposed dentin, or untreated periodontal disease in the treatment field.
- Identify all restorations in the smile zone and flag them as non-bleachable.
- Review medical history for pregnancy, peroxide allergy, or uncontrolled conditions affecting soft tissue healing.
- Schedule scaling and polishing at least a few days before bleaching begins, not the same visit.
- Take baseline shade photos under consistent lighting with a shade guide in frame.
- Document informed consent covering expected outcomes, sensitivity risk, and the limits of restoration matching.
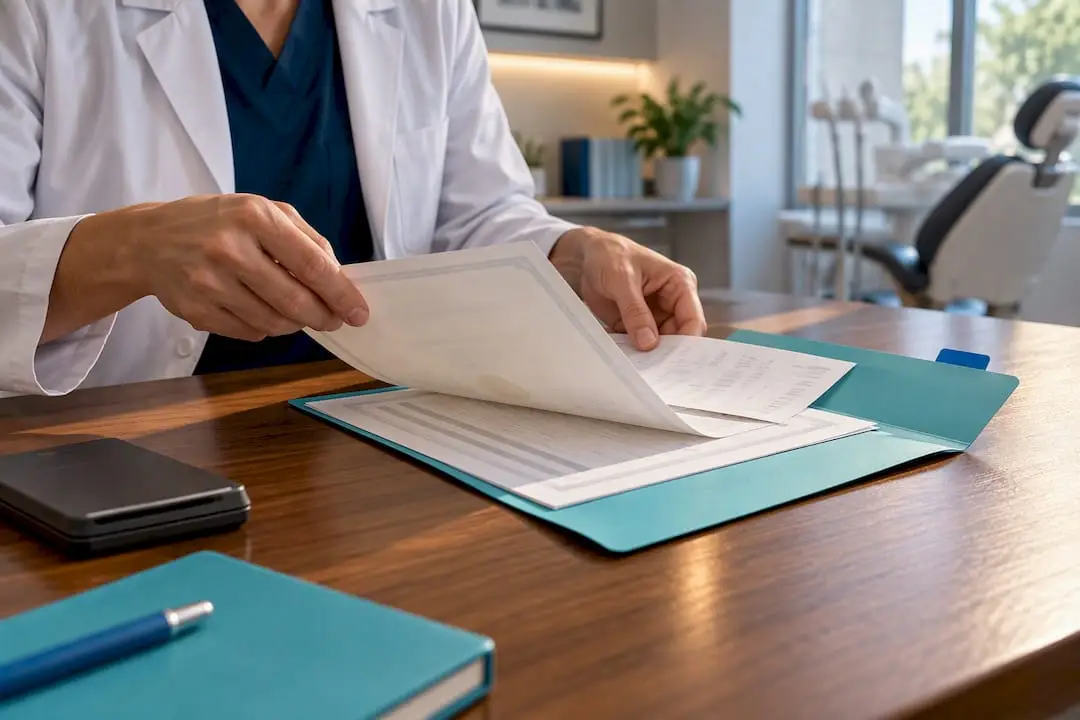
Shade mapping deserves more rigor than most practices give it. A single Vita shade tab photo taken under office fluorescents will not match what the patient sees in their bathroom mirror. Take at least two images, natural light and office light, with the shade tab held directly against the central incisors. That baseline record is what protects you if a patient later claims the result did not match what was promised, and it is what lets you measure actual improvement rather than guess at it.
Step-by-Step In-Office Bleaching Protocol
In-office bleaching is the right call when a patient wants visible change in a single visit, has limited time for a multi-week home regimen, or has demonstrated poor compliance with tray wear in the past. It is not automatically the stronger option. At-home tray protocols can match or exceed single in-office sessions for long-term stability, so the choice should hinge on the patient’s timeline and tolerance for sensitivity, not on an assumption that “professional” means “better.”
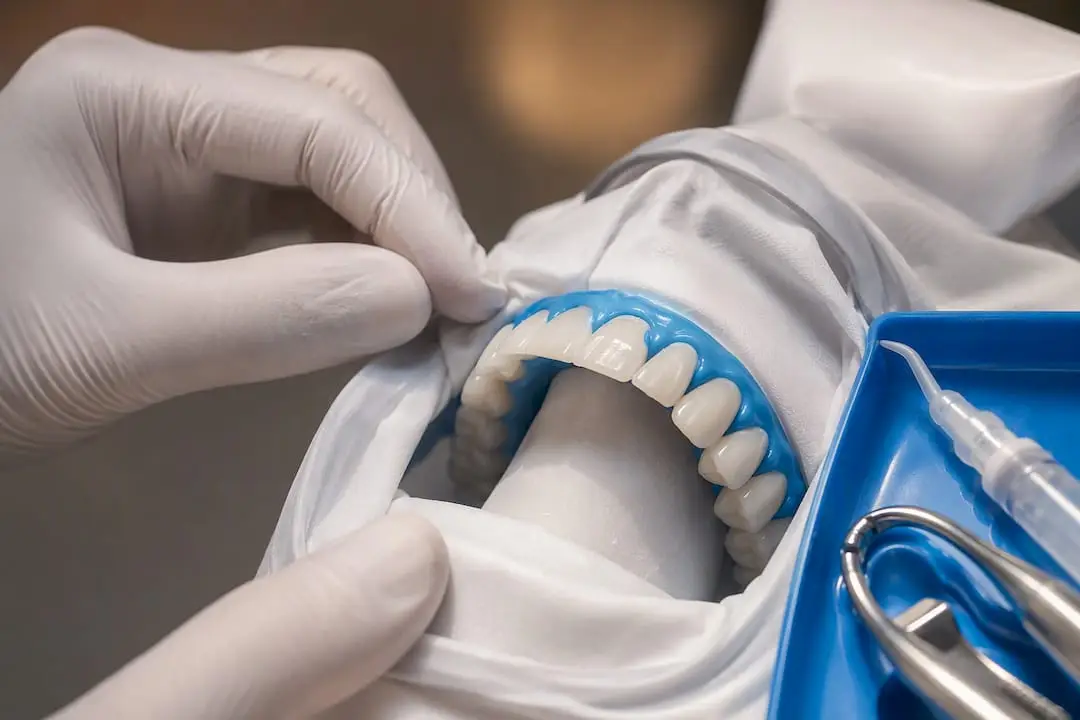
Isolation comes first, every time. A light-cured resin dam or a rubber dam with ligated retainers protects the gingiva from chemical burns, which are the most common in-office complication when isolation is rushed. Petroleum jelly on the lips and a cheek retractor round out the setup. Skipping isolation to save two minutes is the fastest way to turn a routine appointment into a wound-care conversation.
Concentration selection matters more than most protocols acknowledge. Moderate hydrogen peroxide concentrations, roughly within the moderate concentration range supported by recent evidence, deliver whitening results comparable to higher-concentration products while producing meaningfully less sensitivity, based on the umbrella review of in-office bleaching protocols. There is rarely a clinical reason to reach for a 40% formulation as a first-line choice. Reserve higher concentrations for cases where prior moderate-concentration treatment underperformed and the patient has tolerated sensitivity well.
Here is a chairside sequence that reflects what the evidence actually supports:
- Isolate the gingiva and soft tissue with a light-cured barrier or rubber dam.
- Apply desensitizing gel (potassium nitrate or fluoride varnish) for a few minutes if the patient has a sensitivity history.
- Apply the bleaching gel at roughly 1 to 2 mm thickness across the facial surfaces of the teeth being treated.
- Leave the gel in contact for 15 to 40 minutes depending on the product’s manufacturer instructions and the concentration used.
- Suction and rinse thoroughly, checking isolation integrity before reapplying if a second cycle is planned.
- Repeat for one to three cycles in a single visit, evaluating shade change and patient comfort between cycles.
- Remove all isolation material, rinse the mouth completely, and apply a final fluoride or potassium nitrate application.
- Photograph the immediate post-treatment shade and record it against the baseline image.
On light activation: skip it as a default. Routine curing-light or LED activation generally does not improve whitening outcomes and can increase sensitivity, per the same umbrella review. Laser activation shortens gel contact time in some protocols, but a systematic review comparing laser-activated bleaching to conventional methods found inconsistent evidence for superior color change, alongside real thermal risk if fluence and exposure time are not tightly controlled. If you do use light or laser, build in resting intervals to prevent pulpal heat buildup, and never treat it as a substitute for adequate gel contact time.
Pro Tip: Photograph the isolation barrier itself before you start the gel timer. If a patient reports a burning sensation mid-treatment, that photo tells you in seconds whether the dam has pulled back from the gingival margin or stayed intact, which changes how you respond.
Post-op instructions after an in-office session are simple but often skipped in the rush to end the appointment: no staining foods or beverages for 24 to 48 hours, no smoking, and a follow-up call or message within a day to catch early sensitivity before it becomes a complaint.
Dentist-Supervised At-Home Tray Whitening Protocols
At-home tray whitening remains the backbone of most long-term whitening plans, and it starts with fit. A poor impression or a rushed digital scan produces a tray that either leaks gel onto the gingiva or fails to hold enough material against the enamel surface, and tray fit failures cause more sensitivity complaints in practice than the peroxide concentration itself.
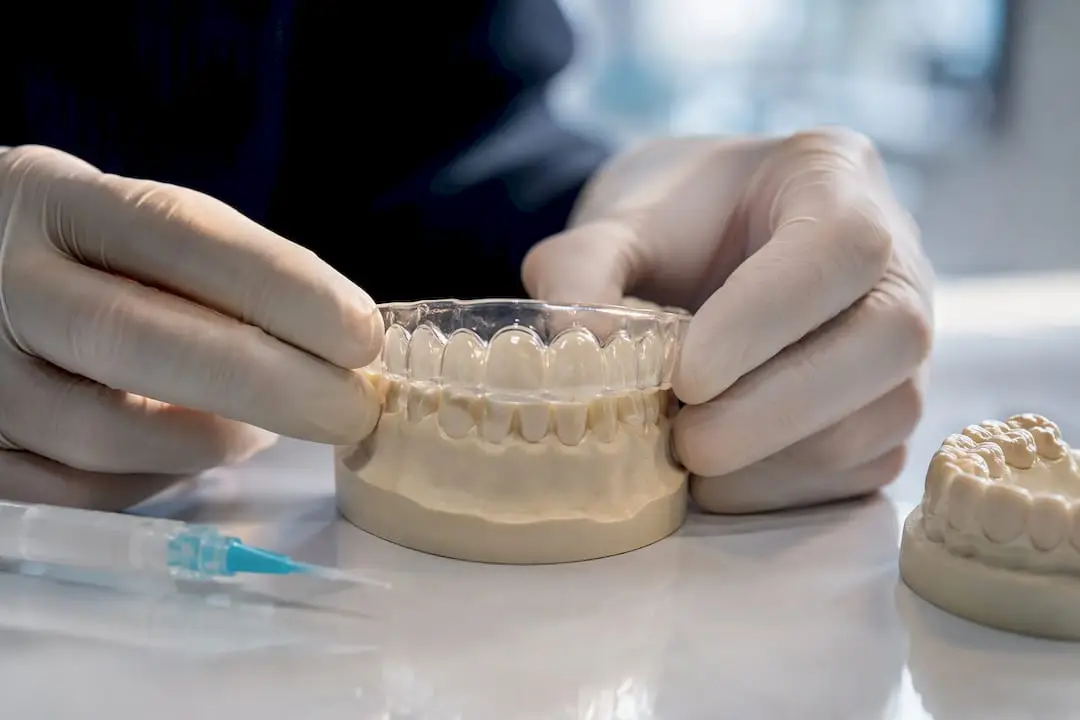
Take a full-arch impression or digital scan, trim the tray to stop just short of the gingival margin, and verify the fit at a follow-up visit before dispensing a full course of gel. A five-minute fit check catches problems that would otherwise surface as a frustrated phone call a week into treatment.
Agent selection depends on wear pattern and patient tolerance:
- Carbamide peroxide, 10% to 16%, worn overnight, breaks down slowly into hydrogen peroxide and urea, giving a gentler release profile suited to patients sensitive to concentrated exposure.
- Hydrogen peroxide, 4% to 10%, worn for shorter daytime sessions of an hour or two, suits patients who cannot tolerate an overnight appliance or who have a compressed timeline.
- Total treatment duration typically runs multiple weeks, with most patients seeing visible change within the first several days, similar to the shade shift reported with OTC strip products used twice daily for a typical course duration.
- At-home regimens can produce more durable long-term results than a single in-office session, based on comparative review data on professional whitening modalities.
Instruct patients to use a pea-sized amount of gel per tooth well, avoid overfilling that pushes material onto the gingiva, and wipe away any excess that extrudes immediately rather than letting it sit against soft tissue. A tray loaded like a toothpaste commercial is a tray that will cause gum irritation by day three.
Schedule a follow-up around the one-week and two-week marks to check tissue health, ask about sensitivity, and compare shade photos against baseline. Maintenance touch-ups, usually a few nights of tray wear every six to twelve months, keep results stable and are far easier to plan for when the original shade record exists to measure against.
Combining In-Office and At-Home Whitening for Better Results
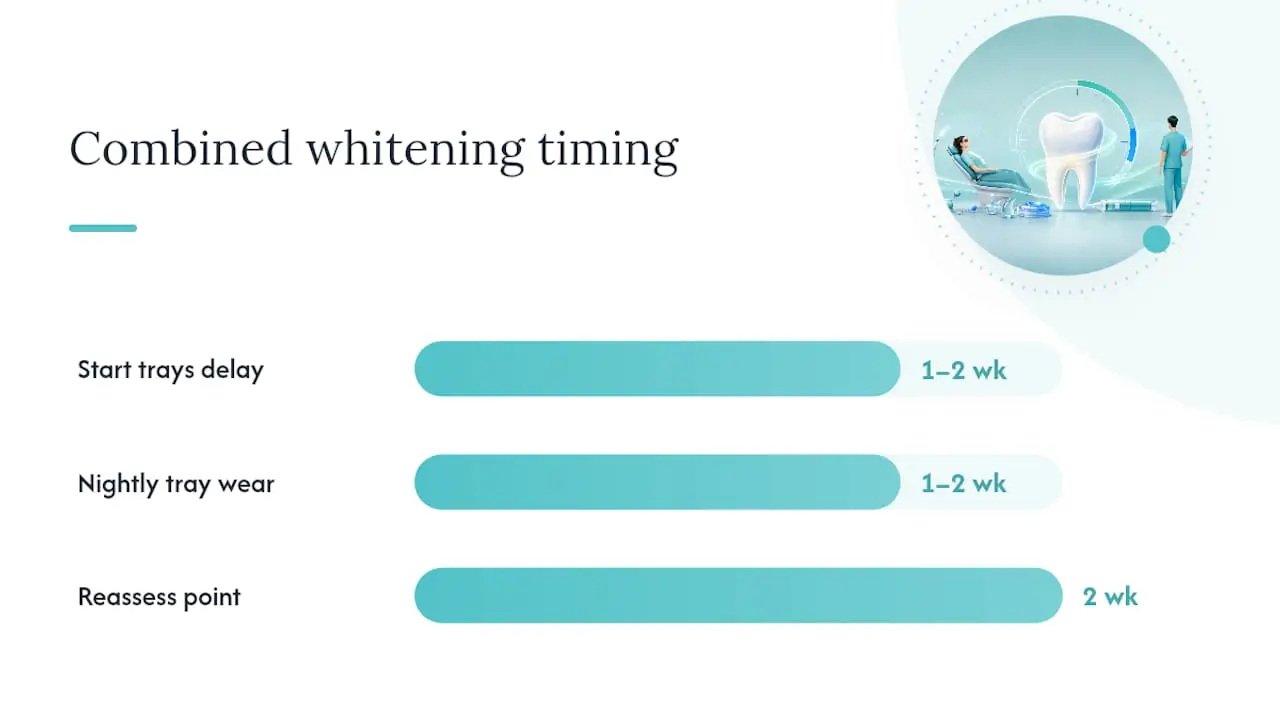
A combined protocol makes sense when a patient wants a visible jump-start for an event but also needs the long-term stability that trays provide, or when compliance with a multi-week home regimen alone is uncertain. Staging the treatment, rather than choosing one method exclusively, tends to produce more stable outcomes and gives you more room to manage sensitivity across the process instead of concentrating it into a single aggressive session.
The typical sequence looks like this:
- Perform a single in-office bleaching session to deliver an immediate, visible shade change.
- Dispense custom trays at the same visit, with instructions to begin wear one to two weeks later once initial post-treatment sensitivity has settled.
- Have the patient wear carbamide peroxide trays nightly for one to two weeks to consolidate and extend the in-office result.
- Reassess at the two-week mark, comparing shade photos to baseline and adjusting tray wear frequency if further lightening is needed.
Teeth dehydrate slightly during aggressive in-office bleaching, which can make the immediate result look more dramatic than it will appear once rehydration occurs over the following days. Staging the take-home phase after that rehydration window gives a more honest read on true color change and prevents the letdown some patients feel when the initial “wow” fades. Build the touch-up conversation into this same visit rather than waiting for the patient to ask.
Preventing and Managing Tooth Sensitivity During Whitening
Sensitivity is the complication you will manage more than any other, and it is largely preventable rather than something to just apologize for after the fact. Potassium nitrate and sodium fluoride both consistently reduce bleaching-related sensitivity without reducing whitening effectiveness, a finding that holds up across multiple systematic reviews and meta-analyses.
Build desensitizing measures into the protocol at three points, not just as a reaction to complaints:
- Prescribe a potassium nitrate desensitizing toothpaste for two weeks before treatment begins, especially for patients with a known sensitivity history.
- Apply topical potassium nitrate or fluoride gel immediately before and after each in-office bleaching cycle.
- Include a fluoride or potassium nitrate tray application as an option between at-home whitening sessions, worn for a short period the same way the bleaching gel is worn.
- Space at-home sessions every other night instead of nightly if a patient reports increasing sensitivity mid-course.
Gingival irritation from gel contact usually resolves within a day or two with no treatment beyond avoiding further exposure. A true chemical burn, recognizable by a white, sloughing lesion at the point of contact, needs immediate rinsing and a topical protectant, and it is a signal that your isolation technique needs review before the next patient. Sharp, lingering pain that persists well after gel removal, rather than the transient zinging sensitivity that’s typical, can indicate pulpal involvement and warrants stopping treatment and evaluating the tooth rather than pushing through to finish a course.
Pro Tip: Ask patients to rate sensitivity on a simple 0 to 10 scale at each check-in rather than a yes or no question. A patient who says “yes, some sensitivity” at a 2 out of 10 needs reassurance; one who says the same thing at a 7 needs a modified schedule.
Peroxide Concentration and Whitening Chemistry Explained
Hydrogen peroxide breaks down into free radicals that oxidize the organic pigment chains responsible for staining, and carbamide peroxide is essentially a slow-release delivery form that decomposes into roughly a third hydrogen peroxide and the remainder urea. That breakdown chemistry is why carbamide peroxide suits overnight wear: it releases its active peroxide gradually rather than delivering it all in the first few minutes.
The concentration-versus-time trade-off is where most protocol decisions actually live. A few principles worth keeping in mind:
- Moderate hydrogen peroxide concentrations within the moderate concentration range supported by recent evidence match higher concentrations on whitening outcomes while producing less sensitivity, so treating maximum concentration as the goal is usually the wrong instinct.
- Carbamide peroxide at 10% to 16% is generally preferred for at-home protocols specifically because its slower breakdown profile tolerates longer wear times without the sensitivity spike a comparable hydrogen peroxide concentration would cause.
- Higher hydrogen peroxide concentrations shorten needed contact time but increase both the frequency and intensity of sensitivity, making them a tool for specific stubborn cases rather than a default first choice.
- Formulation pH and buffering matter clinically: acidic or poorly buffered gels can contribute to transient enamel surface softening, which is part of why sourcing gel from a reputable manufacturer rather than an unregulated supplier is a genuine safety issue, not just a quality preference.
Whitening Lights, Repeat Applications, and Emerging Techniques
Clinicians ask about adjuncts more than almost any other part of the protocol, and the honest answer is that most of them are optional at best. Routine light activation, whether curing light or LED, generally does not improve whitening outcomes and can raise sensitivity, so it should not be a default add-on to justify a higher fee.
- Single, longer gel applications versus repeated shorter renewals both work; renewals let you monitor sensitivity between cycles, while a single longer application saves chair time for tolerant patients.
- Violet-light activation and photobiomodulation are being explored for sensitivity reduction, but the evidence base is still thin enough that adopting them wholesale ahead of stronger data is premature.
- Laser activation can shorten gel contact time but has not shown consistent superiority in color outcomes, and thermal safety limits on fluence and exposure duration must be respected to avoid pulpal damage.
- If you introduce any light-based adjunct, build in cooling or resting intervals between cycles rather than continuous exposure.
Documentation, Consent, and Long-Term Monitoring
Your records should tell the whole story of a case without you having to remember it. Baseline photography under consistent lighting, paired with a shade tab in frame, is the minimum standard, repeated at completion and at any follow-up visit.
- Informed consent should document expected shade change, sensitivity risk, restoration limitations, and the fact that results are not permanent.
- Log any adverse event, even minor transient sensitivity, with the date, severity, and resolution timeline.
- Photography quality affects your ability to defend outcomes later. Investing in consistent patient photography setups protects both your documentation and your before-and-after marketing.
- Long-term maintenance typically means touch-up tray wear every six to twelve months, timed against fading rather than a fixed calendar date, and reassessed against the original baseline shade record.
What One World Dental Training Teaches About Whitening Precision
The gap between reading a protocol and executing it consistently shows up most in tray fit and gel handling, not in memorizing concentration ranges. Clinicians who train hands-on learn to catch a marginal tray fit before it becomes a sensitivity complaint, and to limit gingival gel extrusion through technique rather than trial and error on patients.
Mentorship-driven practice, including live case observation, shortens the learning curve on judgment calls: when to switch from moderate to higher concentration, when a patient’s sensitivity history rules out same-day whitening entirely, when a discoloration pattern signals something other than a stain. Before adding adjuncts like laser activation to a whitening offering, a clinician should be comfortable with isolation technique, shade documentation, and sensitivity triage as baseline competencies, not afterthoughts layered on top of a new device.
Why Predictable Whitening Outcomes Depend More on Discipline Than Chemistry
The evidence is fairly clear that the whitening agent itself is rarely the limiting factor in a disappointing case. Moderate concentrations perform about as well as aggressive ones, light activation adds little, and the meaningful variables are things a clinician controls directly: isolation quality, tray fit, and whether desensitizing steps happen before symptoms show up rather than after.
Conventional wisdom in whitening has leaned too hard on concentration as the lever that drives results, when the umbrella review evidence points the other way. The bigger opportunity most practices miss is staging, using an in-office session to build momentum and trays to consolidate it, rather than treating the two as competing options. Patients get a better outcome and a more comfortable experience when the protocol is sequenced deliberately instead of chosen based on which service has a higher fee attached.
If there is one priority to take from all of this, it is to stop treating the pre-treatment exam as a formality. Every complication discussed here, from mismatched restorations to unmanaged sensitivity to poor tray fit, traces back to a screening step that got rushed or skipped.
— Jake
Build Whitening Skill Through Hands-On Training
Reading a protocol gets you most of the way there. Closing the gap between the written steps and confident chairside execution, especially around isolation technique, tray fit, and sensitivity triage, is where mentorship and live case exposure earn their keep. Onewd’s cosmetic dentistry courses pair that kind of hands-on practice with structured, tiered learning paths, so you build judgment on real cases rather than guessing from a textbook description of gel thickness and contact time.

Courses range from foundational whitening and shade management through advanced esthetic case planning, with mentorship built into the format rather than bolted on as an afterthought. If you are weighing online versus in-person formats, the guide to online dental continuing education breaks down what each path covers. Check current availability on the training courses page and find the cosmetic track that matches where your practice needs the most confidence right now.
Recommended