Use a value-first, standardized workflow — value → chroma → hue — and you will eliminate the most common source of esthetic remakes before you ever pick up a handpiece. That single sequence, backed by published clinical review and VITA’s own protocol, is the difference between a predictable result and a frustrating phone call from the lab.
Quick chairside checklist:
- Take the shade before preparation. Dehydration after tooth reduction shifts perceived color toward lighter and whiter, making the shade look different than it will once the restoration is placed.
- Seat the patient upright, at eye level, with a neutral gray or blue-gray drape covering lips and clothing.
- Use daylight or a standardized lamp (5,500–6,500K). Turn off the operatory light during the comparison to ensure consistent lighting conditions.
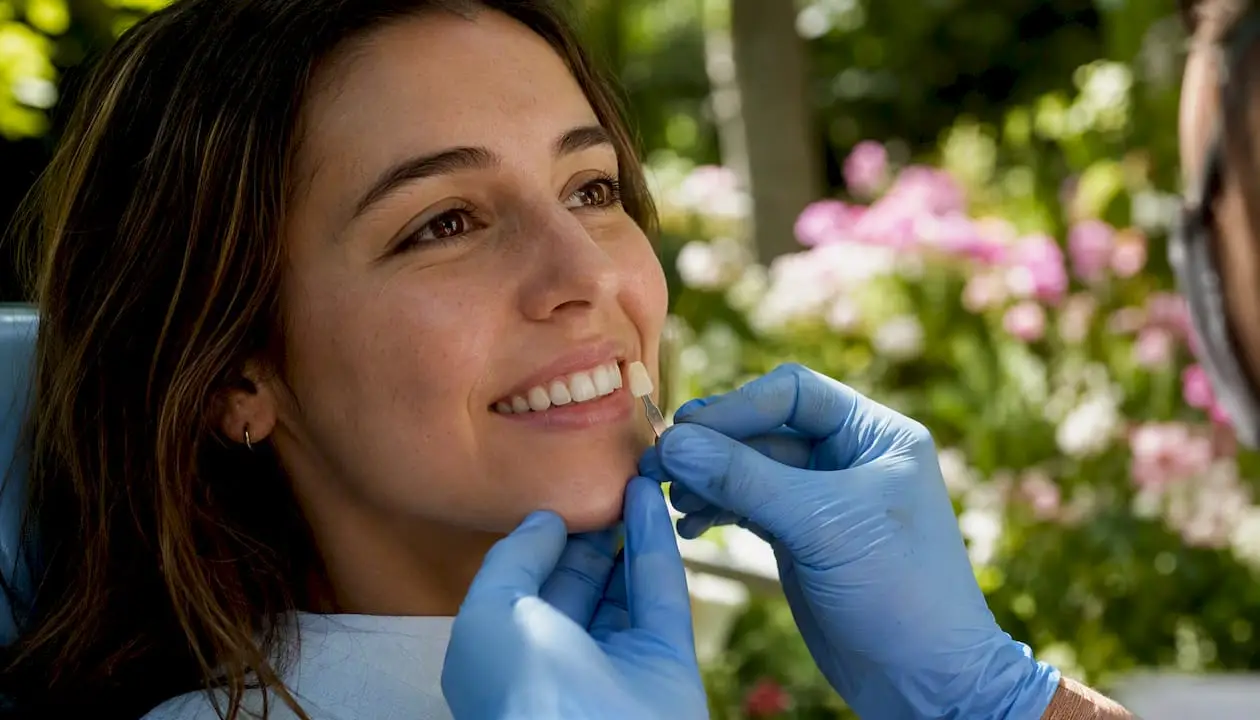
- Determine value (lightness) first. Squint slightly to reduce chroma sensitivity and identify the lightest versus darkest tab.
- Move to chroma (saturation), then confirm hue (the A/B/C/D family or L/M/R axis on the 3D-MASTER).
- Limit each visual comparison to 5–7 seconds, then look at a neutral gray card to reset your eye.
- Accept your first confident choice. Record it with a calibrated photograph before dismissing the patient.
When to add instrumental confirmation: any anterior case where the ΔE tolerance is tight, any case where you are uncertain between two adjacent tabs, or any situation where a remake would be clinically or financially significant. A spectrophotometer or calibrated digital image gives you an objective second opinion in under a minute.
Pro Tip: If you are second-guessing yourself between two tabs, the answer is almost always the lighter one. Clinicians consistently overcall chroma and hue when value is slightly off.
Key Takeaways
Accurate shade selection requires a systematic value-first sequence, controlled environment, instrumental confirmation for high-esthetic cases, and a complete photographic lab package to eliminate ambiguity between the chair and the bench.
| Point |
Details |
| Value-first sequence |
Always select value, then chroma, then hue; this order matches how the eye perceives color most reliably. |
| 5–7 second rule |
Limit each visual comparison to 5–7 seconds and reset with a gray card to prevent chromatic adaptation errors. |
| Shade before preparation |
Take the shade before tooth preparation; dehydration shifts perceived color toward lighter and whiter. |
| Instrumental confirmation |
A 2023 meta-analysis found instruments produce significantly smaller ΔE than visual methods; use them for tight-tolerance anterior cases. |
| Onewd CE training |
Onewd’s hands-on cosmetic dentistry courses include live shade-matching modules and photo calibration labs with accredited CE credits. |
Why color science matters for shade selection in dentistry
Tooth color is not a single variable. It has three independent dimensions, and confusing them is the root cause of most shade-matching errors.
Hue is the color family: the reddish-brown of an A shade, the yellowish of a B shade, the gray of a C shade, the reddish-gray of a D shade on the VITA Classical scale. Most clinicians fixate on hue first because it is the most visually obvious dimension, but it is actually the least important to get right in isolation.
Chroma is the saturation or intensity of that hue. Two teeth can share the same hue family but look completely different because one is pale and washed out (low chroma) while the other is rich and saturated (high chroma).
Value is lightness, independent of color. A high-value tooth is bright and light; a low-value tooth is dark. Value is the dimension your eye is most sensitive to under clinical conditions, and it is the one that produces the most visible mismatch when wrong. That is why every systematic protocol starts here.
CIELAB and ΔE: what the numbers mean
The CIELAB color space (also written CIE Lab*) gives each color a three-number address: L* for lightness, a* for the red-green axis, and b* for the yellow-blue axis. Spectrophotometers and colorimeters report shade in these coordinates, which is why you will see them on device readouts and in research papers.
ΔE (delta-E) is the straight-line distance between two points in that color space. It is the standard metric for how different two colors are.
ΔE thresholds in clinical dentistry: A ΔE of 1.0 is considered the threshold of perceptibility by a trained observer under ideal conditions. A ΔE of 2.7 is widely cited as the threshold of clinical acceptability, meaning a difference below that value is unlikely to be noticed by a patient in normal viewing conditions. A 2023 meta-analysis found that instrumental methods produce significantly smaller ΔE values compared to visual matching, confirming that devices reduce subjectivity when tolerances are tight.
When a device reports a ΔE of 1.5 between your selected shade and the measured tooth, that is perceptible to a trained eye but likely acceptable to the patient. When it reports 3.5, you have a visible mismatch worth addressing before the restoration is fabricated.
How to run a step-by-step chairside shade protocol
A repeatable protocol removes the variables that cause inconsistent results. Follow this sequence every time, and your shade records will be reproducible across operators and appointments.
-
Schedule shade taking at the start of the appointment, ideally in the morning. Teeth are fully hydrated, the patient has not been sitting under operatory lights, and your eyes are fresh. If the appointment runs long, retake the shade before dismissal rather than relying on a post-preparation reading.
-
Have the patient remove lipstick and any brightly colored clothing visible in your field of view. Ask them to wear a neutral drape. Surrounding colors cast a chromatic adaptation effect on your perception of tooth color.
-
Wet the teeth and the shade tabs. Dry surfaces scatter light differently than hydrated enamel. Wetting both the tooth and the tab puts them on the same optical footing.
-
Turn off the operatory light. Position yourself at eye level with the patient’s mouth. Use daylight from a north-facing window or a standardized daylight lamp rated at 5,500–6,500K. VITA’s procedural guidance specifies this color temperature range as the standard for reliable shade taking.
-
Determine value first. Hold the shade guide fan open and squint. You are looking for the tab that matches the overall lightness of the tooth, ignoring color. Narrow it to a value group before touching chroma or hue.
-
Determine chroma next. Within your value group, identify how saturated the tooth is. Move through the chroma steps systematically.
-
Confirm hue last. On the VITA Classical, this means confirming the letter (A, B, C, or D). On the 3D-MASTER, it means confirming the L (reddish), M (neutral), or R (yellowish) suffix within your selected value-chroma combination.
-
Hold each tab parallel to the tooth, focused on the central third. The cervical and incisal thirds have different optical properties. The central area gives the most representative read. Each comparison should last no more than 5–7 seconds; VITA’s protocol notes that eye adaptation begins after that window, distorting your perception.
-
Look at a neutral gray card between each comparison. This resets chromatic adaptation and prevents the previous tab’s color from influencing your next read.
-
Record the shade immediately and take a calibrated photograph before preparation begins. Do not rely on memory. If you are using a spectrophotometer, take the reading now and note the Lab* values alongside the shade tab notation.
Pro Tip: When you are uncertain between two adjacent tabs, accept the lighter one. Restorations tend to appear slightly darker in the mouth than on the bench, and labs can add chroma more easily than they can remove it.
How do VITA Classical and VITA 3D-MASTER differ in practice?
Both guides are widely used in U.S. dental practices, but they organize tooth color differently, and understanding that difference changes how you use them.
VITA Classical (A1–D4)
The VITA Classical arranges 16 shades into four hue groups: A (reddish-brown), B (reddish-yellow), C (gray), and D (reddish-gray). Within each group, the number indicates chroma intensity, not value. A1 is lower chroma than A3, but A1 is not necessarily lighter than B1. That non-systematic organization is the guide’s main limitation: it was designed empirically, not around a perceptual color model, so clinicians sometimes select the wrong hue family because they are actually responding to a value difference.
VITA 3D-MASTER
The 3D-MASTER organizes shades around the three perceptual dimensions in the correct clinical order: value groups (1 through 5, from lightest to darkest), chroma steps (1, 1.5, 2, 2.5, 3), and hue (L, M, R). You select value first, then chroma, then hue, which maps directly onto the recommended clinical workflow. This structure makes the guide more systematic and reduces the risk of hue-first errors.
| Feature |
VITA Classical (A1–D4) |
VITA 3D-MASTER |
| Organization principle |
Hue groups with chroma steps |
Value groups → chroma → hue |
| Number of shades |
16 |
26 (plus bleach shades) |
| Bleached shade coverage |
Limited |
Yes (BL1–BL4) |
| Alignment with value-first protocol |
Indirect |
Direct |
| Learning curve |
Low |
Moderate |
Practical tab-use tips
Hold the tab at the same angle as the tooth surface, not flat against it. Parallel placement reduces specular reflection differences that can make a matching tab look lighter or darker than it is. Focus your comparison on the central third of the tab and the central third of the tooth. Avoid the cervical area, where chroma is always higher, and the incisal edge, where translucency dominates.
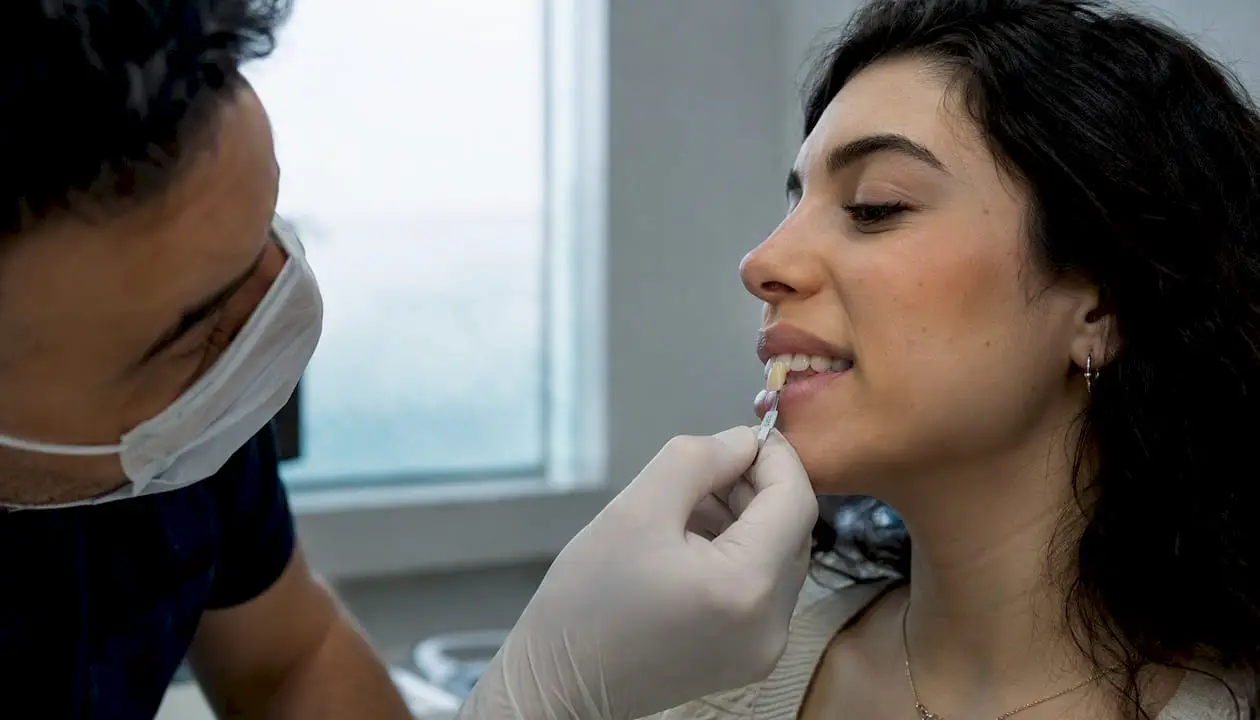
For hygiene, wipe tabs with a disinfectant wipe between patients. Never place a tab directly in the patient’s mouth unless it is a single-use or sterilizable system.
For the remaining cases — heavily bleached teeth, tetracycline-stained teeth, or patients requesting shades outside the standard range, custom shade tabs or material-specific guides are the right call. Most major ceramic manufacturers offer extended shade systems and bleach-range tabs for exactly this situation.
Which digital and instrumental methods give you the most accurate shade?
Visual shade matching is fast and requires no equipment, but it is operator-dependent and sensitive to fatigue, lighting, and color vision. Instrumental methods reduce those variables. The question is which method fits your case and your setup.
Spectrophotometers (contact devices like the VITA Easyshade) place a probe directly on the tooth surface and measure reflected light across the visible spectrum. They report Lab* values and map the result to the nearest shade guide tab. The VITA Easyshade is the most widely used chairside spectrophotometer in U.S. practices and gives readings in seconds.
Colorimeters measure color using filtered light rather than a full spectral analysis. They are less expensive than spectrophotometers but also less accurate, particularly for detecting metamerism.
Spectrophotometric imaging systems (such as SpectroShade) capture a full-arch image and map color across the entire tooth surface rather than a single point. This is useful for characterizing color gradients and communicating nuanced shade maps to the lab.
Digital photography and smartphone workflows are non-contact methods. A systematic review found that under controlled conditions, non-proximity digital imaging can produce clinical outcomes comparable to contact spectrophotometers and is more consistent than visual methods. The key word is “controlled.” Without proper calibration, a smartphone photo is worse than a trained eye.
| Method |
Accuracy (ΔE) |
Contact |
Speed |
Cost |
Calibration needed |
Operator dependence |
| Visual (shade guide) |
Variable |
No |
Fast |
Low |
None |
High |
| Colorimeter |
Moderate |
Yes |
Fast |
Low–moderate |
Periodic |
Low |
| Spectrophotometer (e.g., Easyshade) |
High |
Yes |
Fast |
Moderate–high |
Periodic |
Low |
| Spectrophotometric imaging (e.g., SpectroShade) |
High |
No |
Moderate |
High |
Regular |
Low–moderate |
| Calibrated digital photography |
Moderate–high |
No |
Moderate |
Low (if camera owned) |
Per session |
Moderate |
A meta-analysis published in 2023 confirms that instrumental methods produce significantly smaller ΔE values than visual matching. For high-esthetic anterior cases, adding a spectrophotometer reading as a cross-check is a low-effort way to catch a mismatch before the case goes to the lab.
Photography protocol for reliable shade documentation
Calibrated photography is not just for communication. A well-executed photograph is a reproducible record that the lab can use to verify the restoration before delivery.
Camera settings to standardize:
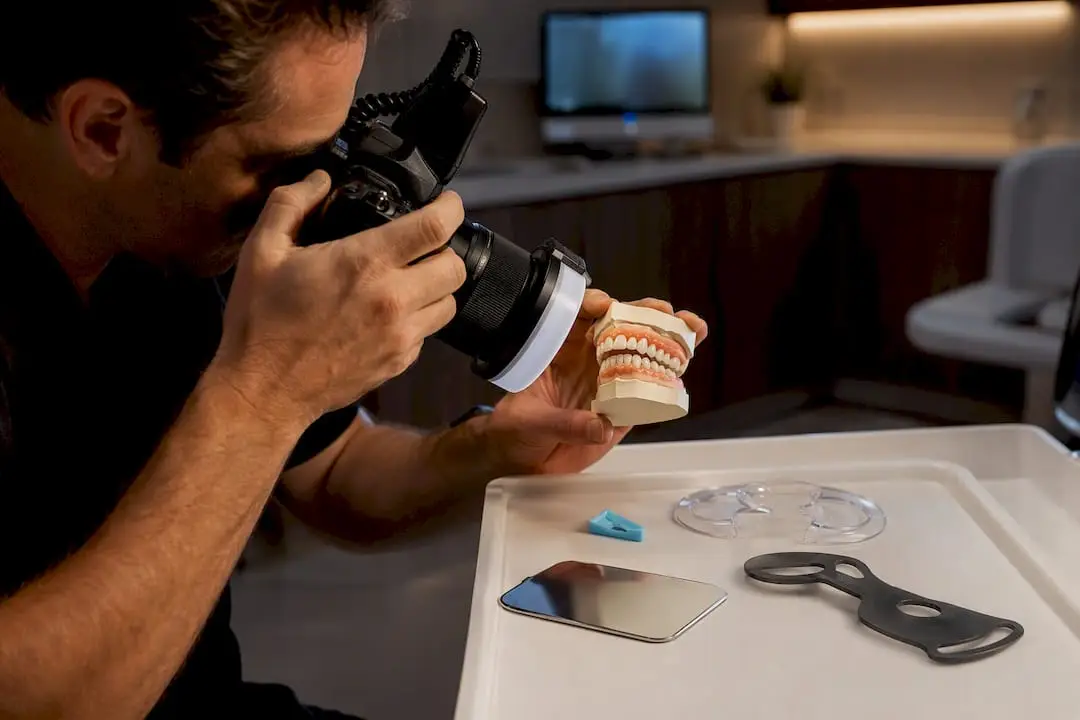
- White balance: set manually using a gray card, not auto white balance. Research on digital shade matching consistently identifies white balance as the single most critical variable in photographic accuracy; 42% of studies in one large systematic review used the CIELAB color space to evaluate photographic methods, and calibration was the differentiating factor.
- Focal length: a macro lens in the 90–105mm range minimizes distortion and allows working distance that keeps the flash from washing out surface texture.
- Aperture: f/22 to f/32 for anterior close-ups gives adequate depth of field.
- Flash: ring flash or twin flash positioned to minimize specular highlights on the labial surface.
Always include a gray card in the frame. Place it adjacent to the tooth in the same focal plane. This gives the lab a reference point for color correction and confirms that your white balance was accurate.
What causes shade mismatches, and how do you fix them?
Most shade failures fall into a handful of categories. Recognizing the pattern tells you the fix.
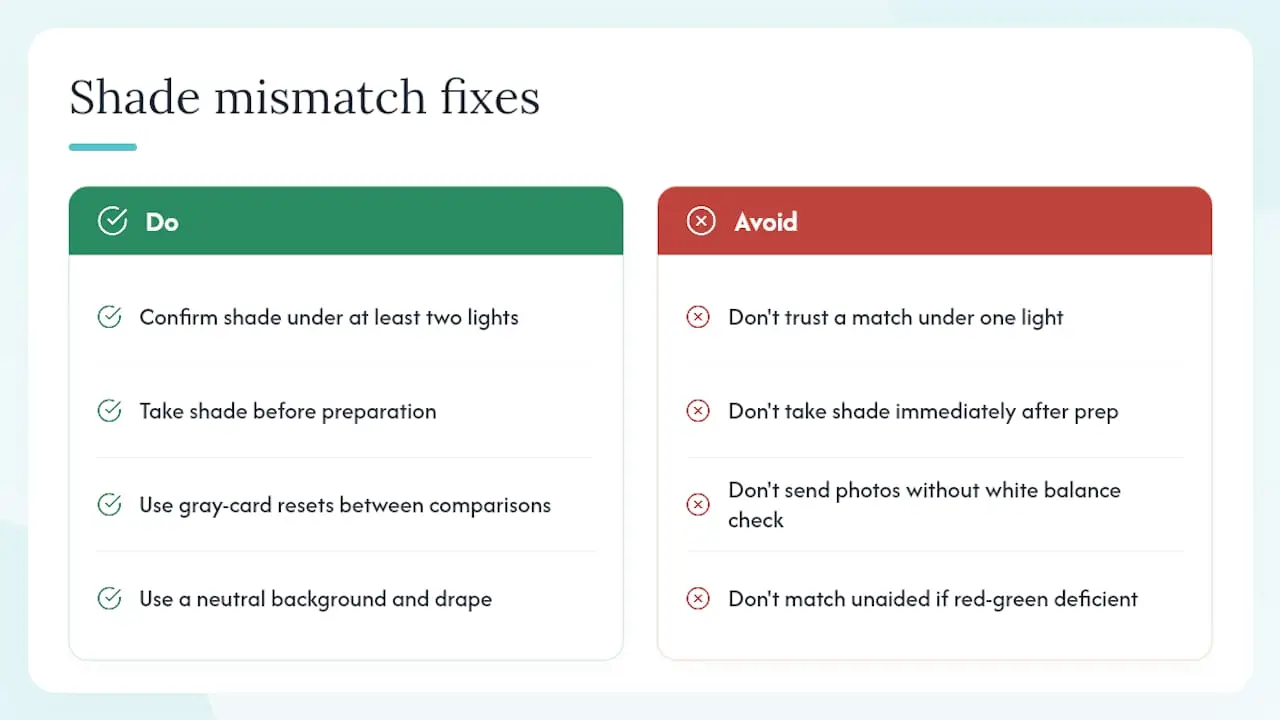
Metamerism is the most misunderstood problem. Two objects that match under one light source can look completely different under another. There are three types relevant to dentistry: illuminant metamerism (the match breaks under a different light), geometric metamerism (the match breaks at a different viewing angle), and observer metamerism (two clinicians see a different match). The fix for illuminant metamerism is to confirm the shade under at least two different light sources before recording it. Daylight and a warm incandescent source are a useful pair.
Dehydration is predictable and preventable. After preparation, the tooth loses moisture rapidly and appears several shades lighter than it will once the restoration is placed. Taking the shade before preparation is the single most effective prevention. If you must take shade after preparation, wait at least 30 minutes for rehydration, or use a spectrophotometer reading as your anchor.
Eye fatigue accumulates faster than most clinicians realize. After 5–7 seconds of direct comparison, the photoreceptors in your fovea begin to adapt to the color you are looking at, making the tab appear to match even when it does not. The gray card reset between comparisons is not optional — it is the mechanism that keeps your perception accurate across multiple comparisons.
A clinician with a red-green deficiency will consistently misread the A/B hue distinction. If you suspect this is affecting your results, a spectrophotometer removes the variable entirely.
Environmental color casts from colored walls, clothing, or operatory upholstery shift your chromatic adaptation before you even look at the tooth. A neutral gray or blue-gray background behind the patient’s head, combined with a neutral drape, eliminates most of this effect. Clinical review guidance specifically recommends confirming shade under different lighting conditions and using a neutral background as standard practice.
Pro Tip: When a shade looks right in the operatory but comes back wrong from the lab, the most common culprit is not the shade selection itself. It is the photograph. Check your white balance settings first.
When to pause and stage the verification
For full-arch esthetic cases or any situation where the patient has strong expectations, build a staged verification into the treatment plan. A bisque-bake try-in, a wax mock-up, or a provisional restoration viewed by the patient in natural light gives you a checkpoint before final glazing. This is not a sign of uncertainty; it is a sign of a systematic clinician.
How to communicate shade to the lab so nothing gets lost
A shade record that lives only in your head is not a shade record. The lab needs enough information to reproduce the intended appearance without calling you.
Minimum lab package for every esthetic case:
- Shade notation in full: value group, chroma step, and hue (e.g., 2M2 on the 3D-MASTER, or A2 on the Classical). Never send just a number.
- A high-quality photograph with a gray card in frame, taken before preparation, showing the full smile, a retracted anterior view, and a close-up of the target tooth with the shade tab adjacent.
- Material system and translucency notes: specify the ceramic system, the translucency level requested, and any characterization (incisal haze, cervical chroma gradient, white spot lesions to replicate).
- Cement shade and try-in instructions: note whether you plan to use a try-in paste before final cementation, and specify the cement shade if it affects the final appearance (relevant for thin veneers and highly translucent materials).
- Any special instructions: patient age, adjacent tooth characteristics, surface texture preferences.
Photo labeling convention: include the patient ID (not the full name on the file), the date, the tooth number, and the shade notation in the file name. Example: PT12345_2026-03-15_T11_2M2.jpg. This prevents mix-ups when the lab is working on multiple cases simultaneously.
When to send a custom shade tab or porcelain mock-up: if the case falls outside the standard guide range, or if the patient’s tooth has significant characterization (banding, hypocalcification, unusual translucency), send a custom tab or a fired porcelain sample alongside the photographs. Standard shade guides cover approximately 85% of natural tooth colors; for the other 15%, a physical reference is worth more than any written description.
Converting verbal shade descriptions into standardized Lab* coordinates improves lab communication and repeatability. If your spectrophotometer exports these values, include them in the lab slip.
Does hands-on training actually improve shade-matching accuracy?
The short answer: yes, and the mechanism is repeatability, not just knowledge. A clinician who understands the value-first sequence intellectually but has never practiced it under time pressure will still default to hue-first selection under stress. Hands-on repetition builds the procedural memory that makes the protocol automatic.
Evidence from training research consistently shows that repeated practice with shade guides, combined with feedback on ΔE outcomes, reduces inter-operator variability. Mentorship-based learning, where a more experienced clinician observes and corrects technique in real time, accelerates this improvement faster than self-directed study alone. The same principle applies to photographic calibration: a single bench-top session where you photograph a shade guide under different white balance settings and compare the results teaches more than reading a camera manual.
The most durable improvement comes from integrating shade-matching practice into live-patient sessions, where lighting, time pressure, and patient variables are real. Short hands-on workshops that include bench-top shade exercises, photo calibration labs, and integrated lab-technician sessions give clinicians the feedback loop that self-study cannot replicate.
Course formats that produce measurable improvement include:
- Bench-top shade-matching exercises using standardized lighting and multiple shade guides, with ΔE feedback from a spectrophotometer.
- Photo calibration labs where participants photograph the same shade guide under varying conditions and compare results against a reference.
- Integrated lab-tech sessions where the clinician and technician work through a case together, with the technician explaining what information they actually need versus what they typically receive.
- Live-patient modules within cosmetic dentistry courses, where shade selection is performed under real clinical conditions with mentorship oversight.
To measure improvement in your own practice, track remake rates by case type and record the ΔE on any case where you used a spectrophotometer. Over time, a declining remake rate and tighter ΔE distributions are objective evidence that your protocol is working. Use that data to guide your CE choices: if your remakes cluster around anterior veneers, a hands-on cosmetic dentistry course with live-patient modules is a better investment than another online lecture.
The structure of hands-on learning matters as much as the content. Programs that follow a tiered pathway, from foundational technique to advanced case complexity, build skills in the sequence that clinical confidence requires. Dental implantology programs that use this model offer a useful template for how esthetic courses can be structured similarly.
The case for systematic workflow over intuition
Most shade failures are not caused by clinicians who do not care about esthetics. They are caused by clinicians who rely on intuition in a situation that rewards systems.
The value-first sequence is not a suggestion. It is the order in which the human visual system is most reliable under clinical conditions. Instruments do not replace that sequence; they confirm it. A spectrophotometer reading that disagrees with your visual assessment is not evidence that the device is wrong. It is a prompt to look again, under a different light, with fresh eyes.
The clinicians who get the most consistent results are not necessarily the ones with the best color vision. They are the ones who have built a protocol they follow every time, document every case with a calibrated photograph, and treat a remake not as a failure but as data. That mindset, combined with the right tools and proper training, is what separates predictable esthetic outcomes from lucky ones.
Instruments are aids. The systematic review evidence showing that non-proximity digital imaging can match spectrophotometer performance under controlled conditions is not an argument for replacing clinical judgment. It is an argument for controlling the conditions.
Sharpen your shade skills with hands-on CE from Onewd
Knowing the protocol is step one. Executing it reliably under real clinical conditions takes practice, feedback, and the kind of mentorship that online lectures cannot provide.

Onewd’s cosmetic dentistry courses include hands-on shade-matching modules, photo calibration labs, and live-patient sessions where you practice the value-first protocol with direct instructor feedback. The tiered learning pathway means you can start at the level that matches your current skill and progress to advanced esthetic cases at your own pace. Courses carry accredited CE credits, and the mentorship model means you leave with a workflow you can implement the next morning, not just slides to review later.
Browse upcoming hands-on classes and on-demand modules at Onewd’s training courses page and find the format that fits your schedule.
Recommended