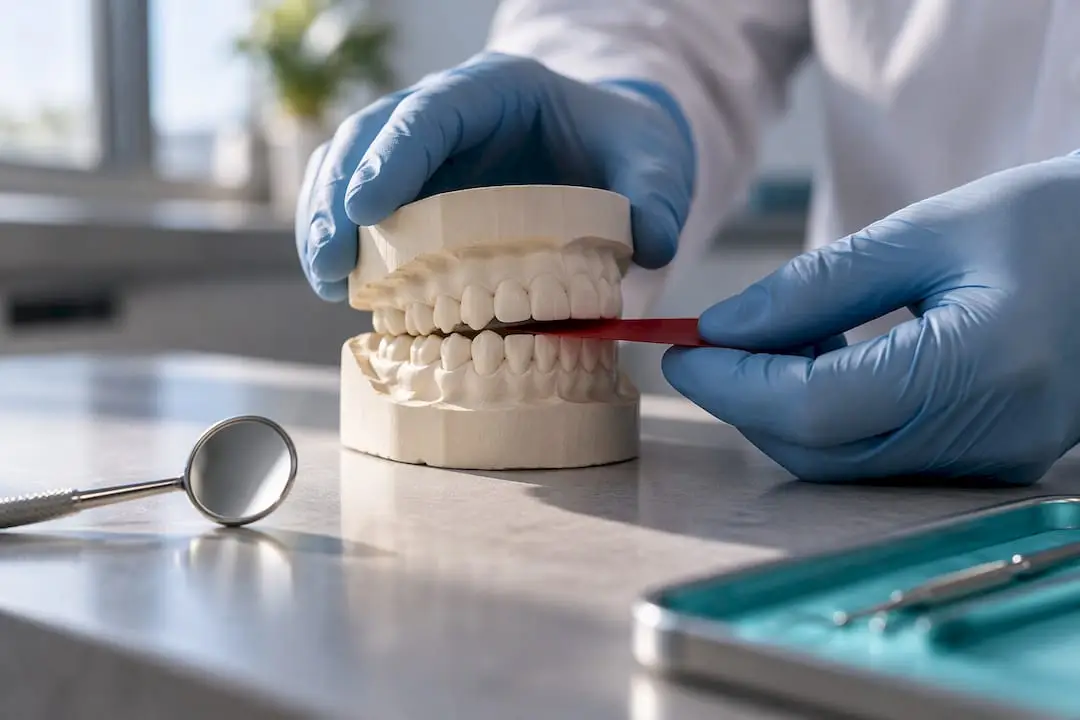
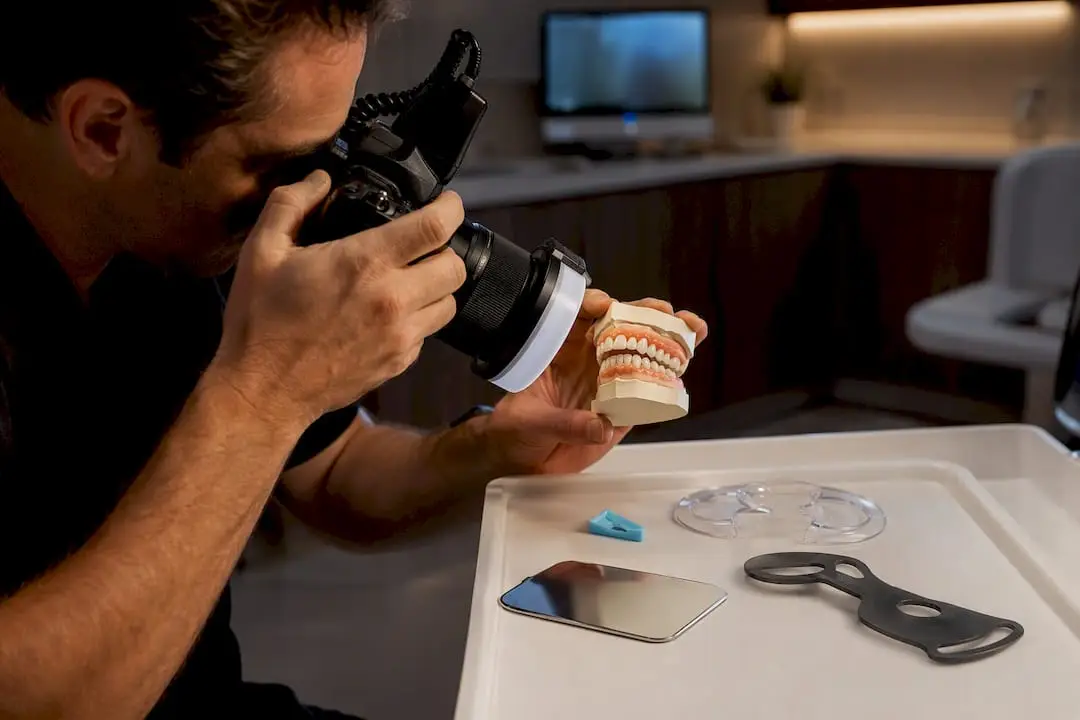
Effective smile design integrates facial, dentogingival, and dental parameters into a single, coordinated plan that produces a natural-looking, functionally stable result that the patient will maintain for years. The maxillary central incisors anchor every esthetic decision: their incisal edge position relative to the lower lip sets the vertical reference, their width-to-length ratio (approximately 4:5, or 75–80%) establishes proportion, and their relationship to the facial midline defines symmetry. Gingival display, the occlusal plane relative to the interpupillary line, and buccal corridor width complete the spatial framework. Digital Smile Design (DSD) ties these parameters together as a communication and mock-up tool before any irreversible preparation begins.
Quick clinical checklist for initial assessment:
- Measure incisal edge display at rest. Some central incisor visible is the typical adult target
- Verify dental midline against the facial midline and philtrum
- Assess gingival display at full smile (0–2 mm is generally considered esthetic)
- Check smile arc: does the incisal curve follow the curvature of the lower lip?
- Evaluate buccal corridors and smile width to determine veneer count
- Document lip dynamics at rest, posed smile, and full animated smile (average upper lip elevation during smiling is about 7–8 mm, with female lip lines approximately 1.5 mm higher than those of males)
What outcomes should every smile design plan achieve?
The primary clinical goal is harmony: the planned smile must look natural within the patient’s face, function without occlusal interference, and remain stable over time. That sounds straightforward, but in practice it means tracking several measurable outcomes simultaneously rather than optimizing one parameter in isolation.
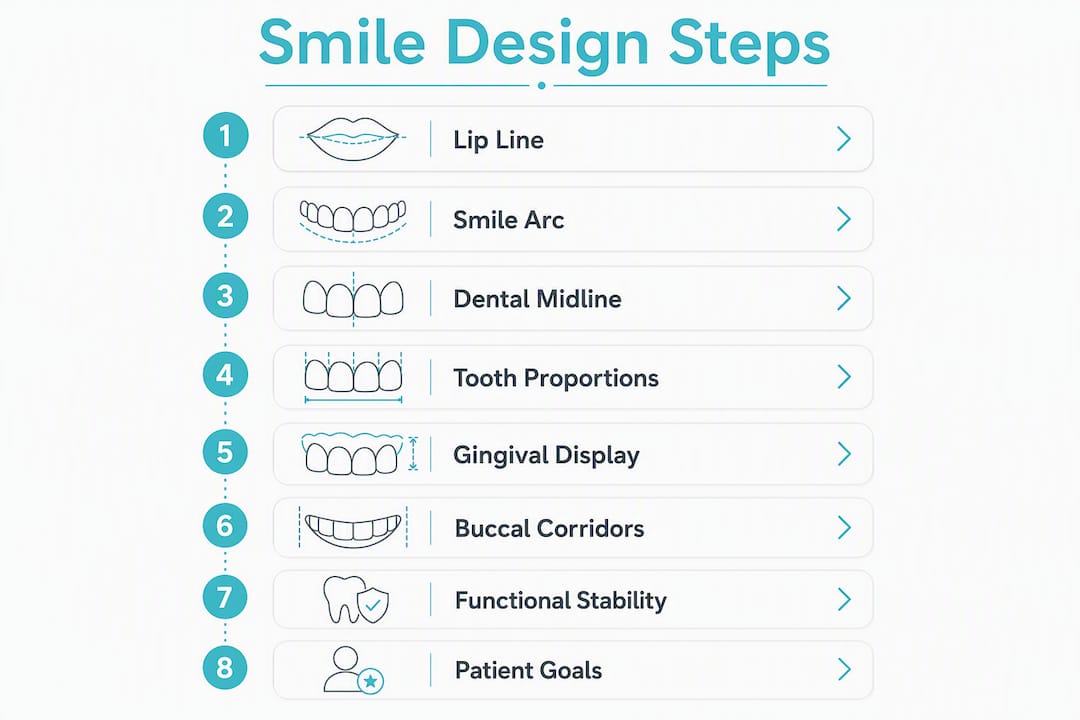
The eight-component framework described in the orthodontic and esthetic literature—lip line, smile arc, upper lip curvature, buccal corridors, dental midline, tooth size/shape/color, axial inclinations, and gingival architecture—organizes these outcomes into facial, dental, and gingival categories. From a treatment-planning standpoint, the outcomes clinicians should document and track include:
Incisal edge position. At rest, 2–3 mm of maxillary central incisor should be visible below the upper lip. This single measurement drives tooth length decisions more reliably than any proportional formula.
Dental midline alignment. Minor midline deviations are generally imperceptible to lay observers, but deviations beyond that threshold attract attention, particularly when they are not parallel to the facial midline.
Gingival display. A small amount of gingival tissue visible at full smile is the accepted esthetic range; excessive gingival display typically requires surgical or orthodontic correction before restorative work begins.
Buccal corridors. Minimal lateral negative space (the dark gap between the posterior teeth and the commissures) is associated with a fuller, more esthetic smile, though some corridor space reads as natural and avoids an overly “denture-like” appearance.
Functional stability. Anterior guidance, canine protection or group function, and posterior disclusion must be verified at delivery and at every recall. Esthetic restorations that introduce occlusal interferences fail early.
Patient-centered psychosocial outcomes. Document the patient’s stated goals at consultation and revisit them at delivery. Satisfaction surveys at one week and six months catch perceptual mismatches before they become complaints.
The PMC review on smile design principles reinforces that esthetic outcomes are most predictable when clinicians define measurable targets before treatment rather than adjusting by eye at the chair.
What are the components of an esthetic smile?
A balanced smile is evaluated across facial, dental, and gingival layers. Treating these as separate checklists is a common mistake; they interact constantly, and a decision in one layer almost always affects the others.
Facial composition
The facial reference framework starts with three horizontal lines: the interpupillary line (eyes), the commissural line (corners of the mouth), and the occlusal plane. Ideally, these run parallel to each other and perpendicular to the facial midline. The facial midline itself is anchored at the subnasale and philtrum, which are the most reliable soft-tissue landmarks for verifying dental midline alignment.
Key facial landmarks to document at consultation:
- Interpupillary line (reference for occlusal plane parallelism)
- Facial midline (philtrum/subnasale)
- Commissural line (reference for smile width and cant)
- Lip line at rest and at full smile
- Nasolabial angle and lip support (critical for anterior tooth length decisions)
Dental and gingival composition
“A balanced smile is evaluated across eight components combining facial, dental, and gingival parameters — including lip line, incisal display, tooth size, shape, color, midline, and gingival contour.” — JCO eight-component framework
The eight components are: (1) lip line, (2) smile arc, (3) upper lip curvature, (4) buccal corridors, (5) dental midline, (6) tooth size, shape, and color, (7) axial inclinations, and (8) gingival architecture. Each component has a documented esthetic norm, but the norms interact. A high lip line, for example, makes gingival zenith position far more critical than it would be in a patient with a low lip line.
Recommended photographic angles for full documentation:
- Full-face frontal at rest
- Full-face frontal at posed smile
- Full-face frontal at full animated smile
- Retracted frontal (teeth in occlusion)
- Retracted frontal (teeth slightly apart, showing incisal edges)
- Lateral profile at rest and smile
- Occlusal views (maxillary and mandibular)
- Close-up of gingival margins and papillae
For interdisciplinary planning, use the same terminology across the team. Orthodontists think in terms of skeletal and dental classifications; periodontists think in biotype and tissue thickness; prosthodontists think in preparation design and material properties. A shared photographic record and a DSD mock-up give every specialist a common visual reference and reduce miscommunication at handoff.
How do you measure and apply dental proportions correctly?
Tooth dimensions and proportions are the most numerically specific part of smile design, and also the most frequently misapplied. The numbers are benchmarks, not prescriptions.
Central incisor width-to-length ratio
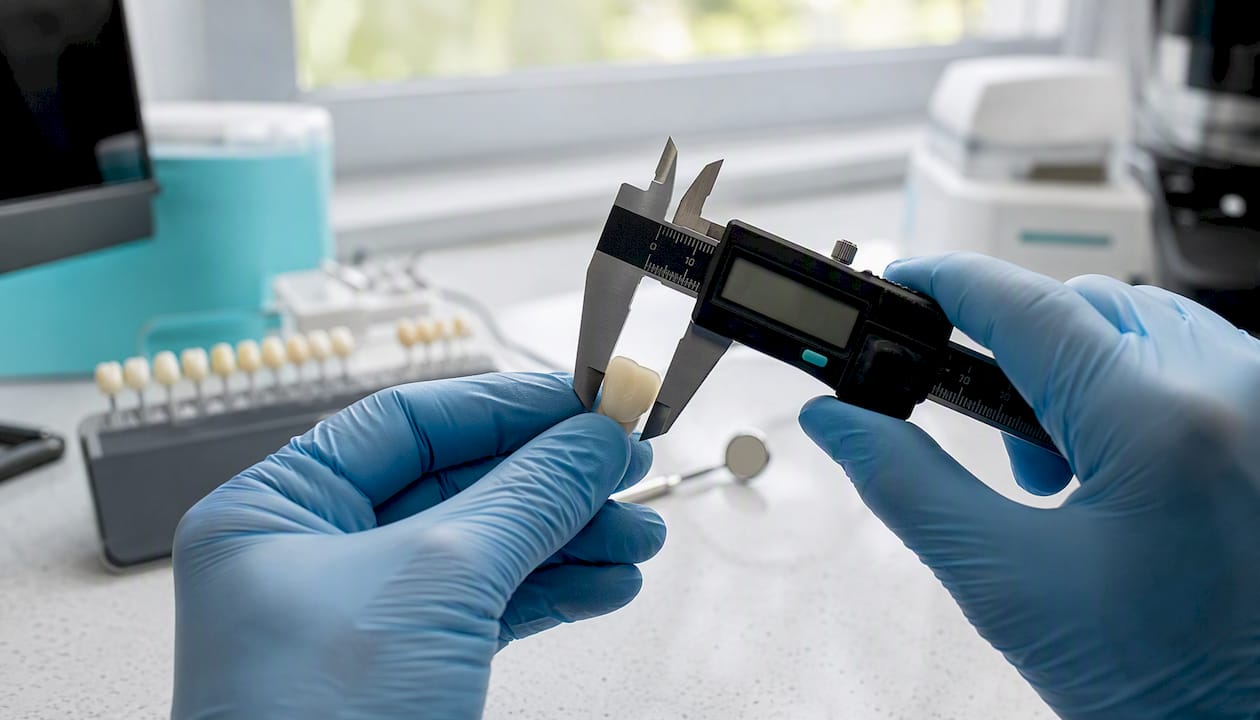
Research supports an approximate width-to-length ratio of 4:5 for the maxillary central incisor, with width running approximately 75–80% of length. Central incisor length is commonly targeted in the 10–11 mm range, though this varies with facial proportions, lip support, and the degree of incisal wear present.
| Tooth |
Suggested Length Range |
Acceptable Width:Length Ratio |
| Maxillary central incisor |
10–11 mm |
75–80% |
| Maxillary lateral incisor |
typical adult length range |
75–80% |
| Maxillary canine |
typical adult length range |
75–80% |
| Mandibular central incisor |
typical adult length range |
75–85% |
These ranges come from clinical literature and should be cross-checked against the patient’s existing tooth dimensions, lip support, and phonetics before any preparation begins.
Step-by-step measurement protocol
- Take a retracted frontal photograph with a millimeter ruler or reference scale in the same plane as the incisal edges.
- Calibrate the image in your software (DSD platform, PowerPoint, or a dedicated imaging tool) using the known ruler dimension.
- Measure apparent crown width at the widest point and apparent crown length from the gingival zenith to the incisal edge.
- Calculate the width-to-length ratio and compare to the 75–80% benchmark.
- Repeat on casts or digital scans to correct for photographic foreshortening (the camera angle can artificially widen or narrow apparent tooth dimensions by 5–10%).
- Record measurements in the patient chart and use them as the starting point for the digital wax-up.
Axial inclination and perceived symmetry
Progressive mesial inclination from centrals to canines is a natural feature of the dentition. Centrals are nearly vertical; laterals tip slightly mesially; canines tip more. When all teeth are parallel or when a lateral is more upright than the central, the smile reads as artificial. This is a common outcome when veneers are placed without orthodontic pre-treatment to correct axial positions.
Pro Tip: When adapting proportions for a patient with a round face, slightly wider central incisors (closer to 80–85% width-to-length) read as more harmonious than strict 75% ratios. Visagism — matching tooth shape to facial temperament and personality — gives you a principled framework for these adjustments rather than relying on intuition alone.
How do you assess gingival harmony and lip dynamics?
Soft tissue is the frame around the teeth, and no restorative result survives a gingival architecture that was never properly assessed. The parameters below are the minimum to document before any esthetic treatment plan is finalized.
Gingival display and zenith positions
Acceptable gingival display at full smile is 0–2 mm, consistent with the esthetic range supported in clinical research. Display above 3 mm is generally considered a “gummy smile” and typically requires crown lengthening, orthognathic surgery, or lip repositioning before restorative work. Display of exactly 0 mm (no gingival tissue visible) is also esthetic, though it becomes a concern when the lip line is high and the gingival margins are uneven.

Zenith points (the most apical point of the gingival margin for each tooth) follow a predictable pattern: the central incisor zenith is at or slightly distal to the long axis of the tooth; the lateral incisor zenith is at the long axis; the canine zenith aligns with the long axis. Deviations from this pattern are visible at high lip lines and should be corrected surgically or orthodontically before final restorations.
The typical central-lateral-canine gingival contour relationship places the canine and central incisor zeniths at the same height, with the lateral incisor zenith 0.5–1 mm coronal to them. This creates the characteristic “wave” that reads as natural.
Documenting lip dynamics
Research shows the upper lip elevates on average during smiling, with female lip lines generally higher than male lip lines. These norms help predict how much gingival tissue will be visible at full smile before any treatment begins.
Photograph the patient in three states:
- Lips at rest (reveals incisal edge display and lip support)
- Posed/social smile (reveals the typical gingival display)
- Full animated smile (reveals maximum gingival display and smile arc)
A short video clip during conversation is more informative than any static photograph for assessing lip hypermobility.
Black triangles: the predictable treatment ladder
Black triangles (open gingival embrasures) are among the most common post-treatment complaints in esthetic dentistry. They result primarily from root divergence, triangular tooth anatomy, or loss of papilla height after periodontal disease or extraction.
The predictable treatment sequence:
- First: Orthodontic root paralleling to move contact points apically and allow papilla reformation. Research confirms this is the most biologically stable approach.
- Second: Papilla regeneration strategies (hyaluronic acid injection protocols, connective tissue grafting) where tissue volume is the primary deficit.
- Third: Restorative masking (widening contact areas with composite or porcelain) only when orthodontic and surgical options are not feasible or have been exhausted.
Restorative masking alone is less predictable long-term and can create unnaturally wide contact areas that compromise hygiene.
Clinical warning flags that require surgical or orthodontic input before restorative work:
- Gingival display greater than 3 mm at full smile
- Hypermobile upper lip (display increases dramatically between posed and animated smile)
- Active gingival inflammation or uncontrolled periodontal disease
- Thin biotype with visible root prominence
- Significant zenith asymmetry (greater than 1 mm difference between contralateral teeth)
- Papilla height loss greater than 3 mm from the contact point
How do the occlusal plane and smile arc affect esthetic outcomes?
The occlusal plane and smile arc are the two spatial relationships most likely to be overlooked in a purely tooth-focused esthetic plan. Both have direct consequences for restorative decisions.
Reference plane relationships
The occlusal plane should run parallel to the interpupillary line when viewed from the front. A cant of more than 2–3 degrees is perceptible to most observers and cannot be corrected restoratively without creating teeth of unequal length. Cants of this magnitude require orthodontic or orthognathic correction first.
The incisal edge line should follow the curvature of the lower lip in a consonant smile arc. When the incisal edges curve downward to match the lower lip’s upward curve, the smile reads as youthful and natural. A flat or reverse arc (where the incisal edges curve upward while the lower lip curves up) reads as aged or artificial.
Detecting cants and planning corrections
At the clinical examination, use a tongue blade or a millimeter ruler held horizontally across the incisal edges and compare it to the interpupillary line. A photograph with a horizontal reference line drawn through the pupils makes the comparison precise and documentable.
When a cant is present, determine whether it is dental (teeth only, correctable with orthodontics or selective restorative adjustment) or skeletal (jaw asymmetry, requiring surgical evaluation). Restorative compensation for a skeletal cant produces teeth of visibly different lengths and is rarely esthetic.
A nonconsonant (flat) smile arc in a restorative case usually means the incisal plane was flattened by wear or by previous restorations. Restoring a consonant arc requires lengthening the central incisors relative to the laterals and canines, which has direct implications for preparation design, occlusal clearance, and anterior guidance. Overcontouring to create the arc illusion without adequate length increase produces bulky restorations that trap plaque and fail at the margins.
Age-related changes in smile arc are clinically significant: as patients age, the upper lip drops and covers more of the maxillary incisors, while the lower lip drops and reveals more of the mandibular incisors. For patients over 50, shade selection should account for the fact that mandibular incisors will become more visible over time, and material choices should prioritize durability over maximum translucency.
What does a reliable Digital Smile Design workflow look like?
DSD is most valuable as a communication and predictability tool. Literature reviews confirm it improves case acceptance and technician-clinician alignment, but clinicians must interpret digital plans against actual tissue behavior and periodontal health. The workflow below is designed to minimize the gap between the digital plan and the clinical result.
Essential diagnostic records
Before any digital design work begins, collect:
- Full-face frontal photograph at rest and at full smile (standardized: same camera, same distance, same lighting)
- Retracted intraoral photographs (frontal and lateral)
- Occlusal photographs (maxillary and mandibular)
- Full-arch digital scans or accurate alginate/PVS impressions with poured stone casts
- Facebow transfer or facial reference data (when full-arch or full-mouth cases are planned)
- Short video clip of the patient speaking and smiling naturally
- Periodontal charting and radiographic survey
Step-by-step DSD workflow
- Import standardized facial and intraoral photographs into the DSD platform.
- Draw the interpupillary line and facial midline on the facial photograph.
- Transfer the midline and horizontal reference to the dental photograph to align the dental composition with the facial framework.
- Overlay the tooth outline on the facial photograph to assess proportion and smile width.
- Generate a digital wax-up based on the planned tooth dimensions and proportions.
- Fabricate a provisional restoration or a printed/milled mock-up for intraoral try-in.
- Test the provisional for phonetics (sibilants, labiodentals), lip support, esthetics under natural and clinical lighting, and occlusal function.
- Adjust the provisional based on patient and clinician feedback before communicating final parameters to the laboratory.
- Deliver final restorations only after the provisional has been accepted by both the patient and the clinician.
Software selection and clinical role
DSD programs vary in comprehensiveness. Some platforms are dentist-specific (such as ADSD) and connect directly to CAD/CAM systems; others rely on general image editors adapted for dental use. When selecting a platform, weigh three factors: how thoroughly it integrates facial, dentogingival, and dental parameters; whether it connects to your laboratory’s CAD/CAM workflow; and how much time it adds to the clinical appointment versus how much communication value it creates.
No DSD platform replaces clinical judgment. Digital plans are built from photographs, which are two-dimensional representations of three-dimensional tissue. Gingival biotype, tissue thickness, bone levels, and lip mobility cannot be fully captured in a photograph. The provisional is where the digital plan meets biological reality.
Photo protocol to avoid scale errors:
- Always include a millimeter ruler or reference scale in the same focal plane as the incisal edges
- Use a standardized camera-to-patient distance (typically 90–100 cm for full-face, 30–40 cm for retracted intraoral)
- Keep the patient’s Frankfort horizontal plane parallel to the floor
- Use a cross-polarized flash to eliminate glare on tooth surfaces
- Shoot retracted photographs with the teeth slightly apart (1–2 mm) to capture incisal edge position accurately
How do you choose between veneers, conservative options, and the 4-8-10 rule?
Treatment selection in esthetic dentistry follows a conservative-to-invasive logic: do the least irreversible thing that achieves the planned outcome. The 4-8-10 rule is a planning heuristic that helps determine veneer count, not a substitute for measuring the actual smile zone.
The treatment decision flow
Start with the least invasive option that can achieve the planned outcome:
- Whitening and microabrasion for color and mild surface texture issues with no proportion or alignment concerns.
- Direct composite additions (additive approach, no preparation) for minor length, shape, or contour corrections. These are reversible and serve as excellent provisional tests.
- Porcelain or composite veneers (minimal or no preparation) for cases where color, shape, and proportion changes exceed what direct composite can achieve predictably.
- Full-coverage crowns when structural compromise, endodontic treatment, or severe wear requires it. Full coverage is rarely the first choice in an esthetic-only case.
- Surgical adjuncts (crown lengthening, osseous surgery, orthognathic procedures) when soft-tissue or skeletal parameters fall outside restorative correction range.
The 4-8-10 rule explained
The 4-8-10 rule is a clinical heuristic for deciding how many upper veneers to place based on smile width and tooth visibility:
- 4 veneers covers the four maxillary incisors. Appropriate when the smile width is narrow and the premolars are not visible during smiling.
- 8 veneers extends coverage through the first premolars. Appropriate for average smile widths where the premolars show at the corners of the smile.
- 10 veneers includes the second premolars. Appropriate for broad smiles where the second premolars are visible in the buccal corridor.
The number should be determined by measuring the actual smile zone during a full animated smile, not by defaulting to the nearest popular number. Placing 8 veneers when only 4 teeth show creates unnecessary preparation; placing 4 veneers when 8 teeth show creates a visible color and contour mismatch at the lateral margins.
Material selection considerations:
- Lithium disilicate (e.g., IPS e.max): High strength, good translucency, suitable for veneers and full-coverage restorations. Preferred when some preparation is required and durability is a priority.
- Feldspathic porcelain: Maximum translucency and esthetic depth, but lower fracture resistance. Best for minimal-preparation or no-preparation veneers in low-occlusal-load cases.
- Composite resin (direct or indirect): Most conservative, repairable chairside, lower cost. Appropriate for younger patients, provisional testing, or cases where reversibility is a priority.
Shade matching deserves its own step in the workflow. Photograph the unprepared teeth next to a shade tab under natural light before any rubber dam or retraction is placed (dehydration shifts tooth color significantly within 20 minutes). When some teeth will remain unveneered, whiten those teeth first and allow 2–4 weeks for shade stabilization before selecting the veneer shade.
What does clinical execution look like from delivery through maintenance?
The restorative delivery appointment is where planning either pays off or unravels. A structured checklist prevents the most common execution errors.
Delivery checklist
- Verify dental midline against the facial midline before cementation.
- Check incisal edge position at rest (2–3 mm display target) and at full smile.
- Assess phonetics: ask the patient to say “sixty-six” (sibilants) and “fifty-five” (labiodentals). Lisping or air escape indicates incisal edge position or contour problems.
- Evaluate shade under natural light, operatory light, and the patient’s own phone camera. Shade shifts under different light sources are the most common patient complaint post-delivery.
- Confirm lip support: the provisional contour should have been tested for this, but verify with the final restorations in place.
- Check occlusion in centric relation, lateral excursions, and protrusive. Mark with articulating paper and adjust before final cementation.
- Polish all margins to a high luster before cementation to reduce plaque accumulation and margin staining.
Provisionalization strategy
Provisionals serve two purposes: they test the esthetic plan in the patient’s actual oral environment, and they allow the clinician to refine contour, length, and shade before committing to the final laboratory work. A provisional that the patient and clinician both accept without reservation is the single best predictor of a successful final result.
Extend the provisional trial period when: the case involves significant length changes (more than 2 mm), the patient has a history of esthetic dissatisfaction, or the occlusal scheme has been altered. Two to four weeks is a reasonable minimum for complex cases; some clinicians run provisionals for 6–8 weeks in full-mouth reconstructions.
Finishing, cementation, and occlusion
Use a resin cement with a try-in paste that matches the planned cement shade. Evaluate the try-in paste result under multiple light sources before mixing the final cement. Once cemented, remove excess cement immediately from all margins, especially interproximally, where retained cement causes periodontal inflammation.
Post-cementation occlusal check: verify that no restoration carries a premature contact in centric relation. Even a 20-micron high spot on a veneer can cause chipping within weeks in a patient with a parafunction habit.
Follow-up schedule
- 1 week: Verify occlusion, check for sensitivity, assess patient satisfaction and phonetics.
- 1 month: Periodontal assessment, margin evaluation, shade stability check.
- 6 months: Full periodontal charting, radiographic check of margins, polish restorations.
- Annual: Comprehensive esthetic and functional review; re-polish as needed; assess shade match of unveneered teeth; check for wear facets indicating parafunctional activity.
Maintenance advice for patients:
- Use a non-abrasive fluoride toothpaste (avoid whitening abrasives on porcelain margins)
- Wear a night guard if any parafunctional activity was noted at delivery
- Avoid biting hard objects (ice, fingernails, pen caps) with anterior restorations
- Schedule professional re-polishing every 12–18 months to maintain surface luster
How do these principles translate into a chairside clinical checklist?
The following checklist and case summaries are designed to be reproduced for chairside use. They condense the full workflow into a format clinicians can move through systematically from the first consultation to the final delivery appointment.
One-page stepwise case checklist
Consultation and records:
- Collect standardized facial and intraoral photographs (all angles listed in Section 3)
- Record lip dynamics at rest, posed smile, and full animated smile (video preferred)
- Complete periodontal charting and radiographic survey
- Take full-arch scans or impressions
- Document patient’s stated esthetic goals
DSD and planning:
- Import photographs into DSD platform; draw interpupillary line and facial midline
- Measure incisal edge display at rest and at full smile
- Assess gingival display and zenith positions
- Generate digital wax-up; confirm tooth dimensions against 4:5 ratio benchmark
- Determine veneer count using 4-8-10 assessment of actual smile zone
- Confirm material selection based on preparation requirements and occlusal load
Provisional phase:
- Fabricate and deliver provisional restorations or printed mock-up
- Test phonetics, lip support, shade, and occlusion
- Adjust and re-evaluate; extend trial period if any parameter is uncertain
- Communicate final parameters to laboratory with photographs of accepted provisional
Delivery:
- Follow delivery checklist (midline, incisal edge, phonetics, shade, lip support, occlusion)
- Cement with try-in paste confirmation; remove all excess cement
- Schedule 1-week follow-up before patient leaves
Maintenance:
- Follow-up at 1 week, 1 month, 6 months, and annually
- Re-polish at 6-month and annual visits
Case thumbnails
Case A: Orthodontics first, then veneers
A patient presented with crowding, a 3 mm midline deviation, and triangular tooth anatomy creating black triangles at the central-lateral contacts. The treatment sequence: 14 months of clear aligner therapy to correct the midline, parallel roots, and lengthen contact areas; followed by 8 feldspathic veneers. The orthodontic phase eliminated the black triangles without any restorative masking. Key decision: the restorative plan was designed before orthodontics started so tooth movement was targeted to the final veneer positions.
Case B: Crown lengthening before veneers
A patient with a high lip line and 4 mm of gingival display at full smile. Osseous crown lengthening on teeth 6–11 reduced gingival display to 1.5 mm and corrected zenith asymmetry. After 3 months of tissue healing, 6 lithium disilicate veneers were placed. Key decision: attempting veneers without the surgical phase would have produced short-looking restorations with uneven gingival margins.
Case C: Conservative veneer-only case, 4-8-10 assessment
A patient with a narrow smile (premolars not visible at full smile), mild discoloration, and slightly short central incisors. Smile zone assessment confirmed only 4 teeth visible. Treatment: 4 minimal-preparation feldspathic veneers on the central and lateral incisors, following the 4:5 proportion target. No orthodontics or surgery required. Key decision: the 4-veneer plan was confirmed by measuring the actual smile zone, not assumed from the patient’s stated preference for “a full smile makeover.”
| Case |
Midline deviation (pre/post) |
Gingival display change |
Veneers placed |
| A: Ortho + veneers |
3 mm / 0.5 mm |
No change required |
8 |
| B: Crown lengthening + veneers |
0.5 mm / 0.5 mm |
4 mm → 1.5 mm |
6 |
| C: Conservative veneers only |
1 mm / 0.5 mm |
No change required |
4 |
The Golden Proportion (each tooth is 61.8% the width of the tooth to its mesial) and the recurring esthetic dental (RED) proportion are useful starting points, but research supports the view that rigid adherence to either can limit clinical creativity and produce results that look mathematically correct but feel wrong on a specific patient’s face.
The core problem is that proportion formulas were derived from population averages. They describe what is common, not what is optimal for an individual. A patient with a wide face, prominent cheekbones, and an extroverted personality may read a slightly wider, squarer central incisor as more harmonious than the Golden Proportion would suggest. A patient with a narrow, angular face may look better with a more tapered central form that violates the standard ratio.
“Visagism reframes esthetic dentistry by aligning dental design with the patient’s temperament and facial character — moving the clinician from formula-follower to artist-diagnostician.” — Visagism and esthetic personalization review
Visagism provides a structured framework for this personalization. It maps tooth shape (square, ovoid, triangular) and surface texture to personality types and facial character, giving clinicians a principled basis for deviating from standard proportions. The practical steps:
- Assess facial shape (square, ovoid, tapering) and note dominant facial features.
- Discuss the patient’s personality and lifestyle (active, conservative, artistic, professional).
- Map these to tooth form preferences using a visagism guide or reference card.
- Build the deviation into the digital wax-up and test it in the provisional.
- Use dynamic smile video analysis (not just static photographs) to confirm the result reads naturally during speech and movement.
The provisional is the non-negotiable test. No proportion formula, digital design, or wax-up can fully predict how a tooth form will read in a living, moving face. Clinicians who skip or shorten the provisional phase because the digital plan “looks right” are the ones who end up remaking cases.
Pro Tip: When teaching smile design, have trainees build two provisionals for the same case: one strictly following the Golden Proportion and one following a visagism-informed form. Comparing them in the patient’s mouth is more instructive than any lecture on proportion theory.
For training programs, the highest-yield teaching priorities are: standardizing photographic records before any design work begins, practicing DSD workflows on real cases with early laboratory involvement, and running full provisional mock-up sequences rather than jumping to final restorations. These three habits eliminate the majority of esthetic failures seen in early-career clinicians.
Key Takeaways
Effective smile design requires integrating facial, dentogingival, and dental parameters into a single coordinated plan, with the maxillary central incisor’s incisal edge position and 4:5 width-to-length ratio serving as the primary measurement anchors.
| Point |
Details |
| Measure incisal edge first |
Incisal edge display at rest (target: 2–3 mm) drives tooth length decisions more reliably than any proportion formula. |
| Use 4:5 as a benchmark, not a rule |
The 75–80% width-to-length ratio for central incisors is a validated starting point; target length is typically 10–11 mm, and this should be adjusted for face shape, wear, and visagism-informed personalization. |
| Document lip dynamics before planning |
Average upper lip elevation during smiling is 7–8 mm, with female lip lines about 1.5 mm higher than male lines, directly affecting predicted gingival display. |
| Test with provisionals before committing |
Provisionals validate esthetics, phonetics, and anterior guidance in the actual oral environment; no digital plan replaces this step. |
| Onewd courses bridge theory and execution |
Onewd’s tiered CE programs, including hands-on veneer workflows and DSD fundamentals, give clinicians structured practice in the exact protocols covered here. |
Where does clinical training fall short in smile design?
Most clinicians who struggle with esthetic cases are not missing knowledge. They are missing repetition. The principles covered in this guide are well-documented in the literature; the gap between reading them and applying them reliably at the chair is almost entirely a matter of structured practice.
The skill gaps that show up most consistently in trainees are: inconsistent photographic records (making DSD analysis unreliable from the start), skipping or abbreviating the provisional phase under time pressure, and underestimating the interdisciplinary complexity of cases that look straightforward on the surface. A case that appears to need only 4 veneers can reveal a gingival zenith asymmetry, a midline discrepancy, and a black triangle risk the moment you put a provisional in place and photograph it under proper lighting.
Case-based mentorship addresses these gaps in a way that lectures and textbooks cannot. Watching an experienced clinician work through a DSD analysis, explain why they chose 8 veneers instead of 6, and then modify a provisional based on phonetic testing gives trainees a mental model they can replicate. Reading about it gives them vocabulary.
The practical teaching priorities that produce the fastest clinical improvement: record standardization first (every trainee should be able to produce a complete, calibrated photographic record before touching a design tool), followed by DSD workflow practice on real cases with early laboratory involvement, and then full provisional mock-up sequences before any irreversible preparation. Clinicians who build these habits early make far fewer esthetic errors and far fewer remakes.
Onewd’s cosmetic dentistry training puts these principles into practice
Knowing the 4:5 ratio and the DSD workflow is one thing. Executing them on a real patient, under real clinical conditions, with a mentor watching and correcting in real time, is where the skill actually forms.

Onewd offers a structured path from foundational esthetic concepts to advanced hands-on veneer and cosmetic dentistry workflows. The training courses include online DSD fundamentals you can complete on your own schedule, in-person hands-on sessions where you work through veneer preparation and provisional fabrication on real cases, and multidisciplinary clear aligner planning for cases where orthodontic pre-treatment is part of the esthetic plan. Every course is built around the same principle this article is built around: measurable clinical outcomes, not just theory. If you are ready to move from reading about smile design to doing it predictably, the next step is browsing the Onewd course catalog and finding the format that fits your current skill level and schedule.
Useful sources and further reading
The references below are the primary sources used in this guide. Each is worth reading in full for teaching, journal club discussions, or deeper clinical review.
| Source |
What it contributes |
| Principles of smile design (PMC) |
Comprehensive clinical review covering tooth proportions, the 4:5 ratio, Golden and RED proportions, and the role of provisionals in esthetic planning. Core reference for Sections 4 and 9. |
| DSD programs review (PMC) |
Literature review of DSD platform capabilities, facial analysis integration, and CAD/CAM compatibility. Core reference for Section 7. |
| Visagism and esthetic personalization (PMC) |
Review supporting personality-based tooth form selection and the clinical rationale for moving beyond strict proportion formulas. Core reference for Section 11. |
| Eight components of a balanced smile (JCO) |
Orthodontic literature framework for the eight smile components; includes lip dynamics data (7–8 mm average elevation, sex differences in lip line). Core reference for Sections 3 and 5. |
| 4-8-10 rule for veneers |
Clinical explanation of the veneer count heuristic and its application to smile width assessment. Core reference for Section 8. |
Additional reading for teaching and journal club:
- The Journal of Conservative Dentistry (PubMed archive) publishes regularly on esthetic protocols, material selection, and minimal-preparation veneer techniques.
- PubMed ID 21217950 covers anterior esthetic guidelines relevant to incisal edge position and proportion assessment.
- PubMed ID 10825866 addresses gingival display norms and surgical thresholds in esthetic planning.
These sources are suitable for assigning as pre-reading before a hands-on smile design workshop, or as the basis for a structured case-review session where trainees apply each principle to a real patient record.
Recommended