The composite veneer technique is a conservative anterior restorative approach that uses direct, indirect, or direct–indirect composite layering to reshape, resurface, and restore incisal aesthetics with minimal or no tooth reduction. Choose the direct approach for single-visit additive recontouring, diastema closure, and cases where enamel substrate is sound and shade demands are moderate. The indirect method suits high-wear cases or patients who need superior mechanical properties and lab-verified aesthetics. The direct–indirect workflow sits between the two: it gives you chairside sculpting control plus the mechanical and finishing advantages of extraoral processing.
Before you commit to any approach, three decision points determine the path:
- Substrate availability: Is there adequate enamel for reliable bonding, or does existing dentin exposure push you toward a technique with better adhesive control?
- Shade and optical complexity: Does the case require simple color masking, or polychromatic layering to replicate opalescence, mamelons, and incisal halos?
- Occlusal and functional demands: Is the patient a bruxer, do they have a deep bite, or are there parafunctional habits that increase fracture risk and demand better material properties?
How do you choose between direct, indirect, and direct–indirect composite veneers?
Clinical assessment data from controlled comparisons shows that indirect composite and ceramic veneers outperform direct composites for marginal discoloration and mechanical failures at short- to mid-term follow-up. That finding does not make direct veneers a poor choice. It means case selection is everything.
Indications by technique
Direct composite veneers are indicated for:
- Diastema closure (especially midline gaps up to 3–4 mm)
- Minor shape corrections and additive recontouring
- Single-tooth color anomalies where shade demands are moderate
- Patients with limited budgets or who prefer a single-visit solution
- Young patients where tooth preparation would be premature
Indirect composite veneers are indicated for:
- Multiple-unit cases requiring consistent shade and form across the arch
- Worn or abraded teeth needing significant volume replacement
- High-aesthetic cases where polychromatic layering needs extraoral control
- Patients with parafunctional habits (indirect composites tolerate occlusal adjustment better)
Direct–indirect composite veneers are indicated for:
- Cases where you want chairside sculpting control but need improved polymerization and finishing
- Moderate-to-complex shade modulations where try-in before cementation matters
- Clinicians building skill toward fully indirect workflows
Contraindications to watch
Avoid composite veneers entirely when there is active caries, insufficient enamel for bonding, severe bruxism without a protective occlusal scheme, or when the patient’s maintenance compliance is poor. A patient who skips recalls and drinks coffee daily will stress any composite margin within months.
Pro Tip: In borderline cases where you are unsure whether to go direct or fully indirect, the direct–indirect hybrid is often the most forgiving choice. You sculpt chairside, verify the try-in, and finish extraorally — giving you a second chance to correct shade and contour before luting.
A useful pre-treatment checklist: confirm enamel thickness with transillumination or CBCT if needed; review existing restorations for compatibility with your adhesive system; assess occlusal risk with articulating paper and a mounted study model; document patient expectations in writing; and confirm the patient understands that composite veneers require periodic maintenance and polishing.
Which composite materials and shades work best for veneers?
Material choice determines how predictable your layering strategy will be. The layering concepts described in the literature classify composite layers by optical function: dentin layer, body enamel, value enamel, translucent effect enamel, and milky-white incisal. Each layer requires a different composite category.
Composite categories for veneer work
- Flowable composites: Used for the first internal adaptation layer, especially in minimally invasive preparations. Their low viscosity wets the etched surface well and reduces voids at the adhesive interface. Not suitable as a bulk material.
- Nanofilled and nanohybrid anterior composites: The workhorse for body and enamel layers. High filler content gives excellent polish retention and surface smoothness. Brands like IPS Empress Direct, Filtek Supreme Ultra, and Estelite Sigma Quick are widely used in the U.S. for anterior work.
- Microhybrid composites: Slightly coarser filler than nanofilled, but still polishable. Useful for dentin-replacement layers where translucency needs to be lower and chroma higher.
- High-translucency enamel composites: Thin incisal layers that replicate opalescence. These are placed last and must be kept thin (0.3–0.5 mm) to avoid graying the restoration.
Shade strategy: hue, chroma, and value
Value is the most critical optical variable. A restoration that is too gray reads as dark regardless of hue accuracy. Start shade selection before isolation and before the tooth dehydrates. For high-stakes cases, delay final shade verification at least 24 hours after any preparation to allow full rehydration — dehydrated enamel appears lighter and will mislead your selection.
A simple layering-shade strategy:
- Select the dentin shade first (higher chroma, lower translucency).
- Select the body enamel shade to match the middle third of the natural tooth.
- Choose an incisal/translucent shade that matches the patient’s natural incisal edge character (blue-gray opalescence vs. warm amber).
- Photograph under daylight, tungsten, and operatory light to check for metamerism.
Adjunct consumables and compatibility notes
- Isolation: Rubber dam with appropriate clamps (212 or 212SA for anteriors) is non-negotiable for moisture control and adhesive reliability.
- Matrices: Mylar strips for interproximal contours; silicone putty indices from a diagnostic wax-up for additive cases.
- Finishing instruments: Flame-shaped and football-shaped carbide finishing burs (12- and 30-blade), flexible discs (Sof-Lex or Optidisc), and interproximal finishing strips.
- Polishing systems: Two- or three-step rubber cup/point systems (Enhance, PoGo, Exa-Cel) followed by a diamond polishing paste.
- Curing lights: Use a high-irradiance LED (≥1,000 mW/cm²) and cure each increment for the time the manufacturer specifies — never assume a single 10-second cure covers a 2 mm increment.
- Adhesive compatibility: Self-etch adhesives (Clearfil SE Bond, Scotchbond Universal in self-etch mode) are compatible with most methacrylate-based composites. Selective enamel etching with 37% phosphoric acid before a self-etch primer improves enamel bond strength and is recommended for veneer cases where the margin sits predominantly in enamel.
Layering sequences for the cases you see most often
Polychromatic and pentalaminar layering approaches evolved specifically to replicate tooth optical properties — opalescence, fluorescence, and the depth effect of natural dentin. The sequence you use depends on the clinical scenario.
Additive minimally invasive veneer
Goal: Add volume to an undersized or worn tooth without preparation.
Sequence: thin flowable adaptation layer → dentin-shade body composite (build cervical and middle thirds) → enamel-shade composite (facial surface) → translucent incisal composite (incisal third only). Keep total thickness under 1.5 mm to avoid overcontouring. The main pitfall here is building too much bulk in the cervical third, which creates a ledge that traps plaque and stains within months.
Worn or abraded anterior teeth
Goal: Restore lost incisal length and facial volume.
These cases often need a silicone index from a diagnostic wax-up to guide incisal placement. Build the palatal shelf first using a translucent or enamel-shade composite, cure it, then layer the facial surface. This “palatal wall first” sequence prevents incisal collapse during layering. Pitfall: skipping the wax-up index and free-handing the incisal edge — the result is inconsistent length across the arch.
Diastema closure composite
Goal: Close a midline or lateral diastema while maintaining natural emergence profile.
Use a Mylar strip on the mesial of one tooth to create the first contact point, cure, then strip and repeat on the adjacent tooth. Build the contact point slightly palatally to avoid a flat, boxy appearance. Layer a slightly higher-chroma dentin shade in the cervical third to mimic natural root shadow. The most common pitfall is creating a “black triangle” at the gingival embrasure by not extending the composite far enough apically — use a fine brush to feather the gingival margin before final cure.
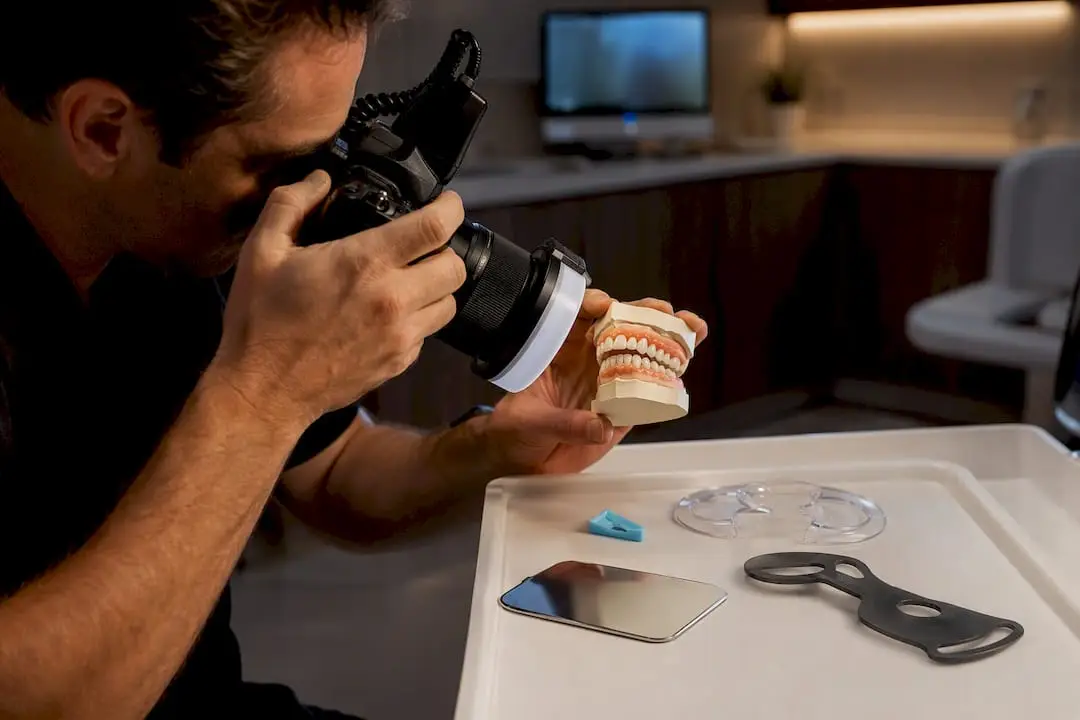
Pro Tip: For diastema closure, photograph the case with a black contraster before starting. It reveals the exact shape of the embrasure and lets you plan the contact point position precisely, rather than discovering a gingival void after you have already cured.
Polychromatic multi-shade cases
Goal: Replicate complex natural tooth anatomy across multiple anterior teeth.
Use at least four composite shades: a high-chroma dentin shade, a body enamel shade, a value enamel shade, and a translucent incisal shade. Add characterization with tints (brown for developmental grooves, white for hypocalcification spots) before the final enamel layer. Introduce surface texture with a fine diamond bur before polishing — horizontal perikymata and vertical developmental grooves catch light the way natural enamel does. Pitfall: over-characterizing. One or two subtle tint lines read as natural; five look painted.
The direct–indirect composite veneer workflow explained
The direct–indirect technique, described in detail in the peer-reviewed literature, combines chairside sculpting with extraoral processing to deliver better mechanical properties and finishing than a purely direct approach. The rationale is straightforward: composite cured intraorally never reaches full conversion because oxygen inhibition and moisture compromise the surface layer. Heat-tempering extraorally at 110–130°C for 5–7 minutes increases degree of conversion, hardness, and wear resistance.
Stepwise workflow
- Diagnostic wax-up and silicone index: Fabricate a putty index from the wax-up to guide incisal and palatal contours.
- Intraoral sculpting without bonding: Apply a separating medium (glycerin or a dedicated separator) to the tooth surface. Sculpt the composite veneer directly on the tooth without adhesive — the separator prevents bonding.
- Initial light cure: Cure the composite to a working hardness (not full cure) so it can be removed intact.
- Removal: Carefully remove the veneer with a flat plastic instrument. Label and store each veneer in order.
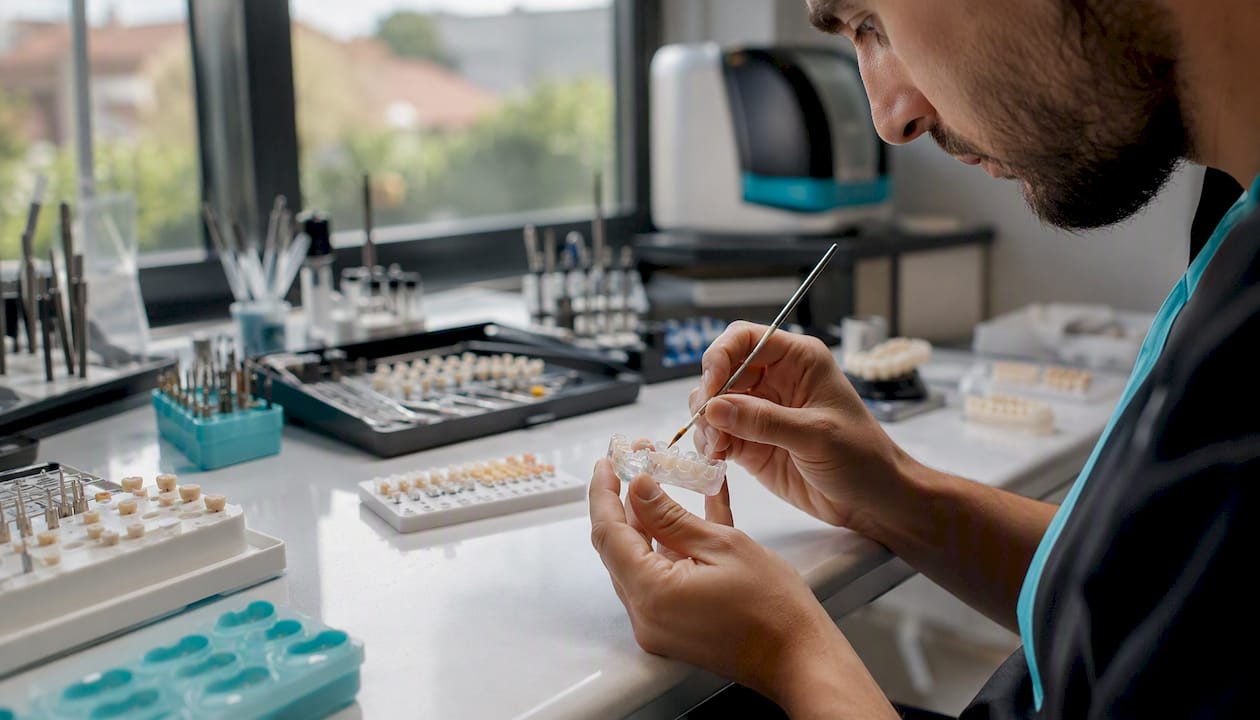
- Extraoral heat-tempering: Place veneers in a light-curing oven or a dedicated post-curing unit at the manufacturer’s recommended temperature and time. This step is what separates the direct–indirect method from a standard direct approach.
- Extraoral finishing: Finish contours, margins, and surface texture with rotary instruments outside the mouth. This is far easier than intraoral finishing and produces superior marginal adaptation.
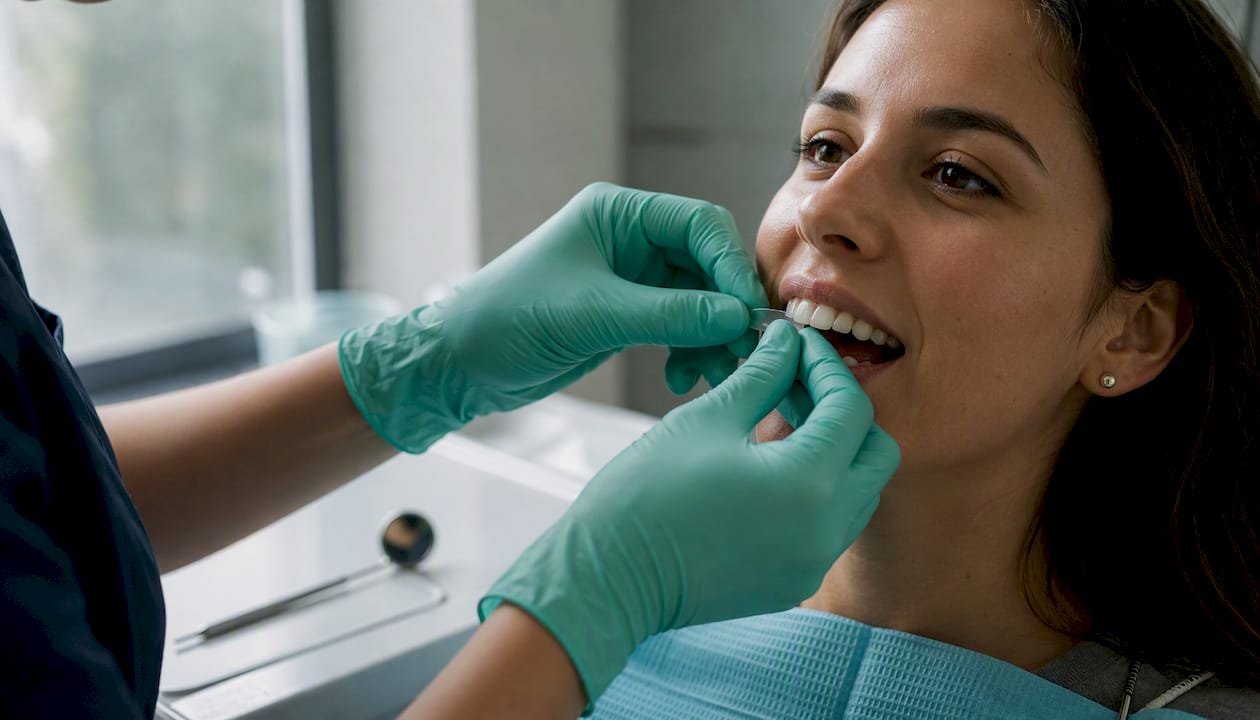
- Try-in and shade verification: The try-in step allows patient approval and shade verification before final cementation — a significant advantage over direct methods where the patient sees the result only after bonding.
- Luting: Etch enamel, apply adhesive, use a flowable or dedicated veneer luting composite, seat the veneer, remove excess, and light-cure from multiple angles.
Pro Tip: During the try-in step, use water-soluble try-in paste in the shade of your luting composite to preview the final color effect. The refractive index of the luting material will shift the shade slightly, and this step prevents surprises after cementation.
Lab/processing checklist
- Separating medium applied evenly before sculpting
- Veneers labeled (tooth number, facial/palatal orientation)
- Heat-tempering unit calibrated to manufacturer specifications
- Extraoral finishing completed before try-in
- Luting composite shade selected and confirmed at try-in
When NOT to use the direct–indirect approach
Skip this technique when the case is a simple single-tooth diastema closure or minor additive recontouring — the extra steps add time without proportional benefit. Also avoid it when you lack a post-curing unit, since heat-tempering is the step that delivers the mechanical advantage.
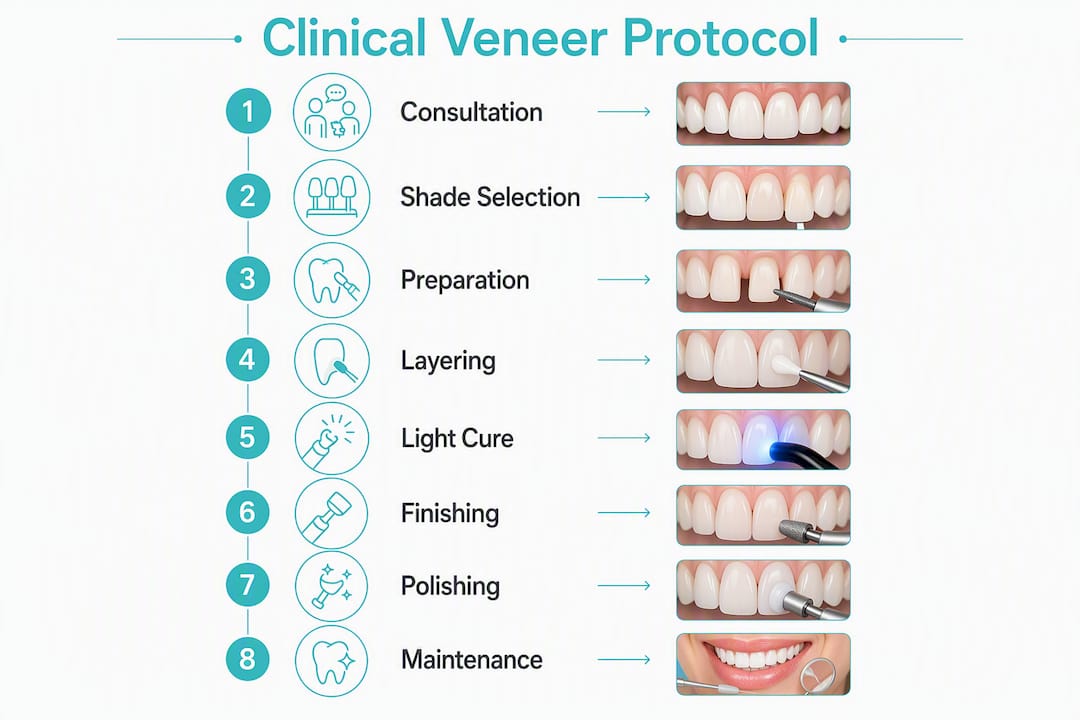
Step-by-step clinical protocol from consultation to final polish
A reproducible protocol reduces errors and makes teaching straightforward. The sequence below applies to a direct composite veneer case on anterior teeth.
Numbered clinical protocol
- Consultation and diagnosis: Review radiographs, periodontal status, and occlusion. Confirm enamel availability with transillumination. Obtain informed consent with written documentation of expected longevity and maintenance requirements.
- Shade selection: Select shade before isolation, under daylight and operatory light. Photograph with a shade tab adjacent to the tooth. For complex cases, defer final verification 24 hours post-preparation.
- Diagnostic wax-up and mock-up: Fabricate a wax-up; transfer to the mouth with bis-acryl or flowable composite as a mock-up. Confirm patient approval of shape and length before any preparation.
- Isolation: Place rubber dam with appropriate clamps. Retract gingival tissue if needed with retraction cord before dam placement.
- Preparation (if indicated): For additive cases, no preparation is needed. For cases requiring masking or significant shape change, minimal enamel reduction (0.3–0.5 mm) with a depth-cut bur. Bevel the incisal margin at 45° for a feathered composite margin.
- Adhesive protocol: Selective etch of enamel margins with 37% phosphoric acid for 15–30 seconds, rinse, dry gently. Apply self-etch primer to dentin. Apply adhesive resin, thin with air, light-cure per manufacturer instructions. Meticulous adhesive technique is the primary determinant of long-term marginal integrity.
- Incremental layering: Apply composite in increments no thicker than 2 mm. Follow the layering sequence appropriate to the clinical scenario (see layering section above). Use a brush moistened with bonding resin to adapt and sculpt each increment.
- Curing parameters: Cure each increment for the manufacturer-specified time at ≥1,000 mW/cm². Tack-cure before final sculpting; full-cure after each increment is placed.
- Gross finishing: Remove excess with a 12-blade carbide finishing bur. Shape the emergence profile and incisal edge. Check occlusion in centric and lateral excursions with articulating paper.
- Polishing: Progress from coarse to fine abrasives (see finishing section). Final gloss with a diamond polishing paste.
- Post-operative check: Confirm occlusion, photograph, and schedule a 2-week review.
Chairtime planning table
| Stage |
Typical Chairtime |
| Consultation and diagnosis |
30–45 min |
| Shade selection and mock-up |
15–20 min |
| Isolation and preparation |
10–20 min |
| Adhesive protocol |
10–15 min |
| Incremental build (per tooth) |
20–30 min |
| Gross finishing and occlusal check |
15–20 min |
| Polishing (per tooth) |
10–15 min |
| Post-operative review |
10 min |
Instrument and material checklist
- Rubber dam, clamps (212/212SA), frame, and forceps
- Silicone putty index from wax-up
- Mylar strips and wedges
- 37% phosphoric acid etchant
- Self-etch adhesive system
- Composite kit (dentin, body enamel, translucent incisal shades)
- Composite placement instruments (flat plastic, Goldstein Flexi-Thin)
- Sable or nylon brush for sculpting
- 12-blade and 30-blade carbide finishing burs
- Flexible finishing discs (coarse to superfine)
- Polishing cups, points, and diamond paste
- High-irradiance LED curing light
- Articulating paper (8 µm and 40 µm)
Photo sequence placeholders: Pre-operative full-face and retracted smile; shade tab photograph; mock-up in place; rubber dam isolation; post-etching; post-adhesive; each layering stage; post-gross finishing; final polished result; 2-week follow-up.
Finishing, polishing, and maintenance: what actually determines longevity
Progressive polishing from coarser to finer abrasives is the standard recommendation, and the reason is mechanical: each finer step removes the scratches left by the previous one. Skip a step and those micro-scratches become stain traps within weeks.
Stepwise polishing checklist
- Step 1 — Gross contouring: 12-blade carbide finishing bur at low speed. Removes flash and shapes emergence profile.
- Step 2 — Medium finishing: Coarse flexible disc (Sof-Lex, Optidisc) or medium-grit rubber point. Reduces bur marks and begins surface refinement.
- Step 3 — Fine finishing: Fine flexible disc or fine rubber point. Surface should appear uniformly matte at this stage.
- Step 4 — Superfine finishing: Superfine disc or polishing cup. Surface begins to show gloss.
- Step 5 — Final gloss: Diamond polishing paste (Enamelize, Prisma Gloss) applied with a felt disc or rubber cup at low speed. This step determines the final surface luster and stain resistance.
- Interproximal finishing: Finishing strips (Epitex, Sof-Lex strips) from coarse to fine. Do not skip — interproximal margins are the most common site of early staining.
Maintenance interval table
| Recall Interval |
What to Check |
Action |
| 2 weeks post-placement |
Occlusion, patient comfort, marginal adaptation |
Minor occlusal adjustment if needed; re-polish if surface is rough |
| 6 months |
Marginal staining, surface gloss, gingival health |
Professional polish with diamond paste; check for early chipping |
| 12 months |
Marginal integrity, shade stability, wear |
Full photographic documentation; repair minor chips; assess occlusal loading |
| 24 months |
Overall restoration integrity, patient satisfaction |
Consider full re-polish; evaluate for replacement if marginal gaps exceed 0.5 mm |
Patient homecare instructions
- Use a soft-bristle toothbrush and non-abrasive fluoride toothpaste. Whitening toothpastes with high RDA values scratch composite surfaces.
- Avoid biting hard objects (ice, fingernails, pen caps) directly on the veneered teeth.
- Wear a night guard if any parafunctional habit is present or suspected.
- Limit staining beverages (coffee, red wine, tea) and rinse with water immediately after consumption.
- Return for professional polishing every 6 months — composite does not self-gloss the way ceramic does.
Common failure modes and how to fix them
Direct composite veneers carry higher risk of marginal discoloration, lower wear resistance, and postoperative sensitivity compared with indirect techniques. Knowing the failure pattern lets you intervene early.
Diagnostic checklist: stain vs. microleakage vs. decay
- Marginal stain only: Surface discoloration at the margin, no probing depth change, no radiographic change. Cause: inadequate polishing or patient diet. Repair: re-polish or micro-abrasion.
- Microleakage: Stain penetrates below the surface, patient reports sensitivity to cold. Cause: adhesive failure or inadequate curing. Repair: remove and replace the affected margin.
- Recurrent decay: Radiographic evidence of demineralization, soft texture on probing. Cause: marginal gap plus poor oral hygiene. Repair: remove veneer, treat decay, replace.
Repair protocols
Chipping: Bevel the chip margins with a fine diamond bur, roughen with a coarse disc, apply silane if the fracture exposes the original composite surface, etch, bond, and add composite. Blend the shade carefully — adding new composite to an aged restoration often requires a slightly higher-value shade to match the aged surface.
Minor delamination: If a surface layer separates but the base is intact, roughen, apply silane, etch, bond, and replace the delaminated layer. Do not attempt this repair if the base adhesive layer is compromised.
Persistent staining: If professional polishing does not resolve staining, consider whether the margin has opened. A 0.5 mm probe tip that catches on the margin confirms a gap. At that point, repair is preferable to replacement if the underlying tooth structure is sound.
Pro Tip: Before any repair, photograph and probe the margin systematically. A stain that looks superficial often has a gap underneath. Repairing over an open margin without addressing the adhesive failure just delays the inevitable.
Red flags for replacement rather than repair
- Marginal gap exceeding 0.5 mm on probing
- Fracture extending to the adhesive interface
- Recurrent decay beneath the veneer
- Multiple chipping events in a short period (suggests occlusal overload — address the cause before replacing)
- Patient dissatisfaction with shade that cannot be corrected by polishing
Realistic timelines and cost drivers for composite veneer cases
Direct composite veneers are cost-effective and single-visit, but that efficiency comes with trade-offs in longevity and maintenance burden. Understanding the cost structure helps you set fees and manage patient expectations honestly.
Typical appointment structure
- Direct composite veneer: — Single appointment, 45–90 minutes per tooth depending on complexity. No lab fee.
Cost drivers
- Material cost: Anterior composite kits, adhesive systems, and polishing consumables. Per-tooth material cost for a direct veneer is generally modest compared to ceramic.
- Clinician time: The largest cost driver for direct veneers. A complex polychromatic case on six anterior teeth can require 4–6 hours of chair time.
- Lab processing: Adds cost for direct–indirect and fully indirect cases, but reduces chair time and often improves the result.
- Polishing and maintenance: Composite requires professional polishing every 6 months. Factor this into your fee discussion or offer a maintenance plan.
- Repair and replacement: Patients should understand that composite veneers may need repair within 3–5 years, particularly if they have parafunctional habits or high staining risk.
- Composite veneers are reversible and repairable, unlike ceramic veneers.
- They require professional polishing every 6 months to maintain gloss and marginal integrity.
- Longevity depends heavily on oral hygiene, diet, and occlusal habits.
- Color stability is good but not equivalent to ceramic — some shade shift over time is expected.
- A night guard is recommended if any parafunctional habit is present.
Clinical case thumbnails: technique mapped to outcome
These short case summaries illustrate how technique selection plays out in practice. Photo placeholders indicate where documentation images should be inserted.
Case 1: Midline diastema closure with direct layering
Presentation: 28-year-old patient with a 2.5 mm midline diastema, sound enamel, no parafunctional habits.
Technique chosen: Direct composite veneer, single visit.
Critical step: Mylar strip used to create the first contact point palatally; gingival margin feathered with a fine brush to avoid a black triangle.
Key pitfall: Building the contact point too facially creates a flat, boxy appearance. Keep it slightly palatal.
Case 2: Worn incisal edge rehabilitation with direct–indirect approach
Presentation: 42-year-old patient with generalized incisal wear, 1.5–2 mm of lost length on teeth 8–10, mild bruxism managed with a night guard.
Technique chosen: Direct–indirect composite veneer for improved wear resistance and extraoral finishing control.
Critical step: Palatal wall built first using a silicone index from the wax-up; extraoral heat-tempering completed before luting.
Key pitfall: Skipping the wax-up index and free-handing incisal length leads to inconsistent edge position across the arch.
Case 3: Single-tooth shape correction (peg lateral)
Presentation: 19-year-old patient with a peg lateral incisor (tooth 10), no preparation planned.
Technique chosen: Direct additive composite veneer, single visit.
Critical step: Dentin-shade composite placed in the cervical third first to create root shadow effect; translucent incisal composite kept thin (0.3 mm) to avoid graying.
Key pitfall: Over-building the incisal third creates a tooth that looks too opaque and does not match the adjacent central.
Case 4: Polychromatic multi-tooth aesthetic case
Presentation: 35-year-old patient requesting smile enhancement across teeth 6–11, moderate tetracycline staining, adequate enamel.
Technique chosen: Direct–indirect composite veneers for shade control and try-in verification before luting.
Critical step: Try-in with water-soluble paste to verify shade effect of luting composite before final cementation.
Key pitfall: Selecting composite shades under operatory light only — metamerism causes shade mismatch under natural light. Always check under multiple light sources.
Why hands-on training improves your composite veneer outcomes
Case selection, operator skill, and finishing/polishing largely determine composite veneer success — the literature is consistent on this point. Reading a protocol and executing it on a patient are two different things. The gap between them closes fastest with supervised hands-on practice.
What structured training actually builds
- Muscle memory for sculpting: Composite placement and contouring require fine motor control that only repetition develops. Phantom head and live patient practice are both necessary.
- Shade perception: Distinguishing hue, chroma, and value under different light sources is a learned skill. Structured exercises with shade guides and composite samples accelerate it.
- Finishing technique feedback: Knowing when a surface is ready for the next polishing step, and when you are over-finishing, requires tactile and visual feedback from an experienced instructor.
- Case selection coaching: Recognizing which cases are within your current skill level — and which need referral or a different technique — is a judgment that develops through mentored case review.
Questions to ask when evaluating a course or mentor
- What is the ratio of hands-on hours to lecture hours?
- What is the instructor-to-participant ratio during live patient or phantom head exercises?
- Does the course cover case selection and failure management, or only the technique itself?
- Is there post-course mentorship or case review available?
- Does the curriculum include finishing and polishing as a dedicated module?
Pro Tip: After every composite veneer case you complete, photograph it at 2 weeks and 12 months and compare. Reflective case documentation is the fastest way to identify your own pattern of errors — whether it is marginal staining from incomplete polishing, or shade mismatch from dehydrated shade selection. You cannot fix what you do not track.
Clinicians who integrate cosmetic dentistry CE with structured case documentation consistently report faster skill acquisition than those who rely on self-directed practice alone.
Key Takeaways
Direct composite veneers require meticulous adhesive protocol, scenario-matched layering, and progressive polishing to achieve predictable long-term marginal integrity and shade stability.
| Point |
Details |
| Match technique to case complexity |
Use direct for simple additive cases; choose direct–indirect or indirect when shade complexity or occlusal demands are higher. |
| Adhesive protocol is the foundation |
Selective enamel etching and a compatible self-etch adhesive system are the primary determinants of marginal integrity and longevity. |
| Polishing is not optional |
Progressive finishing from coarse to fine, including interproximal strips, determines surface gloss and stain resistance at every recall. |
| Delay shade selection on dehydrated teeth |
Wait at least 24 hours after preparation before final shade verification to avoid mismatch from dehydration artifacts. |
| Onewd accelerates skill acquisition |
Onewd’s hands-on cosmetic dentistry courses provide supervised layering practice, finishing feedback, and case review that close the gap between protocol knowledge and clinical execution. |
The case for composite veneers that most clinicians understate
The conversation around composite versus ceramic veneers often gets framed as a quality debate, with ceramic positioned as the obvious winner for serious aesthetic cases. That framing misses something important: composite veneers are not a compromise. They are a different clinical tool with a specific set of advantages that ceramics cannot match.
Repairability is the one that matters most in practice. A chipped ceramic veneer is a replacement conversation. A chipped composite veneer is a 20-minute repair appointment. For a 22-year-old patient with a diastema and 50 years of dental visits ahead, the ability to repair, recontour, and adapt the restoration over time is a genuine clinical advantage, not a consolation prize.
The cases where composite consistently outperforms ceramic are the ones where tooth conservation is paramount, where the patient’s occlusion or habits make fracture risk real, or where the budget does not support ceramic but the clinical need is genuine. A well-executed direct–indirect composite veneer on a worn lateral incisor, finished extraorally and luted with a matched composite cement, can hold up for years with proper maintenance.
What limits composite veneer outcomes is not the material. It is undertrained finishing, inadequate shade planning, and poor case selection. Those are correctable problems. The clinician who invests in hands-on training and builds a reflective documentation habit will consistently outperform the one who relies on material quality to carry the case.
Hands-on composite veneer training that produces real clinical results
Knowing the protocol is step one. Executing it predictably on patients, across different case types, under time pressure, is where most clinicians stall. Onewd’s cosmetic dentistry training courses are built around exactly that gap.

Courses cover live demonstrations of layering sequences, supervised participant replication on phantom heads and live patients, dedicated finishing and polishing modules, and post-course case review. Instructor-to-participant ratios are kept low so you get real feedback on your technique, not just a seat in a lecture. The curriculum includes case selection coaching, clinical checklists, and photo documentation guidance you can use immediately in practice.
For clinicians who want to move from reading about composite veneer techniques to executing them with confidence, the practical next step is enrolling in a structured hands-on program. Browse Onewd’s current training courses to find a cosmetic dentistry module that fits your schedule and skill level.
Useful sources
Recommended