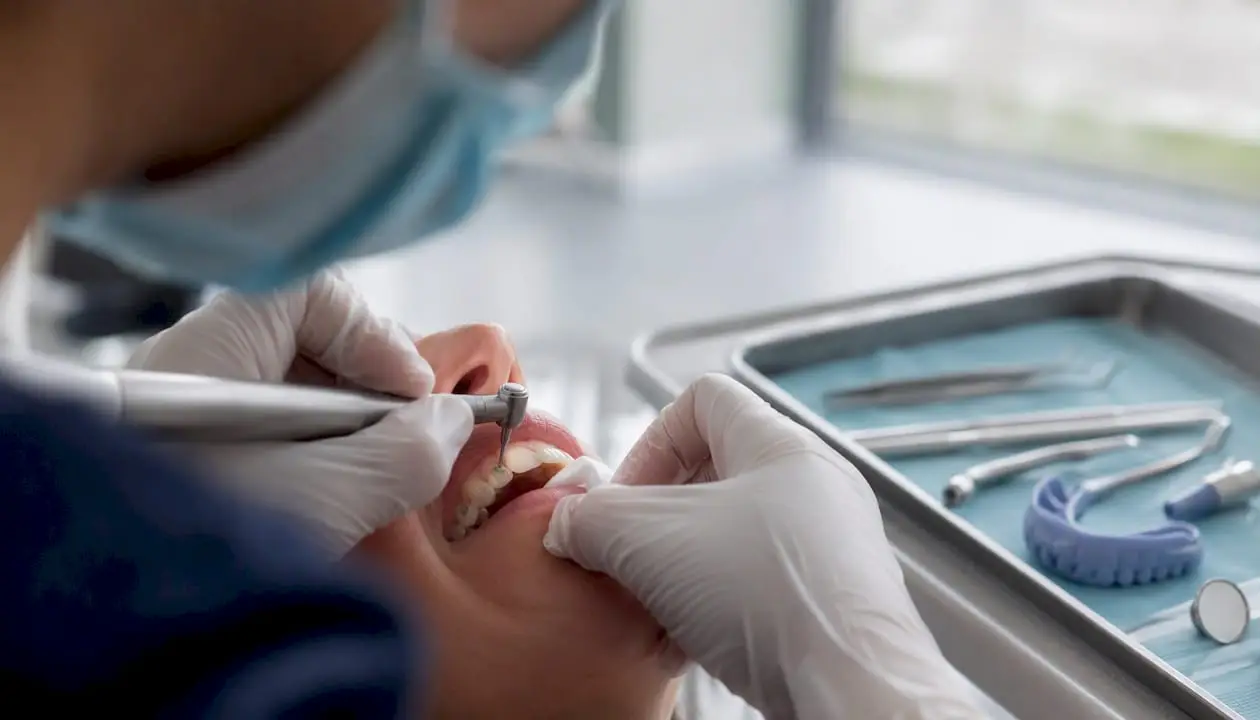
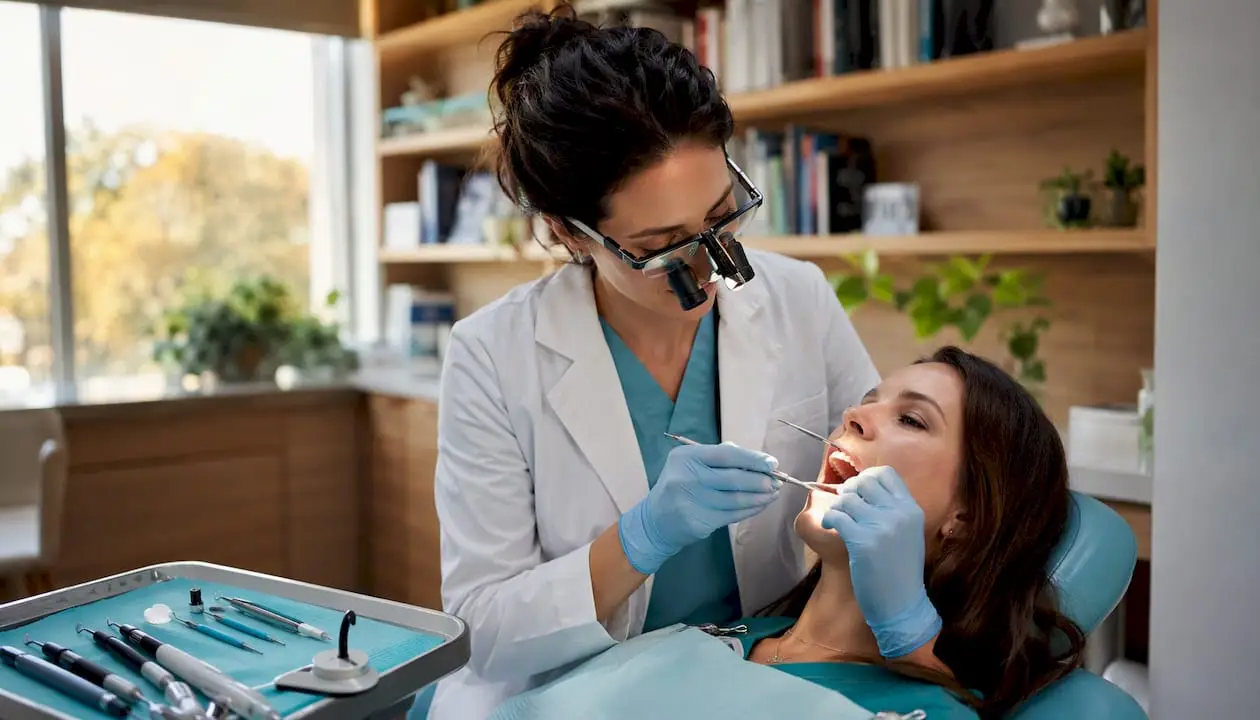
Predictable porcelain veneer preparation comes down to one principle: bond to enamel, reduce by zone, and let the diagnostic work drive every cut. The three-zone protocol divides the tooth into incisal, middle, and cervical regions, each with its own reduction target. Middle-zone facial reduction typically runs from minimal to moderate depths increasing with shade masking needs. Incisal reduction, when indicated, generally stays within a moderate vertical range. The cervical margin is usually a light chamfer placed supragingivally whenever the clinical situation allows.
Before picking up a bur, three questions should already be answered: Is there enough enamel to stay out of dentin throughout the prep? Has the patient been screened for bruxism? Has a wax-up or digital mock-up been approved? If any of those answers is uncertain, the preparation should wait.
Quick triage by preparation type:
- Minimal prep (0.3–0.5 mm facial): Small shade changes, no form correction, ample enamel. Feldspathic or ultra-thin porcelain veneers lithium disilicate. Suitable for most straightforward esthetic cases.
- Moderate prep (0.5–0.7 mm facial): One to two shade changes, minor tooth repositioning, or slight form correction. IPS e.max (lithium disilicate) is the workhorse material here.
- Aggressive prep (0.7–0.9 mm facial): Large shade changes, dark substrates (tetracycline staining), significant form correction, or replacement of failing restorations. Requires careful enamel accounting and may need opaquing cement.
Pre-start checklist: mock-up confirmed and approved by patient, enamel thickness verified (periapical radiographs and transillumination), bruxism status documented, and dark substrate strategy planned.
Key Takeaways
Predictable porcelain veneer preparation requires enamel preservation, zone-specific reduction targets, silicone index verification, material-matched bonding protocols, and controlled occlusion at every stage.
| Point |
Details |
| Bond to enamel |
Veneers bonded to dentin show significantly higher failure rates; preserve enamel at every step. |
| Zone-based reduction |
Middle facial: 0.3–0.9 mm; incisal: 1.0–2.0 mm vertical; cervical chamfer: ~0.3 mm. |
| Silicone index verification |
Check all three zones after each reduction stage to avoid over- or under-preparation. |
| Material-specific bonding |
Feldspathic and IPS e.max require HF etch plus silane; zirconia requires air abrasion and MDP primer. |
| Onewd training |
Onewd’s tiered CE courses and Level 4 expert programs provide supervised hands-on veneer prep practice. |
What are the right indications for porcelain veneer preparation?
Veneers are a conservative solution for a specific set of problems. They work well for esthetic corrections involving shape, shade, and minor alignment; worn or chipped incisal edges; and replacing failing direct composite restorations where the tooth structure is otherwise sound. The key word is conservative: the moment a case demands significant structural support or full-circumference coverage, a crown becomes the more defensible choice. A clinical decision-making framework comparing veneers and crowns is worth reviewing before committing to a prep design.
When veneers are not the answer
Active caries, inadequate enamel for bonding, and severe tooth malposition that orthodontics would correct more conservatively are all contraindications. Heavy bruxism without a clear protection plan is a relative contraindication: the occlusal forces that destroy enamel will eventually fracture porcelain, too. Patients who clench or grind need a nightguard protocol in place before any veneer case moves forward.
The 4‑8‑10 rule for smile planning
The 4‑8‑10 rule is a practical planning guide: four veneers address the central incisors and laterals for limited changes; eight veneers cover the full visible smile for most patients; ten veneers extend into the second premolars for very wide smiles. The rule matters for prep planning because each additional tooth added to the case expands the zone of reduction and increases the total enamel budget you are working with.
Choosing prep aggressiveness: a decision checklist
- Minimal: Enamel-only reduction, small shade change (one shade or less), no form correction needed.
- Moderate: One to two shade changes, minor repositioning, or slight length addition. Most elective cosmetic cases fall here.
- Aggressive: Large shade changes (tetracycline, fluorosis), major form correction, or replacement of existing restorations with significant dentin exposure.
Pro Tip: Before any aggressive prep, consider staged treatment: whitening first reduces the shade gap the porcelain must mask, which means less reduction and a thinner veneer. Orthodontic alignment before veneers can eliminate the need for aggressive prep entirely on malposed teeth.
What diagnostics and mock-up work should you complete before any reduction?
No bur should touch a tooth until the diagnostic sequence is complete. This is not a formality; preparing through an approved mock-up and verifying with silicone indices is the single most reliable way to avoid unintentional dentin exposure, which is a frequent cause of early failures.
Essential pre-op records
- Full-face and retracted smile photographs (lip at rest, broad smile, lateral profile)
- Periapical and bitewing radiographs for enamel thickness and caries assessment
- Full-arch study models or intraoral digital scans
- Facebow transfer when vertical dimension or occlusal plane is being altered
- Occlusal analysis: static contacts, anterior guidance, and lateral excursions
Mock-up and wax-up workflow
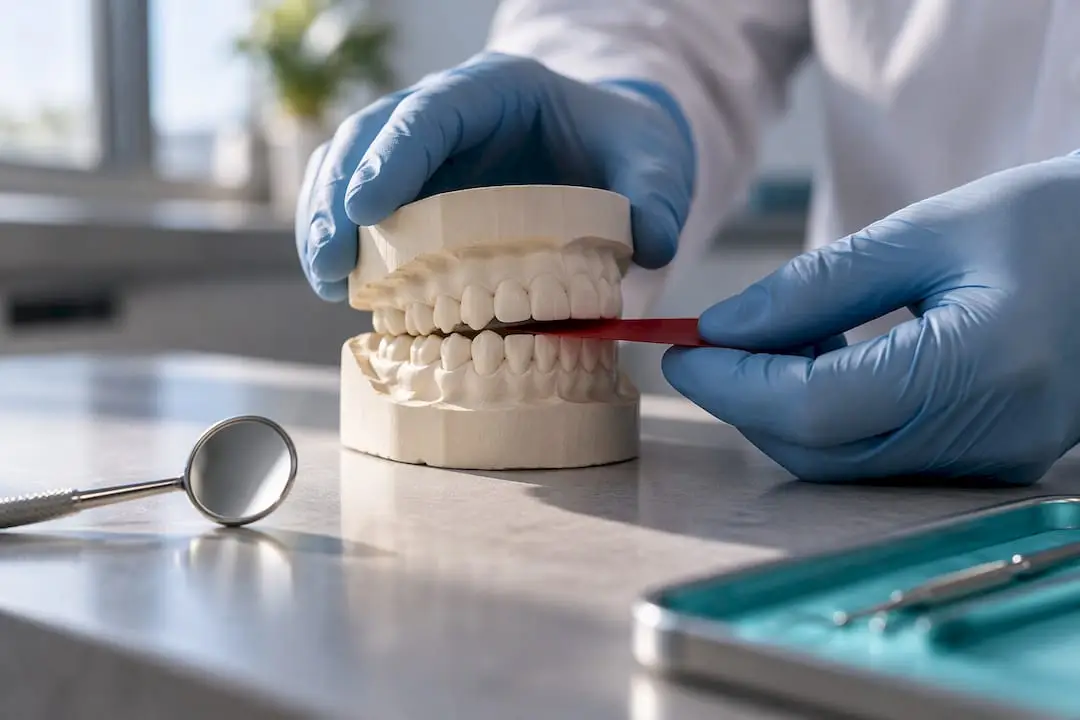
The wax-up translates the esthetic plan into a physical model. From that model, a silicone putty index is fabricated in two parts: a palatal section to control incisal length and a labial section to verify facial reduction depth. The mock-up is placed directly in the patient’s mouth with bis-acryl or flowable composite, and the patient approves the shape, length, and proportion before any reduction occurs.
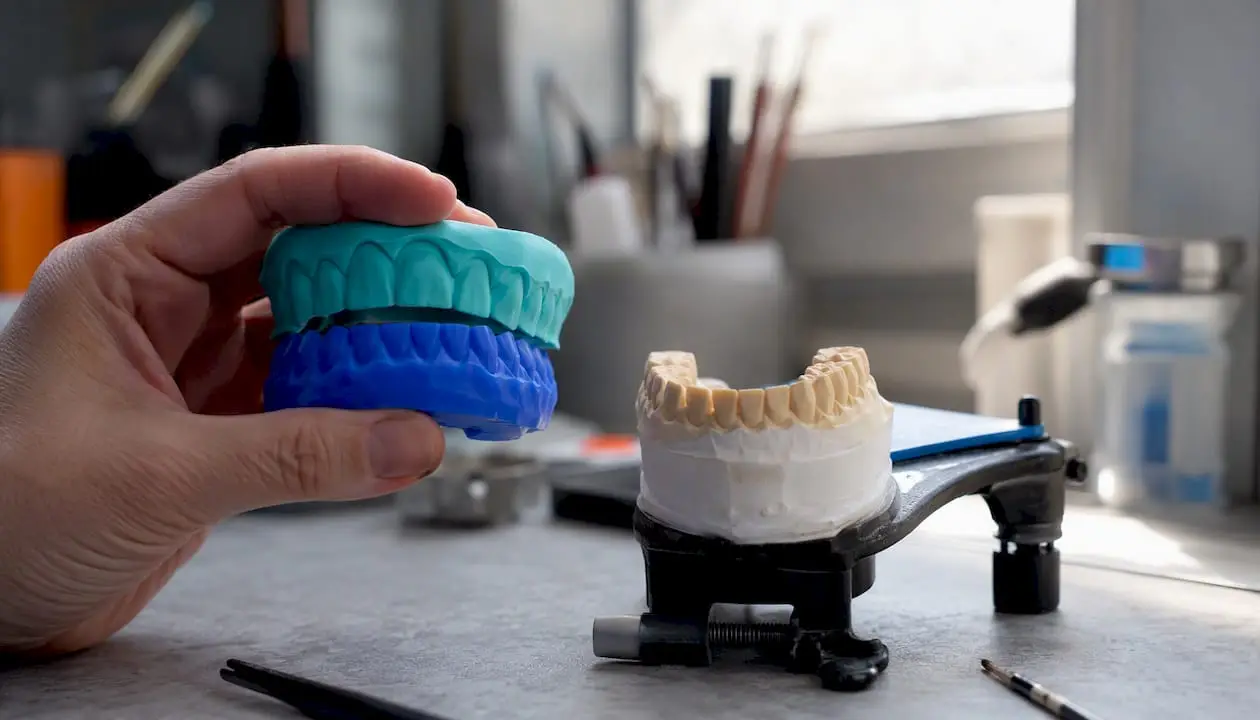
Digital smile design tools (DSD, 2D/3D planning software) fit here as a visualization layer, but they do not replace the physical mock-up. The mock-up is what the patient actually approves, and it is what guides the depth cuts.
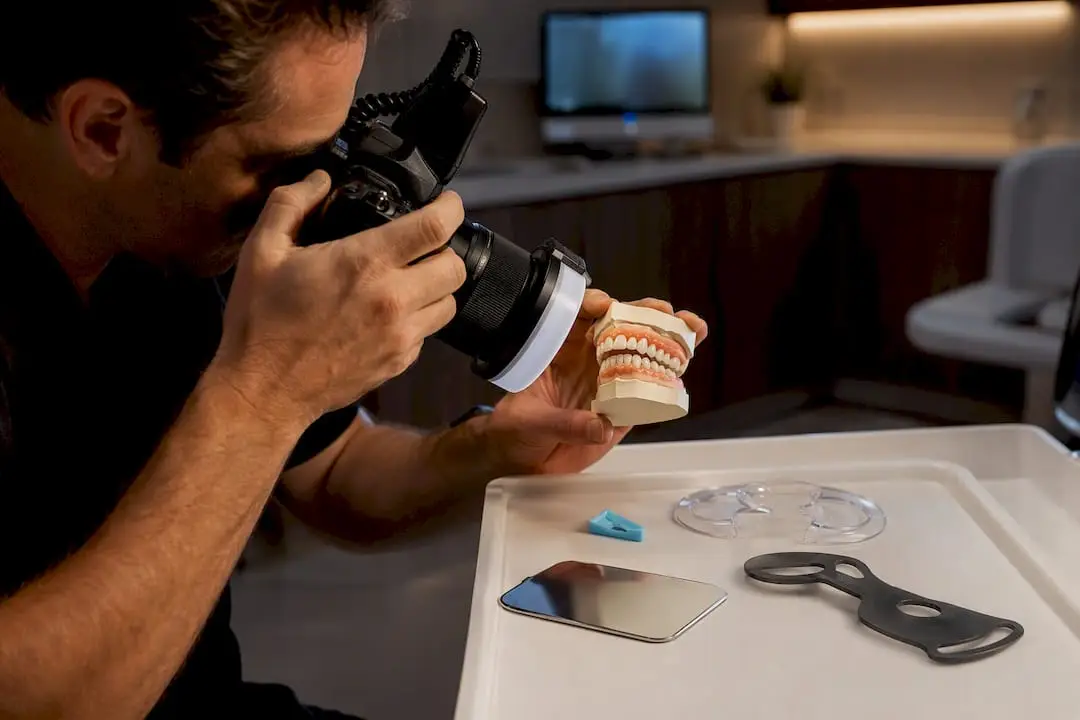
Pro Tip: Photograph the approved mock-up from multiple angles and send those images to the lab along with the wax-up model. The ceramist needs to see what the patient accepted, not just a shade tab.
Step-by-step diagnostic workflow
- Gather full records (photos, radiographs, models/scans, occlusal analysis).
- Perform diagnostic wax-up on study models.
- Fabricate silicone putty index from the wax-up (palatal and labial sections).
- Place chairside mock-up using the index as a guide.
- Photograph mock-up in natural light with a neutral gray background.
- Obtain patient approval on shape, length, and proportion.
- Mark depth-cut targets on the mock-up before beginning tooth reduction.
How do you execute the zone-by-zone clinical preparation?
The ten-step preparation sequence is the clinical backbone of predictable veneer prep. Every step has a specific purpose, and skipping any one of them tends to show up at the bonding appointment.
Zone-specific reduction targets
Reduction targets are drawn from the three-zone diagnostic protocol and the porcelain thickness guidance that recommends approximately 0.2–0.3 mm of porcelain per shade change. Veneers thinner than approximately 0.3 mm become difficult for the ceramist to handle and may crack when wrapping an incisal edge; 0.5 mm is the practical minimum for any incisal wrap design.
Ten-step clinical preparation sequence
- Place depth-cut grooves through the mock-up. Use a 0.4–0.5 mm depth-cut bur on the labial surface and a 1.5 mm depth-cut bur at the incisal edge. Mark the groove bottoms with a pencil or disclosing agent.
- Outline the preparation boundaries. Define the mesial, distal, and gingival extent before removing any bulk.
- Incisal reduction. Reduce the incisal edge 1.0–2.0 mm vertically using a coarse tapered diamond. For a window prep (no incisal coverage), stop short of the incisal edge; for a wrap or incisal shoulder, carry the reduction onto the palatal surface 0.5–1.0 mm.
- Labial leveling: cervical third. Use a medium-grit round or tapered diamond to reduce the cervical third to the depth-groove marks, keeping the bur parallel to the tooth surface.
- Labial leveling: middle third. Continue with the same bur, blending the middle third reduction smoothly with the cervical third.
- Labial leveling: incisal third. Reduce the incisal third, connecting to the incisal reduction. Check with the labial section of the silicone index.
- Interproximal extension. Use a thin tapered diamond at a 45° angle to break the contact point without nicking the adjacent tooth. Carry the margin just past the contact in a gentle curve. For a wrap design, extend the margin onto the palatal surface.
- Gingival margin and finish line. Place a light chamfer (~0.3 mm) at or just above the free gingival margin using a chamfer bur. Supragingival margins are preferred for periodontal health; subgingival placement is reserved for cases with visible cervical discoloration or existing restorations at the margin.
- Verify reduction with the silicone index. Check all three zones. Any area where the index does not seat fully indicates insufficient reduction. Any area with visible space exceeding the target indicates overpreparation.
- Smooth and polish the preparation. Use a fine-grit finishing bur or polishing disc to remove sharp line angles, smooth the surface, and round all transitions. A smooth prep reduces stress concentration in the final veneer.
Pro Tip: Never skip the silicone index check after step 6. Clinicians who rely on visual estimation alone consistently underestimate middle-third reduction and overestimate incisal reduction. The index is the only objective check available chairside.
Bur selection by step
- Depth-cut burs: 0.4–0.5 mm round-end cylinder (labial), 1.5 mm round-end cylinder (incisal)
- Bulk reduction: Coarse tapered diamond (100–150 µm grit) for incisal and initial labial
- Zone leveling: Medium tapered diamond (50–80 µm) for labial thirds
- Interproximal: Thin flame or needle diamond for contact-point extension
- Margin finishing: Fine chamfer bur or fine tapered diamond (25–40 µm)
- Final polish: Polishing disc or rubber point at low RPM with light pressure
Run all diamonds at moderate speed (approximately 150,000–200,000 RPM) with copious water coolant and light, intermittent pressure. Heavy pressure generates heat and increases the risk of pulpal irritation.
How do you fabricate provisionals that protect the preparation?
Provisionals for veneers serve three functions: they protect the prepared enamel, they allow functional testing of the planned esthetic outcome, and they give the patient a preview of the final result. Fabricate them immediately after preparation while the silicone index is still available.
Material options
- Bis-acryl composite (e.g., Protemp, Luxatemp): Fast, chairside-friendly, and polishes reasonably well. Adequate strength for short-term wear (two to four weeks). The most common choice for direct provisionals.
- Light-cure composite resin: More technique-sensitive but allows incremental adjustment and better polishability. Preferred when the provisional needs to serve as a functional test drive for several weeks.
- Lab-fabricated PMMA temporaries: Indicated for complex cases, long-span provisionals, or when the patient needs to wear temporaries for more than four weeks. Stronger and more esthetic than direct options, but require an additional appointment or same-day milling.
Fabrication and retention
- Load the labial section of the silicone index with bis-acryl material.
- Seat the index over the prepared teeth and hold in place until the material reaches a rubbery consistency.
- Remove the index and allow full set before trimming.
- Spot-etch one or two small areas on each preparation (avoiding the full bonding surface) to create micro-retention for the provisional without compromising the final bonding surface.
- Bond with a non-eugenol temporary cement. Eugenol-containing cements can inhibit resin polymerization at the final bonding appointment.
- Adjust occlusion: provisionals should have light contact in centric and smooth anterior guidance in protrusive. Eliminate all lateral interferences.
Avoid overcontouring the cervical area. Thick margins at the gingival line cause tissue inflammation that complicates impression-taking and final seating.
Provisional removal
Use a scaler or plastic instrument to gently pry the provisional from the gingival margin. Never use a metal instrument against the prepared enamel surface. Clean residual cement with a pumice slurry before proceeding to impression or scan.
What does a precise impression and lab prescription look like?
The impression or digital scan is where preparation quality either gets communicated accurately to the ceramist or gets lost. A perfect prep with a poor impression produces a poorly fitting veneer.
Impression vs. intraoral scan
- Polyvinyl siloxane (PVS) or polyether impression: Still the gold standard for capturing fine marginal detail, particularly when margins are at or slightly below the gingival crest. Use a two-cord retraction technique: a thin cord (size 000 or 00) placed first to control bleeding, a slightly larger cord (size 0 or 1) placed second and removed just before impression. Pick-up tray technique with a light-body/heavy-body combination captures the margin most reliably.
- Intraoral digital scan: Preferred when margins are clearly supragingival and tissue management is straightforward. Faster, eliminates dimensional distortion from impression material, and allows immediate digital transmission to the lab. Most current scanners (CEREC Primescan, iTero Element, 3Shape TRIOS) capture veneer margins accurately when tissue is well-retracted.
Pro Tip: Send the lab a photograph of the prepared teeth with a neutral gray background and a shade tab held at the same focal plane. This single step reduces shade remakes more than any other communication tool.
Lab prescription checklist
- Final shade (VITA Classical or VITA 3D-Master reference)
- Desired translucency level (high, medium, low) and incisal characterization notes
- Margin design: butt joint or chamfer, and exact location (supragingival, equigingival, or subgingival)
- Insertion path and any undercut notes
- Photographs: mock-up approval photos, prepared teeth photos, and full-smile reference
- Silicone index or digital wax-up file for contour reference
- Provisional contour notes: any adjustments made to the provisional that the ceramist should replicate or modify
- Material specification: feldspathic, lithium disilicate (IPS e.max), or zirconia, with thickness targets
Include the approved mock-up photos and the wax-up model or its digital equivalent. The ceramist cannot replicate what the patient approved if they have never seen it.
What is the bonding protocol for feldspathic, IPS e.max, and zirconia veneers?
Surface treatment and cementation are where most veneer failures originate. The protocol is material-specific, and shortcuts here have consequences that show up years later as debonding, marginal staining, or fracture.
Try-in checklist
Before any surface treatment, verify:
- Passive fit with no rocking or open margins
- Marginal adaptation at the gingival finish line (explorer tine should not catch)
- Shade confirmation with try-in paste in the planned cement shade
- Interproximal contact integrity (floss should pass with slight resistance, not snap through)
Material-specific surface treatment
Glass ceramics (feldspathic and lithium disilicate/IPS e.max) require hydrofluoric acid etching followed by silane application; zirconia requires air abrasion and an MDP-containing primer for reliable adhesion. These are not interchangeable steps.
| Material |
Surface Treatment |
Recommended Cement |
Notes |
| Feldspathic porcelain |
5% HF etch (60 sec), rinse, dry; silane (60 sec, air-dry) |
Light-cure resin luting agent |
Fragile; handle with care during try-in |
| Lithium disilicate (IPS e.max) |
5% HF etch, rinse, dry; silane, air-dry |
Dual-cure or light-cure resin luting agent |
Shorter etch time than feldspathic |
| Zirconia |
Air abrasion (50 µm Al₂O₃, 2 bar); MDP-containing primer |
MDP-based resin cement |
Do not HF-etch zirconia; no silane benefit |
The luting layer quality and bonding substrate are among the most significant factors in marginal failure. Bonding to enamel consistently outperforms bonding to dentin. When a preparation has exposed dentin, use a self-etch adhesive system and consider a dual-cure luting agent to compensate for reduced light transmission through the veneer.
Step-by-step cementation sequence
- Isolate with rubber dam or OptraGate plus retraction cord. Absolute moisture control is non-negotiable.
- Clean the preparation with pumice slurry, rinse, and dry.
- Etch enamel with 37% phosphoric acid for 15–30 seconds, rinse thoroughly, and dry lightly (do not desiccate dentin).
- Apply silane to the intaglio surface of the veneer (already treated in the lab or chairside). Allow to air-dry for 60 seconds.
- Apply adhesive to the preparation surface per the manufacturer’s protocol. Do not light-cure yet.
- Load the veneer with resin luting cement in the planned shade. Seat with gentle, even pressure.
- Tack-cure for 2–3 seconds to stabilize the veneer, then remove gross excess with a brush or explorer.
- Remove interproximal excess with floss before final cure.
- Final cure each surface (facial, incisal, palatal) for the manufacturer-specified time (typically 40–60 seconds per surface with a high-output LED).
- Check occlusion immediately after cure and adjust as needed.
For dark substrates, opaque or high-chroma resin cements can mask underlying discoloration, but they require careful shade matching at the try-in stage using the corresponding try-in paste.
Safety note: Always follow the manufacturer’s instructions for hydrofluoric acid handling. HF is a tissue hazard; use appropriate PPE, work in a well-ventilated area, and have calcium gluconate gel available. Follow current RCT evidence and manufacturer protocols for cement selection.
How do you manage occlusion, finishing, and long-term maintenance?
Finishing and occlusal management after cementation are not afterthoughts. A veneer that survives the bonding appointment but carries a premature contact in lateral excursion will fracture within months.
Occlusion check sequence
- Centric occlusion: Use 40 µm articulating film to identify and eliminate premature contacts on the veneers. Veneers should have light, even contact in centric, not heavy point contacts.
- Protrusive guidance: The anterior veneers should carry smooth protrusive guidance without abrupt transitions. Check with the patient in a relaxed, natural protrusive movement.
- Lateral excursions: Canine guidance is preferred. If group function exists, distribute contacts across multiple teeth rather than concentrating load on a single veneer.
- Refer to VDO management principles when veneers are part of a full-arch or full-mouth rehabilitation involving vertical dimension changes.
Finishing and polishing
Avoid aggressive polishing that removes the glazed surface. The factory glaze on lithium disilicate and feldspathic veneers is smoother and more stain-resistant than any chairside polish can replicate. Use a stepwise approach:
- Coarse adjustment (if needed): Fine diamond or carbide finishing bur at low speed with light pressure.
- Medium polish: Silicone rubber point or polishing cup (e.g., Dialite, Optrafine) through medium and fine grits.
- Final polish: Diamond polishing paste with a felt wheel or polishing cup. Stop here; do not over-polish.
If the glaze has been disrupted by occlusal adjustment, chairside glazing with a light-cure glaze material (e.g., Optiglaze) restores surface smoothness and reduces plaque accumulation.
Pro Tip: Use 40 µm articulating film rather than 200 µm paper for final occlusal checks on veneers. Thicker paper overestimates contact intensity and leads to over-reduction of the porcelain surface.
Post-op maintenance
- Non-abrasive fluoride toothpaste and a soft-bristle brush; avoid whitening toothpastes with high RDA values.
- MI Paste (casein phosphopeptide-amorphous calcium phosphate) for patients with exposed dentin at margins.
- Nightguard for any patient with documented bruxism or clenching history, fabricated before the final veneer appointment.
- Follow-up schedule: 1 week (occlusion and tissue check), 6–8 weeks (tissue health and patient-reported function), then annual review with occlusal film and marginal assessment.
What complications should you anticipate and how do you reduce risk?
Most veneer failures trace back to one of four root causes: bonding to dentin, insufficient porcelain thickness, occlusal overload, or margin placement in the gingival sulcus. Recognizing these early prevents them from becoming clinical problems.
Common failure modes and causes
- Debonding: Most often caused by bonding to dentin rather than enamel. Veneers bonded to dentin show significantly higher failure rates than those bonded entirely to enamel. Moisture contamination during cementation is the second most common cause.
- Fracture: Insufficient porcelain thickness (below ~0.3 mm), occlusal overload, or a premature contact in lateral excursion. Wrap designs that are too thin at the incisal edge are particularly vulnerable.
- Marginal staining: Margins placed in the sulcus, open margins from poor impression technique, or microleakage from incomplete polymerization of the luting cement.
- Gingival inflammation: Overcontoured provisionals or final veneers, subgingival margins with excess cement, or inadequate polishing of the cervical margin.
Risk mitigation checklist
- Verify enamel availability before committing to a veneer case. If enamel is insufficient, consider a crown or a direct composite restoration.
- Keep all margins supragingival whenever possible. Subgingival margins increase cement excess risk and complicate hygiene.
- Control vertical reduction: use depth-cut burs and silicone index checks at every stage.
- Specify minimum porcelain thickness in the lab prescription (0.5 mm for incisal wrap, 0.3 mm minimum for flat labial areas).
- Manage parafunction: nightguard before and after treatment.
- Use absolute isolation at cementation. A single contamination event can compromise the entire bond.
Repair vs. replace
Small chips on feldspathic or lithium disilicate veneers can often be repaired chairside with composite resin after air abrasion and silane application to the fracture site. Full debonding with an intact veneer may allow re-cementation if the intaglio surface is undamaged; re-etch, re-silane, and re-cement following the full protocol. Replace rather than repair when the veneer is fractured through the body, when the preparation has been compromised, or when marginal staining is extensive.
Pro Tip: For dark-substrate cases, plan the cement shade at the diagnostic stage, not at the try-in. Order try-in pastes in the planned shades and test them before the patient is in the chair. Discovering at cementation that the cement shade is wrong is a preventable problem.
Clinical pearls and how to build hands-on competency
The gap between knowing the protocol and executing it reliably under clinical conditions is real, and it closes faster with structured practice than with additional reading.
High-value clinical pearls
- Place depth grooves through the mock-up, not on the natural tooth surface. This keeps you within the planned reduction envelope from the first cut.
- Reduce incrementally: one zone at a time, checking with the index after each zone. Never reduce all three zones simultaneously and then check.
- Use small palatal locks (spot-etched retention points) for provisional retention rather than full-surface etching, which can compromise the bonding surface for the final cementation.
- A smooth, rounded preparation with no sharp line angles reduces stress concentration in the final veneer and makes impression-taking easier.
- When in doubt about reduction depth, err on the side of less. You can always remove more enamel; you cannot put it back.
Practical drills to build skill
- Bench exercise on extracted teeth: Practice depth-cut placement and zone-by-zone reduction on extracted anterior teeth before moving to a typodont.
- Typodont sequence: Complete a full six-tooth veneer prep on a typodont using a silicone index for every check. Time yourself and aim for consistent reduction across all teeth.
- Mock-up-guided reduction drill: Fabricate a mock-up on a typodont, place depth cuts through the mock-up, and reduce to the groove marks. Verify with the index.
- Cementation simulation: Practice the full bonding sequence on extracted teeth or ceramic discs: etch, silane, adhesive, seat, tack-cure, excess removal, final cure.
Pro Tip: Before treating your first live patient, complete at least three full typodont sequences from mock-up through provisional fabrication. The muscle memory from bench work translates directly to chairside efficiency and reduces the cognitive load during the actual procedure.
What to look for in a CE hands-on course
A quality veneer CE course provides a low instructor-to-student ratio (ideally 1:4 or better), case selection guidance, and a take-home checklist you can use chairside. Live-patient modules or supervised clinic sessions are where the real skill transfer happens. Courses that cover only lecture content without a hands-on component leave clinicians with knowledge but not competence.
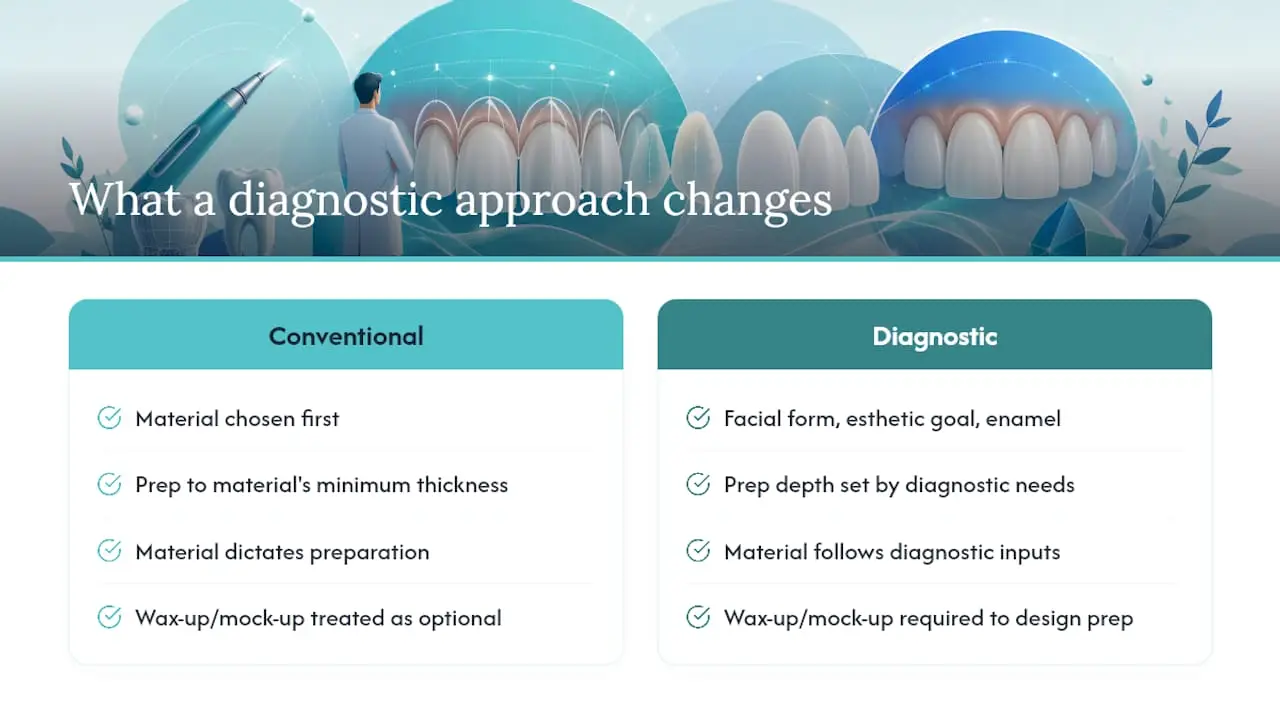
What does a diagnostically driven approach actually change?
The conventional wisdom in cosmetic dentistry has long been that the material drives the preparation. Choose the material, then prep to its minimum thickness requirements. That logic is not wrong, but it is incomplete, and following it without a diagnostic foundation is how clinicians end up over-preparing teeth.
The diagnostically generated protocol inverts that sequence. You start with the patient’s facial form, the esthetic outcome the patient wants, and the enamel available. The material choice follows from those inputs, not the other way around. A patient with naturally prominent teeth and ample enamel may need no preparation at all for a minimal feldspathic veneer. A patient with tetracycline staining and thin enamel may need a lithium disilicate veneer with opaquing cement, and the preparation depth is dictated by the shade-masking requirement, not by a generic “0.5 mm for all cases” rule.
What this means practically is that the wax-up and mock-up are not optional steps you do for complex cases. They are the mechanism by which the diagnostic data gets translated into a preparation design. Skipping them means you are guessing at the reduction, and guessing is how dentin gets exposed.
The other thing the literature makes clear is that enamel bonding is not just preferable; it is the structural foundation of the entire restoration. The long-term outcome data on veneers bonded to dentin is consistently worse than for those bonded to enamel. Every clinical decision in the preparation sequence, from the initial case selection through the finish-line placement, should be evaluated against one question: does this preserve enough enamel to bond to?
Hands-on mentorship accelerates this understanding faster than any lecture. Seeing the silicone index fail to seat on an under-reduced tooth, or watching a provisional debond because the bonding surface was contaminated, creates a clinical memory that sticks. The learning curve for veneer preparation is real, but it is compressible with the right supervised practice environment.
Onewd’s hands-on veneer training builds the skills this protocol demands
Reading a protocol is the starting point. Executing it reliably on live patients requires supervised repetition, immediate feedback, and case variety that only structured hands-on training provides.

Onewd offers tiered cosmetic dentistry CE courses that take clinicians from foundational decision-making through advanced live-patient preparation. The Veneers vs. Crowns clinical decision-making course is a practical starting point for clinicians who want to sharpen case selection before committing to prep. For those ready to work under expert supervision, Level 4 expert courses provide the small-group mentorship and live-case access that converts protocol knowledge into clinical confidence. Browse the full training course catalog to find the program that matches your current skill level and schedule.
Recommended