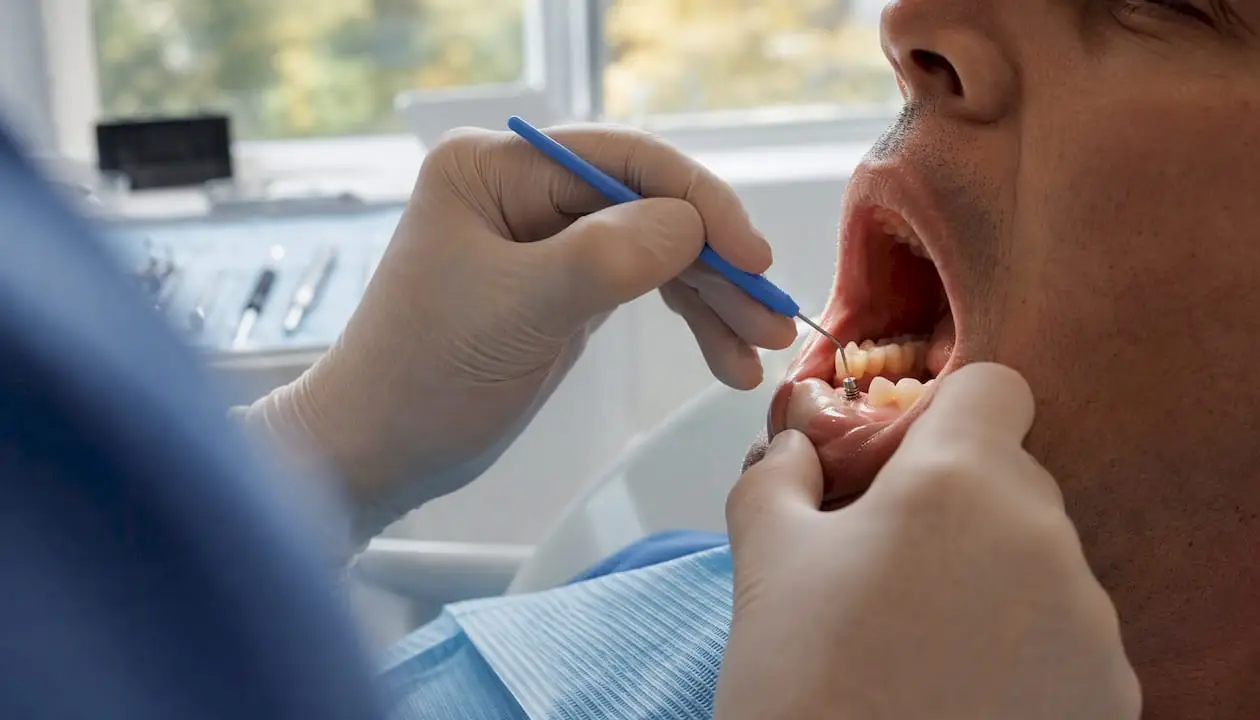
Load implants the way Carl E. Misch mapped out decades ago: force along the long axis, minimal lateral pull, and a prosthesis built to keep bending moments low. That’s Implant‑Protected Occlusion (IPO) in one sentence, and it’s still the working framework behind most restorative decisions on osseointegrated implants. Skip it, and you’re gambling with screw loosening, porcelain fracture, or worse, marginal bone loss around a fixture that has no periodontal ligament to absorb your mistake.
Three things to check before you seat anything permanent:
- Verify the implant’s long axis lines up with the anticipated occlusal force vector, not just the emergence profile.
- Keep the occlusal table narrower than on a natural tooth in the same position.
- Favor splinting or short cantilevers over long, unsupported extensions, especially in the posterior.
Pro Tip: Mark centric contacts with thin articulating paper before you touch anything with a bur. If the implant crown holds a heavier mark than adjacent natural teeth, you already have your answer.
Finite element analysis (FEA) studies back this up repeatedly: stress concentrates fastest at off‑axis contacts and long cantilever tips, not at well‑distributed axial load. One World Dental builds its implant curriculum around exactly this kind of biomechanical reasoning, because reading the principle in a textbook and applying it chairside are two different skills.
Key Takeaways
Implant occlusion succeeds when clinicians direct force axially, narrow the occlusal table by roughly 10 to 20 percent, minimize cantilevers, and verify contacts at every clinical stage.
| Point |
Details |
| Apply IPO as the default |
Direct occlusal force along the implant’s long axis and reduce lateral loading wherever surgical position allows. |
| Narrow the occlusal table carefully |
Aim for roughly a 10 to 20 percent reduction versus a natural tooth, balancing safety against chewing efficiency. |
| Prioritize passive fit and splinting |
A misfitting framework creates static stress before occlusion is even checked, especially on full-arch cases. |
| Screen for parafunction and cantilever risk |
Cantilever length and bruxism often predict complications more reliably than occlusal scheme alone. |
| Build skill through supervised practice |
One World Dental’s hands-on and live surgery courses translate these biomechanical principles into verified chairside technique. |
What Is Implant-Protected Occlusion and Why Do Implants Need Different Rules?
Implant-Protected Occlusion is a restorative philosophy that directs occlusal forces axially, narrows the occlusal table, and moderates cusp form to protect the implant-bone interface from harmful lateral loading. Misch and Bidez formalized the concept, and it remains the dominant biomechanical rationale in implant occlusion literature because the underlying problem hasn’t changed: implants don’t behave like teeth once you load them.
A natural tooth has a periodontal ligament that flexes roughly 100 microns under load, cushions impact, and feeds proprioceptive signals to the neuromuscular system telling the patient to back off before damage occurs. An osseointegrated implant has none of that. It’s rigidly ankylosed to bone, moves only a few microns, and gives almost no early warning when a patient clenches too hard.
| Feature |
Natural Tooth |
Dental Implant |
| Periodontal ligament |
Present, provides shock absorption |
Absent, direct bone contact |
| Proprioception |
High, alerts patient to overload |
Minimal, delayed or absent |
| Mobility under load |
~100 microns |
A few microns at most |
| Clinical implication |
Some forgiveness for occlusal error |
Requires deliberate force control |
That mechanical gap is why IPO exists as a distinct set of rules rather than a rebranding of standard prosthodontic occlusion.
- No shock absorption means excess lateral force transfers straight to the bone-implant interface.
- Reduced proprioception means patients often can’t self-regulate bite force the way they would on natural dentition.
- The prosthesis, not the biology, becomes the primary buffer against overload.
Implants respond to force differently than teeth because they lack the periodontal ligament’s cushioning and feedback loop, which means clinicians, not the patient’s own nervous system, carry more of the responsibility for controlling occlusal load.
What Are the Core Mechanical Rules for Implant Occlusion?
Treatment planning gets easier once you reduce implant occlusion basics to a short list of mechanical priorities rather than trying to memorize every nuance from the literature.
- Direct occlusal force as close to the implant’s long axis as surgical position allows.
- Build in freedom in centric, generally 1 to 1.5 millimeters, so the prosthesis doesn’t lock into a single premature contact point as the patient’s bite settles over time.
- Establish even, simultaneous bilateral centric contacts across the arch rather than one dominant contact.
- Minimize lateral and excursive contacts on posterior implant crowns, particularly where the patient has any history of parafunction.
On occlusal table width, the commonly cited target is a reduction of about 10 to 20 percent relative to what you’d cut for a natural tooth in the same position, since a narrower table shortens the lever arm and cuts the bending moment transmitted to the fixture. That said, narrowing the table too aggressively trades biomechanical safety for chewing efficiency, and patients notice when their bilateral chewing surface shrinks past a certain point. Treat the 10 to 20 percent range as a starting point to adjust chairside, not a fixed prescription.
Pro Tip: When you’re torn between splinting two adjacent implants or restoring them individually, splint whenever crown height space is tall, bone density is compromised, or the patient shows any bruxism history. Individual crowns are fine on favorable bone with short crown height and no parafunction.
A simple mental diagram helps here: picture force running straight down an implant’s axis versus force striking at an angle near the crown’s cusp tip. The angled load creates a bending moment at the implant neck that axial load never generates, and that moment is where most mechanical complications originate.
How Should Occlusal Schemes Change by Clinical Scenario?
The right occlusal scheme depends heavily on what’s restored and what it’s biting against, so the same rule set doesn’t apply uniformly across every case.
- Single implant crowns: use a mutually protected scheme or light centric contact, letting canine guidance on natural dentition handle excursive movements instead of the implant crown.
- Partial implant-supported restorations: choose between group function and canine guidance based on the antagonist. Group function distributes excursive load across several implants, which tends to be safer when opposing a full natural arch.
- Full-arch splinted prostheses (including All-on-4): group function or bilateral stability is standard, and full-arch implant treatments should guide occlusal and prosthetic planning for these cases.
- Implant arch opposing a removable denture: a bilaterally balanced scheme is often preferred, mirroring classic complete denture occlusion principles to keep the opposing denture stable during function.
When you move into a splinted full-arch design, the calculus shifts. Framework rigidity and how stress spreads across the implant polygon matter more than chasing textbook canine guidance, since the splint itself is absorbing and redistributing load across multiple fixtures rather than any single implant bearing an excursive contact alone.
Pro Tip: For All-on-4 cases specifically, measure your anterior-posterior spread before finalizing cantilever length. A wider spread tolerates a longer distal cantilever without the load penalty a narrow spread would incur. One World Dental’s course on understanding AP spread in full-arch implantology walks through this calculation in detail.
Don’t extend a distal cantilever past roughly 1.5 times the AP spread without solid justification. Do recheck occlusal contacts on the cantilever segment at every recall, since it’s the first area to show wear or screw loosening.
Which Prosthetic Design Choices Affect Occlusal Loading?
Crown anatomy isn’t cosmetic detailing on an implant restoration. It’s a direct lever on how much bending force reaches the fixture below.
- Reduce cusp inclination on implant crowns compared to what you’d carve for a natural tooth, since steeper cusps translate vertical force into lateral components during function.
- Preserve enough occlusal anatomy that chewing efficiency doesn’t suffer. Flattening a crown into a featureless table solves one problem and creates another.
- Widen the AP spread or add splinting whenever a cantilever is unavoidable. Every added millimeter of cantilever length increases the bending moment at the terminal abutment.
- Choose occlusal material with wear behavior in mind. Zirconia holds form longer than porcelain but can transmit more force if the opposing dentition is natural and unprotected; PMMA provisionals wear faster but offer a forgiving buffer during the healing and adaptation phase.
A prosthesis with a long unsupported cantilever concentrates stress at the terminal abutment regardless of how carefully the occlusal scheme is planned elsewhere, which is why cantilever length deserves as much scrutiny as contact position.
The literature consistently cites the 10 to 20 percent occlusal table reduction as the working number clinicians use, and it applies whether the final crown is zirconia, layered porcelain, or an interim acrylic.
Crown height matters just as much as table width. A tall crown on a short implant multiplies the lever arm on every off-axis contact, so cases with significant vertical restorative space need extra caution around cusp angulation and centric contact placement.
How Do Implant Placement and Framework Design Affect Load Distribution?
Surgical position isn’t separate from occlusal planning. It’s the first occlusal decision, made before any impression is taken.
- Angle implants during placement to favor a restorative emergence that lets the final crown’s long axis approximate the anticipated occlusal force direction.
- Widen implant distribution across the arch whenever possible. A narrow AP spread limits how much cantilever the framework can safely support later.
- Prioritize splinting on full-arch cases. FEA modeling shows framework rigidity and design determine stress distribution across the implant group more than any single implant’s angulation does.
- Weigh implant-abutment connection stiffness. Internal conical connections tend to distribute load more evenly than some internal hex designs, which affects how forgiving the system is of minor occlusal discrepancies.
Pro Tip: Passive fit isn’t a detail you check after occlusion is set. It’s a prerequisite. A misfitting framework creates static preload stress on implants before the patient ever closes into occlusion, and no amount of occlusal adjustment afterward corrects that.
For clinicians who want the design mechanics behind connection choice, One World Dental’s course on dental implant designs and biomechanics covers how connection geometry changes load transfer in more depth than a chairside summary can.
How Do You Manage Parafunction and Other Biomechanical Risks?
Bruxism and other risk factors don’t show up on a radiograph, so screening has to happen at the chair, through history and observation, before you commit to a final design.
- Long cantilevers, especially past 1.5 times the AP spread.
- Diagnosed bruxism or visible wear facets on remaining natural teeth.
- High crown-to-implant ratio, particularly on shorter fixtures.
- Any framework that doesn’t seat with true passive fit.
- Inadequate AP spread relative to the planned prosthesis length.
Mitigation follows directly from the risk identified: prescribe a night guard for confirmed parafunction, splint implants that would otherwise stand alone in high-risk mouths, shorten or eliminate the cantilever where the AP spread doesn’t support it, and choose an occlusal material with more give if the opposing arch is natural and unprotected. A review of biomechanical risk factors found that cantilever length, parafunction, and prosthetic design predict complications more reliably than the occlusal scheme selected, which should reorder where you spend your chairside attention.
Pro Tip: Document baseline occlusal contacts and any parafunctional signs at the initial exam, in writing, before treatment starts. It’s the only way to tell six months later whether new wear patterns reflect normal settling or a developing problem.
What Is the Clinical Workflow for Verifying and Maintaining Implant Occlusion?
Occlusion isn’t verified once. It’s checked at defined points across the treatment timeline, and each checkpoint uses a slightly different tool.
- Pre-op: analyze antagonist dentition and screen for parafunction history before finalizing the prosthetic design.
- Provisional stage: verify contacts with articulating paper and adjust before committing to the final restoration’s anatomy.
- Insertion: use shimstock to confirm the implant crown doesn’t hold heavier contact than adjacent natural teeth in maximum intercuspation.
- Follow-up instructions: tell patients what normal adaptation feels like versus a sign to call the office early.
Shimstock catches contacts that articulating paper marks miss entirely, since it’s a binary pass/fail test rather than a visual mark. A T-scan adds quantitative force mapping if your practice has one, though it’s optional rather than essential for most general implant cases.
Pro Tip: Schedule occlusal recall checks at 3 months, then annually, and record findings the same way each visit so you can actually compare over time instead of relying on memory.
What Does the Evidence Actually Support?
Most implant occlusion recommendations rest on biomechanical rationale and expert consensus rather than randomized controlled trials, and that gap matters when you’re deciding how rigidly to apply any single rule.
A best evidence consensus statement on occlusal schemes for implant restorations concluded there isn’t strong evidence that one scheme outperforms another, and recommended clinicians adapt existing tooth or mucosal-supported occlusion principles with judgment until better implant-specific data emerges. Real controversy remains over how much non-axial loading actually predicts failure in practice, whether the chewing efficiency lost to a narrowed occlusal table is worth the biomechanical safety gained, and whether occlusal scheme alone can predict complications at all given how many confounding variables (cantilever length, bone quality, parafunction) travel alongside it in most studies.
Until higher-quality clinical trials exist, occlusal scheme choice remains an exercise in applying sound biomechanical logic to an individual patient, not a lookup-table decision with one correct answer.
Future research needs more FEA modeling paired with long-term clinical cohort data, since FEA alone predicts stress distribution but doesn’t confirm which stress levels actually translate into clinical failure over years of function.
A Quick Checklist for Applying These Principles
Run through this before finalizing any implant case:
- Confirm implant axis approximates the occlusal force direction.
- Narrow the occlusal table modestly and check cusp angulation.
- Verify passive framework fit before checking occlusion at all.
- Mark and confirm contacts with shimstock at insertion, not just articulating paper.
- Schedule the first occlusal recall at 3 months.
A typical hands-on case workflow: plan implant position with the final occlusal vector in mind, mock up the provisional to test the chosen scheme under real function, then finalize the prosthesis only after the provisional has proven stable for several weeks. One World Dental’s introductory implant placement course walks through this exact sequence for single-implant cases.
The Gap Between Textbook Rules and Chairside Judgment
The IPO framework gives you a strong default, but treating it as a rigid formula misses the point. The literature is honest about this: no high-level trial proves one occlusal scheme beats another, and factors like cantilever length and bruxism often predict trouble more reliably than contact position alone. What separates confident clinicians from anxious ones isn’t memorizing the 10 to 20 percent occlusal table rule. It’s knowing when a patient’s bone quality, parafunction history, or restorative space justifies bending that rule.
That judgment doesn’t come from a textbook chapter. It comes from watching an experienced mentor make that call in real time, on a real patient, and understanding the reasoning behind the decision rather than just the outcome. That’s the gap supervised, hands-on training is built to close.
How One World Dental Turns These Principles Into Hands-On Skill
Reading the biomechanical rationale behind IPO is one thing. Adjusting a full-arch framework chairside while a mentor watches your shimstock checks is another entirely, and that difference is exactly what separates a course transcript from real clinical confidence.

One World Dental structures its implant curriculum around that gap. Live surgery modules let you apply occlusal verification protocols on real cases under direct supervision, while online lecture series cover the biomechanical reasoning at your own pace before you ever pick up a handpiece. The tiered course catalog moves clinicians from single-implant fundamentals through full-arch and All-on-4 protocols, with mentorship built into every hands-on session rather than left to chance. If cantilever management and framework design are where your confidence drops off, the hands-on implant training program is built specifically for that transition. Browse the current training courses and find a start date that fits your schedule.
Recommended