Level 1 • Implants & Surgery
Immediate vs Delayed Implant Placement – Online Lecture Series
Online lecture series comparing immediate and delayed implant placement protocols.
- Self-Paced
- 3–4 CE Credits
- Self-Paced
- On-Demand
Coming SoonView Course

Implant Dentistry • Clinical Guide
Evidence-based walkthrough for dentists on immediate implant placement: CBCT planning, intraoperative go/no-go checks, complication risks, follow-up...
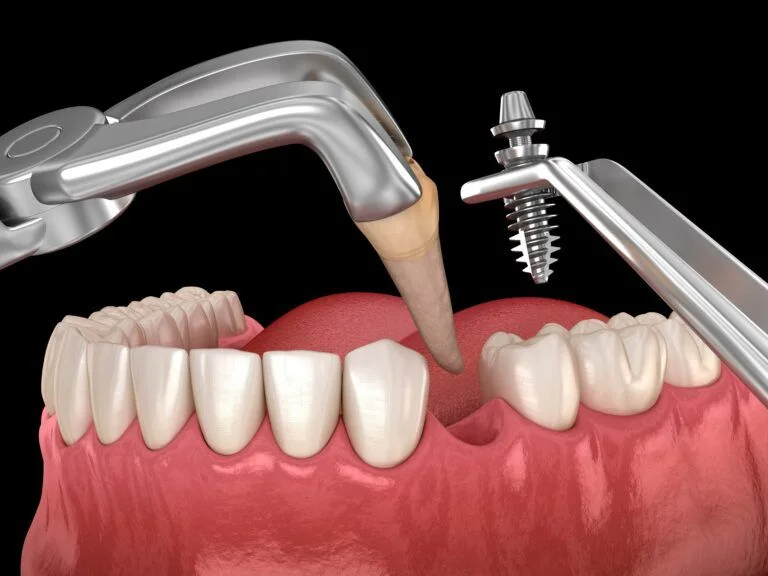
Immediate implant placement, inserting the implant into the socket right after extraction, is predictable in carefully selected anterior sites with intact facial bone, adequate apical or palatal anchorage, and no active infection. Outcomes track closely with delayed placement when ITI and EAO prerequisites are respected. The trade-off is real: faster treatment and better esthetic continuity against a higher chance of needing gap grafting and a narrower margin for error on primary stability.
Patients like it for obvious reasons. One surgical visit instead of two, no removable partial denture sitting in a drawer for months, and a socket that hasn’t had time to collapse. For clinicians, the appeal runs deeper than convenience. Placing an implant into fresh extraction geometry lets you use the existing root position as a positional guide, and in the esthetic zone, that continuity between the departing tooth and the new implant crown often produces a smoother transition for the papilla and gingival margin than staged approaches allow.
The technique fits a specific clinical picture best:
It is not a universal shortcut. When the case fits, though, same day dental implants paired with a well-designed provisional can shave months off treatment while protecting the soft tissue architecture that’s hardest to rebuild later.
Case selection decides the outcome before you ever pick up a handpiece. The 7th ITI Consensus Conference frames this with a SAC-style risk model, sorting patients and sites into straightforward, advanced, and complex categories rather than a simple yes or no.
Work through these factors before committing to an immediate protocol:
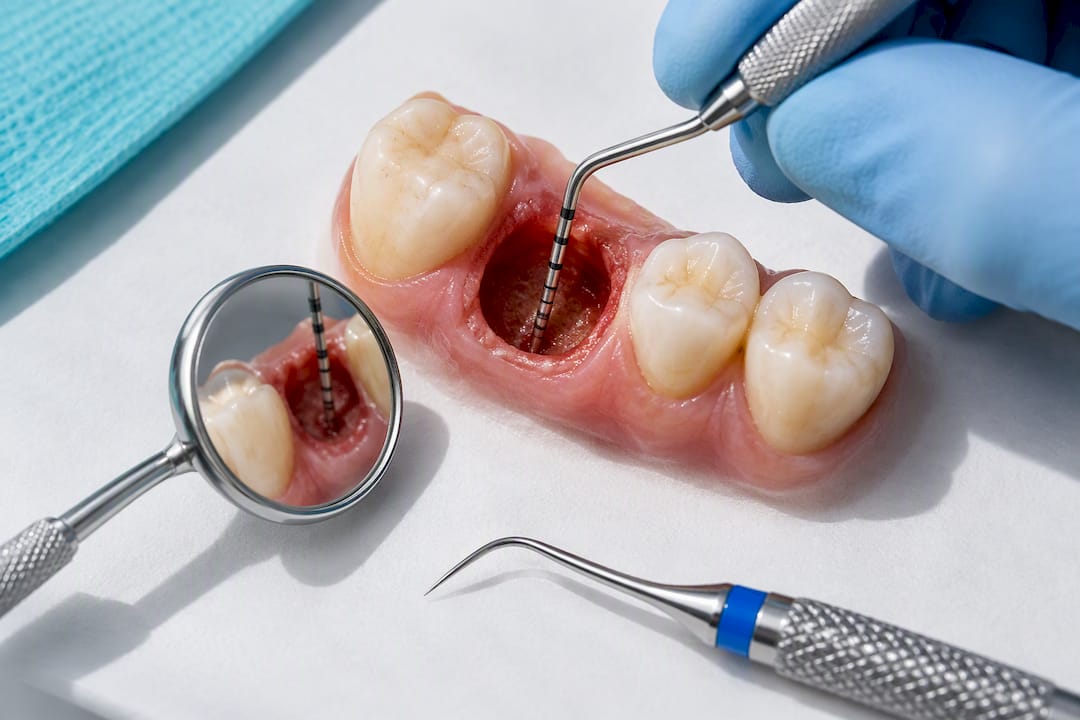
A draining fistula is a firm contraindication for immediate placement. A chronic periapical lesion without active drainage is not automatically disqualifying if you can fully debride the socket and still hit your stability targets, a distinction the literature on infected socket management backs up directly.
Pro Tip: Photograph and measure the facial plate with a periodontal probe at the time of extraction, not just on the preoperative CBCT. Resorption during extraction sometimes reveals thinner bone than the scan suggested.
For a deeper walkthrough of red flags by category, Onewd’s contraindications guide for dental implants is a useful companion checklist.
CBCT is not optional for immediate placement planning. It’s the only way to reliably confirm buccal plate integrity, measure apical bone available beyond the root apex, and check the proximity of adjacent roots or the incisive canal before you’re committed mid-procedure. The EAO position paper lists CBCT as a baseline requirement for predictable case selection, not a nice-to-have add-on.
Your CBCT review should specifically confirm:
Digital planning software layered on top of that CBCT data lets you simulate implant position against the eventual restoration, working backward from where the crown needs to emerge rather than forward from wherever the socket happens to point. That prosthetically driven approach matters more in immediate cases than delayed ones, because you don’t get a second chance to reposition after healing. Guided workflows measurably reduce malpositioning and mid-facial recession compared with freehand placement, particularly in the hands of clinicians still building volume in immediate protocols.
Decide before surgery, not during it, whether the case warrants a 3D-printed surgical guide. Straightforward single-rooted anterior sites with generous palatal bone often don’t need one. Cases with tight mesiodistal space, angulation challenges, or a clinician newer to immediate workflows benefit substantially from guide-assisted placement. Onewd’s guide on digital implant planning walks through that decision tree in more detail, and a separate resource on 3D printing surgical guide accuracy covers the workflow itself.
If immediate restoration is part of the plan, the provisional crown or shell should be fabricated ahead of the appointment. Trying to reline or adjust a provisional chairside while the patient waits adds time pressure to a procedure where you should be focused entirely on implant position and stability.
Extraction technique sets the tone for everything that follows. A traumatic extraction that fractures the buccal plate turns a straightforward immediate case into a graft-and-delay case in seconds.
Pro Tip: Keep a low threshold for conversion. An implant that’s underprepared for immediate loading but otherwise well-positioned can still heal successfully as a delayed case. Forcing restoration on an unstable fixture is the more common route to early failure.
For the specific torque and ISQ numbers that should guide the go/no-go decision, Onewd’s protocol on immediate provisionalization thresholds breaks down the numbers clinicians actually use chairside.
The consensus taxonomy sorts immediate placement into three distinct timing protocols, and the evidence strength behind each one is not equal.
If you’re restoring immediately, screw retention beats cement for provisional crowns in nearly every case: it’s retrievable if something needs adjusting, and it avoids leaving excess cement subgingivally against a healing site. Eliminate eccentric occlusal contacts entirely on the provisional, keep proximal contacts light, and shape the emergence profile to support rather than crowd the healing papilla.
The practical takeaway for treatment planning: default to Type 1A or 1C where the case supports it, and reserve Type 1B for situations with a specific restorative rationale and a well-informed patient, since 1B outcomes are the least predictable of the three protocols.
Most implant failures related to immediate placement surface early. The bulk of losses occur within the first 6 months, which is exactly why the follow-up schedule in the next section front-loads visits during that window rather than spacing them evenly across the first year.
Watch for these failure modes specifically:
Management depends on timing and severity. A superficial wound dehiscence with an otherwise stable implant often resolves with local wound care and closer monitoring. A mobile, failing implant needs removal, thorough site debridement, grafting, and a rescheduled delayed placement rather than any attempt to salvage it in place. Persistent infection around an implant that still tests stable can sometimes be managed surgically, with targeted debridement and antimicrobial therapy, but that decision belongs in experienced hands, not as a default first move.
Pain after immediate implant placement tends toward mild to moderate, and preemptive dosing changes the early experience measurably. Giving ibuprofen roughly an hour before surgery produces a consistently large reduction in early postoperative pain across the trials that have tested it, more effective as a preventive dose than as a reactive one taken after discomfort starts. Interestingly, pain levels don’t differ meaningfully between guided and conventional surgical approaches, so the analgesia protocol matters more than the placement technique itself.
Build the follow-up schedule around these checkpoints:
Pro Tip: Give patients a written red-flag list at discharge: increasing pain after day 3, purulent drainage, or a loose provisional. Most urgent calls happen because patients don’t know which symptoms are normal healing and which aren’t.
Instruct patients on a soft diet for the first week, chlorhexidine rinses starting 24 hours post-op, and gentle brushing that avoids direct pressure on the surgical site.
Immediate implant placement rewards experience in a way delayed protocols don’t forgive as harshly. If you haven’t yet built confidence reading socket walls intraoperatively, or you’re unsure how a given ISQ reading should change your plan mid-surgery, that’s a real signal to refer the case or bring in support rather than push forward solo.
The fastest, safest path to competence isn’t more reading. It’s watching live surgery, getting mentored through cases with someone experienced looking over your shoulder, and building skills in a staged sequence: extraction and site development first, then grafting decisions, then the immediate protocols themselves.
— Jake
Reading the consensus statements gets you the framework. Closing the gap between that framework and confident chairside decisions on primary stability, gap grafting, and 3D position takes hands-on repetition with someone experienced guiding the call. Onewd’s course library is built around exactly that progression, mentorship and live surgery over passive lecture slides.

The From Extraction to Implant surgical workflow course walks the entire sequence covered in this article, from atraumatic extraction through implant placement, priced at $795 for the full workflow. If your gap is specifically in site development and grafting judgment, the Surgical Site Development & Ridge Preservation Masterclass and the Grafting Materials lecture series both build that foundation before you ever touch an immediate case. Suturing technique, often underrated in immediate protocols where soft tissue management determines the esthetic outcome, has its own dedicated course in the same category.
Every course path is led by practicing clinicians, structured from foundational to advanced skill levels, with CE credit attached. Start by browsing the full training courses catalog to find where your current skill level fits into the sequence.
Educational disclaimer: Content is provided for professional education and is not a substitute for a clinician's independent judgment, applicable standards, manufacturer instructions, or relevant laws and regulations.
Related Training
Level 1 • Implants & Surgery
Online lecture series comparing immediate and delayed implant placement protocols.
Level 1 • Implants & Surgery
Self-paced online lecture series on simple single-tooth implant placement in the anterior and posterior.
Implants • Clinical Guide
Clinician-first, evidence-linked protocol for immediate implant provisionalization. Learn the 30 N·cm torque rule, prosthetic checklist, digital planning,...
14 min read · Updated September 6, 2026
Implants • Clinical Guide
Clinic ready, evidence first workflow for dentists to manage implant complications. EFP S3 aligned steps, 3 month recheck, plus surgical and maintenance tips.
15 min read · Updated August 29, 2026
Implants • Professional Education
Discover effective implant maintenance protocols to ensure patient safety and optimal outcomes. Learn actionable recall workflows for clinics.
11 min read · Updated August 22, 2026