Start the recall clock at restoration delivery, not at surgical placement. A 3-month recall for the first year is the safest default, extending to 6 or 12 months only after two consecutive visits show stable probing depths, no bleeding on probing (BoP), and a compliant patient. Shorten the interval immediately if you see BoP at any site, suppuration, mobility, rising probing depths, or a patient with poor home care, smoking history, or diabetes.
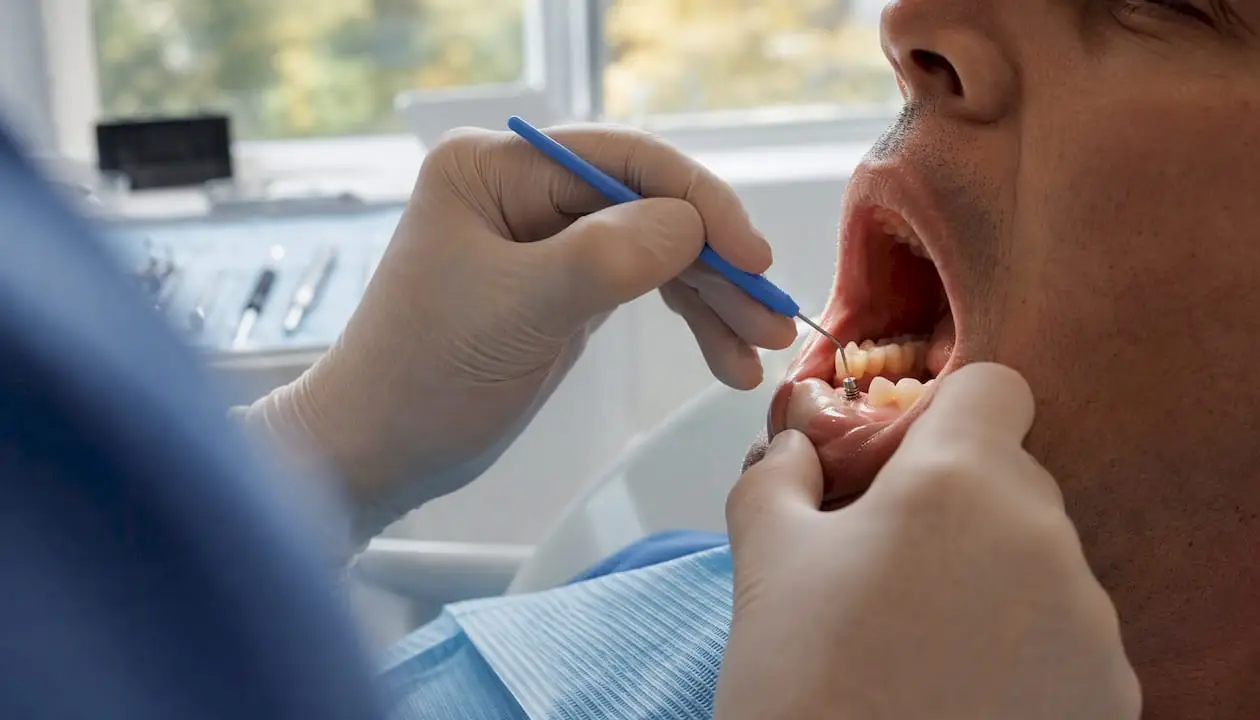
The chairside sequence that matters: visual and radiographic inspection, low-abrasion air polishing to strip biofilm, lavage, targeted debridement with titanium-compatible instruments only where calculus is present, then a check of prosthesis fit and occlusion. This is the core of any workable implant maintenance protocol, and it holds whether you’re maintaining a single crown or a full-arch fixed prosthesis.
- Baseline: radiographs and probing depths recorded at delivery, not before.
- Default recall: every 3 months in year one; extend only when stable.
- Red flags: BoP, suppuration, mobility, PD increase of 2mm or more from baseline.
- Escalate: persistent suppuration or progressive bone loss on comparative radiographs means treatment planning, not another cleaning.
Pro Tip: Build your recall interval decision into the chart template itself, so the hygienist isn’t guessing whether a patient qualifies for extension. A simple checkbox for “BoP present / PD stable / home care adequate” turns a judgment call into documentation.
Key Takeaways
Effective implant maintenance protocols combine a risk-based recall interval, standardized diagnostic baselines, low-abrasion instrumentation, and accurate CDT coding to catch peri-implant disease before it becomes irreversible.
| Point |
Details |
| Start at delivery |
Set baseline probing depths and radiographs at restoration delivery, not surgical placement. |
| Default to 3 months |
Keep new implants on a 3-month recall until two consecutive visits show stability. |
| BoP is your early warning |
Bleeding on probing signals inflammation before radiographic bone loss appears. |
| Match instruments to the surface |
Use glycine or erythritol air polishing and titanium-compatible tips; skip stainless steel entirely. |
| Code the visit accurately |
Use D6180 for routine cleaning, D6081 for single-implant debridement with inflammation, D6080 for prosthesis removal. |
Setting the Recall Schedule and Stratifying Risk
Every recall schedule starts with a baseline visit, and that visit is where most practices under document. Record probing depths at six sites per implant, note bleeding on probing, and capture a periapical radiograph within the first three months of loading. This baseline is the reference point every future comparison depends on, and without it, you’re guessing whether a 3mm probing depth six months from now is stable or a warning sign.
The typical starting cadence is a 3-month recall, which matches what several clinical protocols recommend as the safe default before you have evidence of stability. The EFP S3 clinical practice guideline frames this as part of a broader supportive peri-implant care program that runs from treatment planning through lifelong follow-up, and it notes that regular supportive care measurably reduces the incidence of peri-implant disease. Once a patient shows two consecutive stable visits, extending to 6 or even 12 months is reasonable for low-risk cases, and other clinical guidance supports a floor of at least twice-yearly visits for most implant patients even at the lower end of risk.
Certain patients never earn that extension. Keep the interval at 3 to 4 months for:
- Anyone with a history of periodontitis, treated or not.
- Current smokers or patients with poorly controlled diabetes.
- Any implant with BoP recorded at the prior visit.
- Complex prostheses, including full-arch fixed restorations and cases with augmented bone or short implants.
- Patients who demonstrate weak home-care compliance at chairside demonstration.
Pro Tip: Create two default recall templates in your scheduling software, one labeled “standard” and one “high-risk,” so front-desk staff book the correct interval without asking the clinician every time.
Baseline Records and the Diagnostic Protocol
You cannot detect early peri-implant change without a reproducible baseline, and that means standardizing your radiographic and probing technique before the first recall, not after a problem appears.
Periapical radiographs at loading should use a customized bite stent or film holder positioned for a reproducible, parallel angulation. Without that standardization, small differences in angulation can mimic bone loss that isn’t real, or mask loss that is. Retake the same view at each comparative interval, ideally annually unless risk factors demand more frequent imaging.
Probing technique matters just as much. Use a gentle apico-coronal stroke with a plastic or titanium probe at six sites per implant, the same sites every visit, and record both probing depth and BoP status at each one. According to the narrative review on professional follow-up care for implant patients, baseline probing at loading combined with close monitoring of bleeding on probing gives you the earliest reliable signal of inflammation, well before radiographic bone loss shows up.
Round out the diagnostic set with:
- Mobility testing at every recall, since mobility on a properly integrated implant signals a mechanical or biologic failure, not simple gingival inflammation.
- Exudate detection using gentle lateral pressure or a stroking motion along the sulcus. Suppuration on this maneuver is never a normal finding.
- Photographic documentation at baseline and annually, which catches soft-tissue recession and papilla changes that probing numbers alone miss.
Bleeding on probing remains the single most sensitive early indicator available to you, and it should shorten your recall interval before you ever see a radiographic change.
The In-Office Sequence and Which Instruments Actually Belong Near an Implant
The chairside protocol follows a fixed order: inspect, remove supragingival biofilm, lavage, selectively debride any calculus, then lavage and polish again. Skipping the inspection step or jumping straight to debridement is how clinicians miss the mobility test or the subtle color change that signals early mucositis.
- Inspect the peri-implant tissue, prosthesis fit, and occlusal contacts before touching an instrument to the implant.
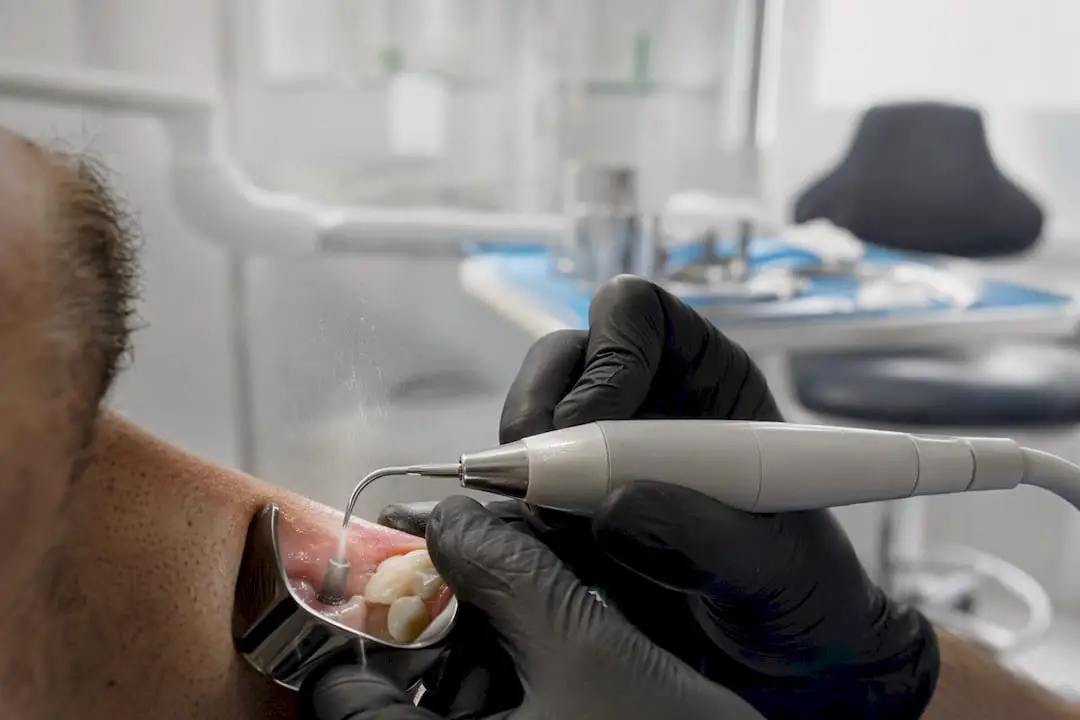
- Remove supragingival biofilm with a low-abrasion air-polishing powder, glycine or erythritol, as your first-line tool rather than a curette.
- Lavage thoroughly to flush disrupted biofilm and powder residue from the sulcus.
- Debride selectively, using a titanium-compatible ultrasonic tip or titanium curette only where actual calculus is present, not as a routine sweep.
- Final lavage and polish, checking that the sulcus is clear and the tissue response is documented.
Instrument choice isn’t a matter of preference. Air polishing with glycine or erythritol disrupts biofilm effectively around implant surfaces and causes measurably less surface alteration than metallic instrumentation, according to the clinical update on implant maintenance published in PMC. That lower abrasion also tends to improve patient comfort, which in turn supports better recall compliance over the long run. Stainless steel scalers and curettes have no place on an implant surface. They scratch titanium at a microscopic level, and those scratches become biofilm retention sites that undo the point of the cleaning in the first place.
When you do need mechanical debridement, use titanium-compatible ultrasonic tips or titanium hand instruments, and keep the power setting low. The technique for a powder-streaming subgingival tip is specific: insert until you feel resistance, retract slightly, then activate in short three to five second bursts on each surface. This limits emphysema risk and reduces unnecessary tissue trauma, particularly in the tight embrasures of a multi-unit prosthesis where access is already limited. In areas you genuinely cannot reach with the tip at the correct angle, it’s better to document the limitation and plan a follow-up than to force access with excessive lateral pressure.
Different Prostheses, Different Maintenance Rules
A single crown on an implant behaves a lot like a natural tooth for maintenance purposes, but the moment you’re dealing with a splinted bridge or a full-arch prosthesis, the calculus changes. Ordinary maintenance covers routine hygiene without disturbing the prosthesis; extraordinary maintenance means removing it, and that step should be reserved for clear clinical need rather than done as a matter of routine.
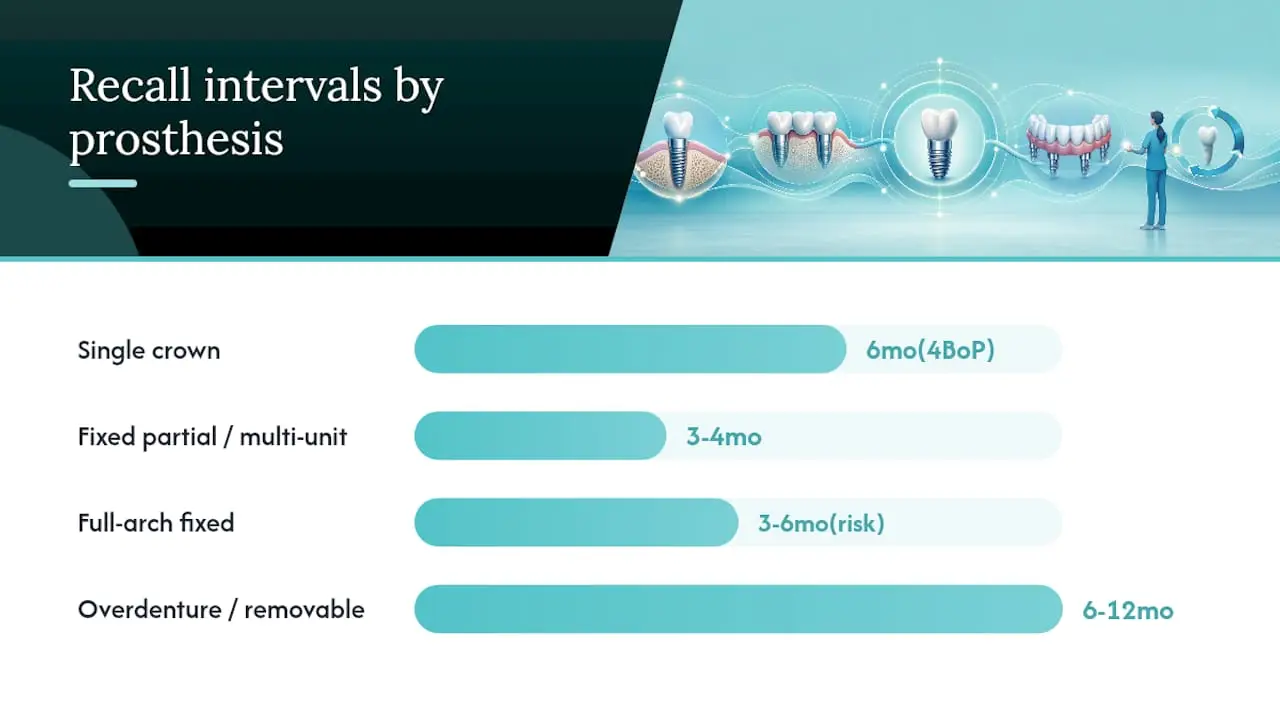
Single crowns follow the standard cadence outlined above, shortening to 4 months if BoP or early tissue changes appear at a routine visit.
Fixed partial and multi-unit prostheses need more frequent attention, typically every 3 to 4 months, because interproximal and emergence-profile areas trap biofilm that a patient’s home-care routine often misses entirely.
Full-arch fixed prostheses should be maintained non-removable whenever possible. Reserve removal for signs of inflammation, mechanical complication, or a documented inability to access biofilm any other way, a position supported by prosthodontic guidance on full-arch restoration maintenance. When you do remove it, decontaminate the prosthesis extraorally using an accepted mechanical or chemical method before reinsertion.
Overdentures and removable prostheses need extraoral cleaning of the appliance itself, periodic inspection and replacement of retentive attachments, and patient education on nightly removal and cleaning routines.
| Prosthesis type |
Typical recall interval |
Removal for maintenance |
| Single crown |
6 months (4 if BoP present) |
Not applicable |
| Fixed partial / multi-unit |
3 to 4 months |
Rare, only for complications |
| Full-arch fixed |
3 to 6 months, risk-based |
Reserved for clear clinical need |
| Overdenture / removable |
6 to 12 months |
Routine, patient-removable daily |
What to Tell Patients About Home Care
Home care is where most peri-implant disease actually gets prevented or missed, and your chairside protocol only works if the patient’s daily routine supports it between visits.
- Twice-daily brushing with a small-head electric brush or a soft manual brush angled toward the sulcus.
- Interdental brushes sized correctly for each embrasure space, plus a water flosser for patients with bridges or full-arch prostheses where floss threading is impractical.
- Short-term chlorhexidine rinse for active mucositis, used for a limited course rather than indefinitely, since long-term use carries its own tissue and taste-alteration tradeoffs.
- A night guard for any patient showing signs of bruxism or occlusal overload, since uncontrolled parafunction accelerates mechanical complications on implant-supported restorations.
One useful home-care benchmark comes from Straumann’s clinical guidance on implant maintenance, which recommends patients disrupt roughly 85% of biofilm every 8 to 12 hours to keep peri-implant tissue healthy between professional visits.
Pro Tip: Don’t just hand a patient an interdental brush and tell them to use it. Have them demonstrate the technique back to you at chairside. A return demonstration catches the wrong brush size or angle in thirty seconds, something a verbal instruction sheet never will.
Documentation and Coding You Need to Get Right
Correct coding isn’t just about getting paid. It’s the paper trail that shows you followed a defensible, risk-based protocol instead of guessing.
- D6081 covers scaling and debridement of a single implant surface when inflammation is present, the code you’ll use most often for active mucositis management.
- D6080 applies to removal, cleaning, and reinsertion of an implant-supported fixed prosthesis, the extraordinary maintenance scenario.
- D6180 covers professional cleaning around an implant when the prosthesis stays in place, your routine maintenance visit code.
This coding structure matches the ADA CDT guidance summary for implant procedures, and getting it right in the chart also means insurers see a documented, individualized rationale rather than a generic cleaning note. For every recall, document baseline comparison, BoP sites, probing depth changes, and radiographic findings alongside the code used. Review current ADA CDT code updates periodically, since coding definitions do shift.
Knowing When Maintenance Isn’t Enough
Peri-implantitis is a different diagnosis from mucositis, and treating it like a routine cleaning problem delays care that the patient actually needs. The distinguishing signs are progressive radiographic bone loss compared to baseline, probing depths that keep increasing visit over visit, and suppuration that doesn’t resolve.
- Confirm suspected peri-implantitis with a comparative radiograph against the baseline film, not a single snapshot in isolation.
- For isolated mucositis without bone loss, begin non-surgical debridement and re-evaluate in 3 to 6 weeks rather than waiting for the next routine recall.
- If bone loss, persistent suppuration, or probing depths fail to improve at re-evaluation, schedule a dedicated treatment appointment for surgical management or refer to a specialist rather than repeating the same maintenance visit.
Guidelines acknowledge that much of implant maintenance rests on expert consensus rather than randomized trial data, which is exactly why individualized documentation and a clear escalation threshold matter more than a rigid formula.
Building the Hands-On Skill Behind the Protocol
Reading a protocol and executing it under time pressure, with a nervous patient and a hygienist who’s never seen a titanium tip before, are different skills entirely. Onewd’s hands-on implant programs are built around that gap, pairing the clinical reasoning in this article with live-patient practice and mentorship rather than lecture slides alone.
- Hands-on implant training covers instrument selection and technique under direct mentorship.
- Dental implant design courses explain how prosthesis and implant geometry affect maintainability from day one.
- Tiered pathways let a team move from foundational maintenance skills to complex full-arch and surgical competence without skipping steps.
The Gap Between Guideline and Chairside Reality
Most of what gets written about implant maintenance treats it as a hygiene footnote, a quick scale-and-polish tacked onto a recall visit. That’s the wrong frame. The evidence points to maintenance as its own clinical discipline, one where the diagnostic step (probing, BoP, radiographic comparison) matters as much as the cleaning itself.
The place conventional advice falls short is instrument choice. Plenty of practices still run a stainless steel curette around an implant out of habit, because that’s what’s already in the cassette. The data on surface alteration from metallic instrumentation is clear enough that this should be a solved problem by now, and it isn’t, mostly because switching to air-polishing powders and titanium-compatible tips requires a small investment and a habit change.
If you take one thing from this protocol, take the risk stratification. A flat “6-month recall for everyone” schedule is easier to run but misses the smoker, the prior periodontitis patient, and the poorly compliant patient who all needed to be seen at 3 months. Individualize the interval, document the reason, and the rest of the protocol falls into place.
Recommended