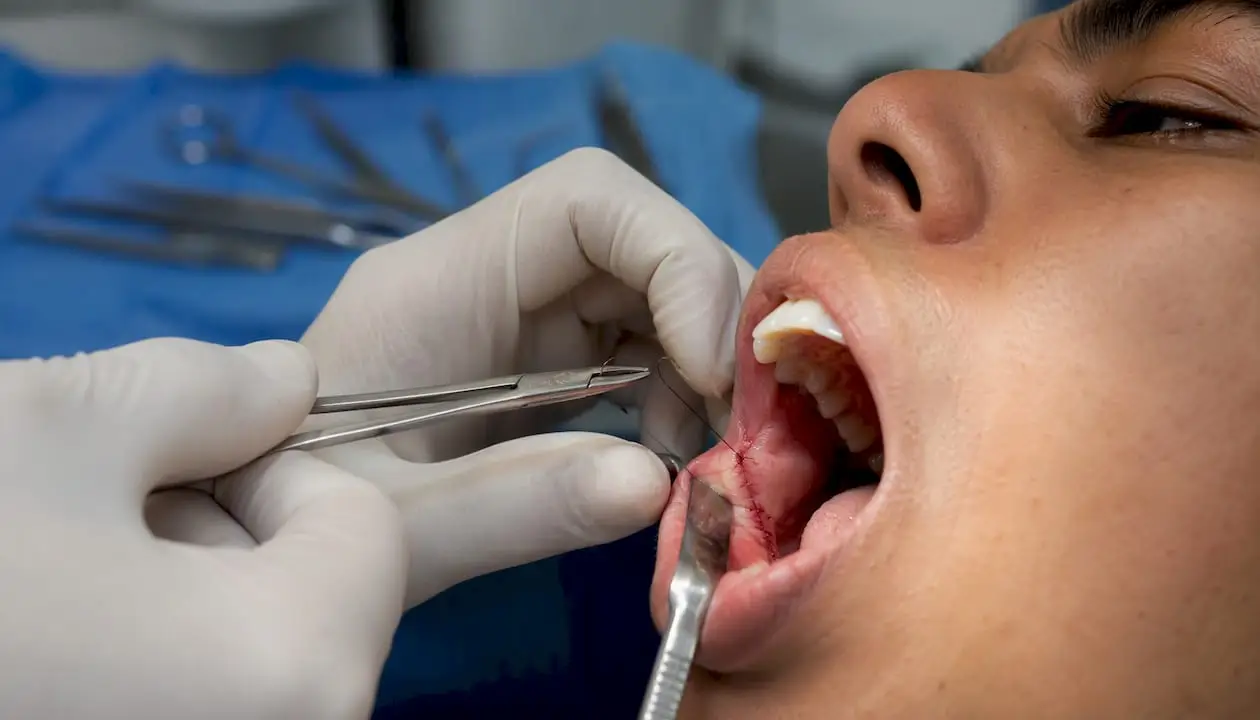
Flap design for implants should prioritize vascular preservation and tension-free primary closure over maximal surgical exposure, since perfusion loss drives most avoidable complications. The choice between full-thickness and split-thickness flaps, and whether to plan simultaneous guided bone regeneration, determines the incision pattern and whether a periosteal releasing incision will be needed. Flapless placement stays reserved for well-templated cases with confirmed bone volume; when in doubt, plan for release rather than force a closure that will not hold.
Principles and Goals of Implant Flap Design
Every flap decision comes down to one trade-off: how much you need to see versus how much blood supply you can afford to sacrifice to see it. Surgical guidance on flap handling consistently stresses one rule above all others: keep the base of the flap wider than its apex. A pedicle that narrows toward its blood source starves the tip of the flap, and that tip is usually the exact tissue you need to survive over the implant collar or graft material.
Atraumatic handling matters as much as the incision pattern itself. Grasping the flap margin with forceps, even briefly, can create localized micro-necrosis that shows up days later as delayed dehiscence rather than an immediate problem in the surgical literature on vascular management. Retract by the base or with a suture loop through thicker tissue, never the wound edge.
Beyond blood supply, a well-designed flap needs to accomplish four things at once:
- Provide adequate access to the surgical site without over-extending the incision
- Preserve the existing band of keratinized tissue, particularly around the future implant platform
- Allow closure without tension, so the wound edges meet passively rather than under stretch
- Minimize visible scarring, especially through vertical releasing incisions in view zones
Pre-operative planning decides most of this before you pick up a blade. Cone-beam imaging and an esthetic risk assessment tell you whether you are working with a knife-edge ridge that demands simultaneous augmentation, or a site with enough width to consider a flapless approach. That single decision, staged versus simultaneous grafting, dictates whether your flap needs to be advanced later and whether a periosteal releasing incision belongs in the plan from the outset. Surgeons who skip this step often find themselves improvising a release mid-procedure, which is a far less controlled way to gain the same millimeters.
Common Incision Patterns and When to Use Each
Flap design principles translate into a handful of recurring incision patterns, and each one solves a different clinical problem. Picking the wrong one rarely causes an emergency, but it does cost you either visibility, tissue, or a cleaner scar line.
- Crestal (envelope) incision. A single incision along the crest with no vertical releases, reflected just enough to expose the ridge. This works well for posterior single-implant cases with adequate width, where minimal reflection limits trauma and speeds healing.
- Triangular flap. One vertical releasing incision added to a crestal incision, forming a three-sided flap. It buys extra access for a single site without sacrificing much keratinized tissue, and it is a common default for straightforward posterior placements needing slightly more visualization.
- Trapezoidal flap. Two vertical releases bracket a longer crestal incision. This pattern gives the widest access and is the standard choice when guided bone regeneration or a larger ridge defect requires full visualization of the buccal plate, but it also carries the highest risk of compromising blood supply if the base is too narrow.
- Papilla-sparing incision. The incision curves around, rather than through, the interdental papilla, usually shifting slightly palatal or lingual to preserve the papillary triangle intact. This is the incision of choice in the esthetic zone where papilla loss creates a visible black triangle.
- Parapapillary incision. A variation that runs just short of the papilla itself, splitting the difference between full papilla preservation and surgical access. It suits single anterior implants where some flap elevation is unavoidable but a full papilla-sparing design is not technically feasible.
Vertical releasing incisions, when needed, should sit at least one tooth away from the surgical site and follow the concavity between root prominences rather than crossing directly over a papilla. Placed correctly, the resulting scar is nearly invisible within a few months. Placed carelessly, it becomes the first thing a patient notices in the mirror.
Full-Thickness vs. Split-Thickness Flaps: What the Evidence Shows
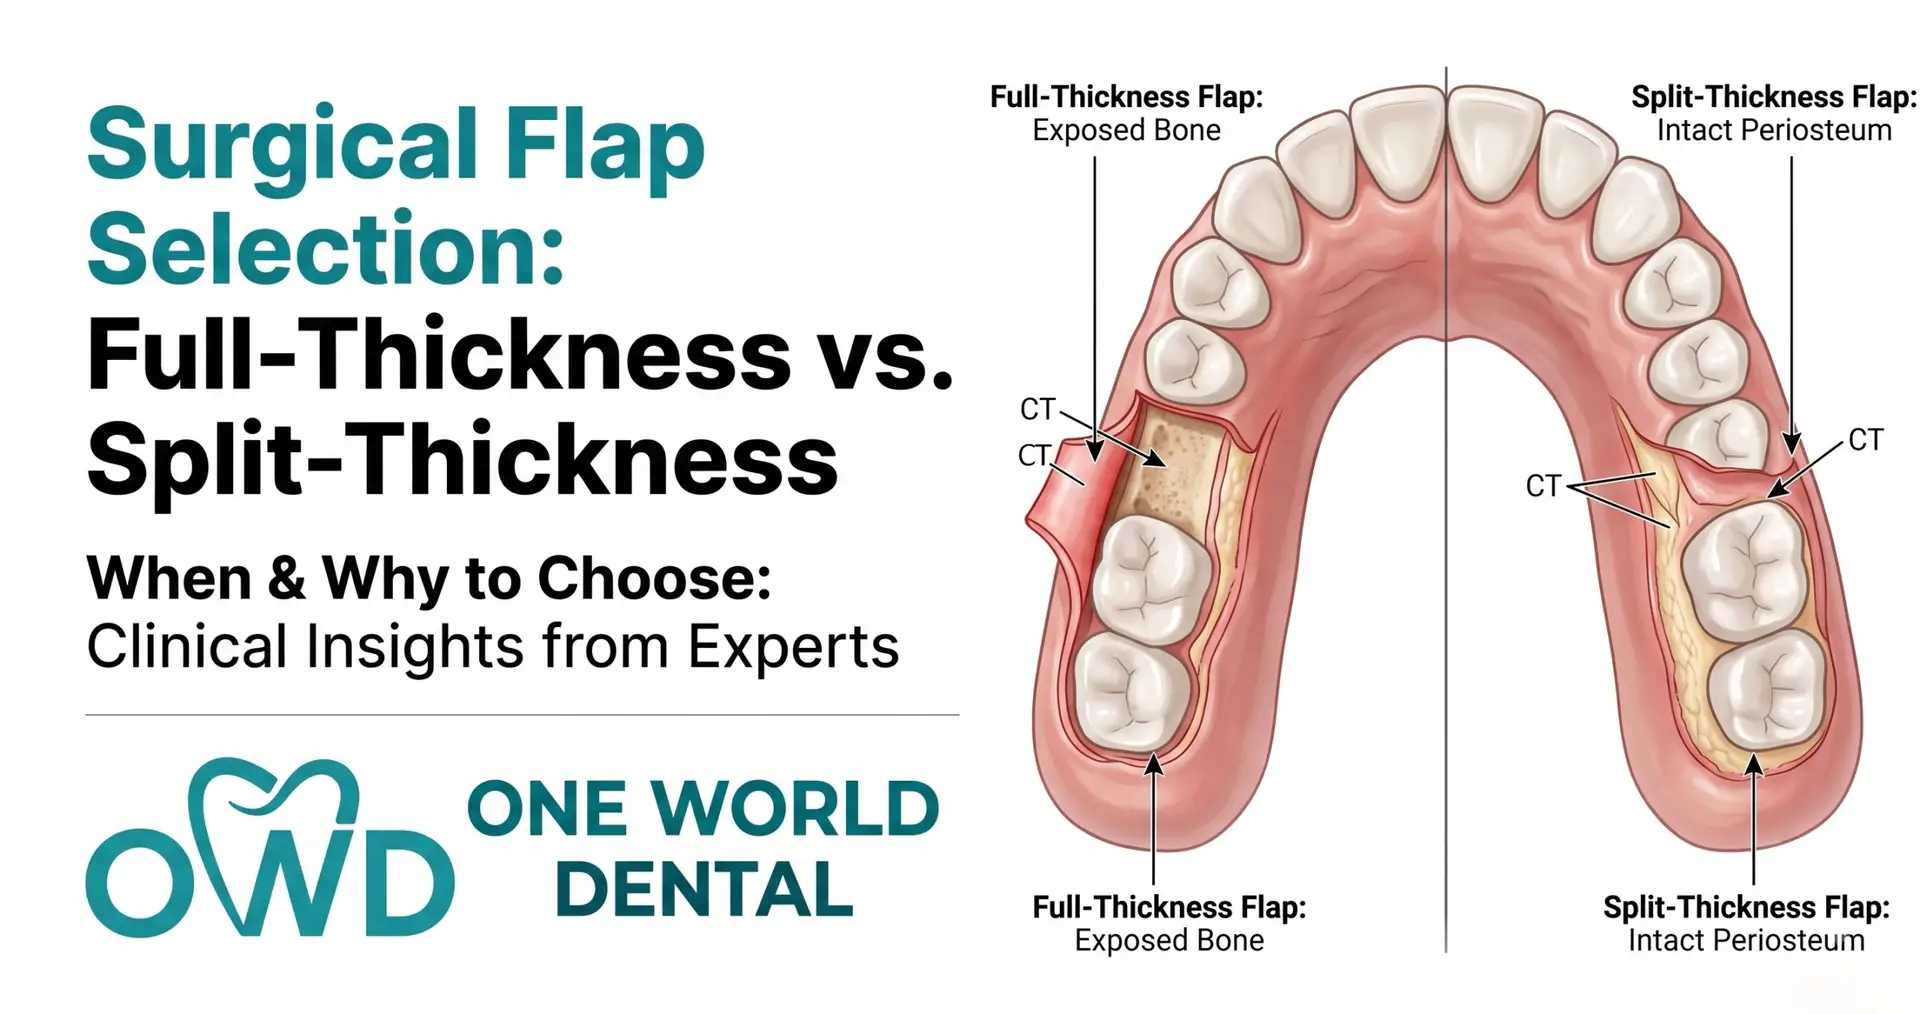
Full-thickness (mucoperiosteal) flaps lift mucosa, submucosa, and periosteum together in one layer, exposing bone directly. Split-thickness flaps separate the mucosa from the periosteum, leaving a periosteal bed attached to bone. The choice is not cosmetic. It changes what heals and how much keratinized tissue you end up with.
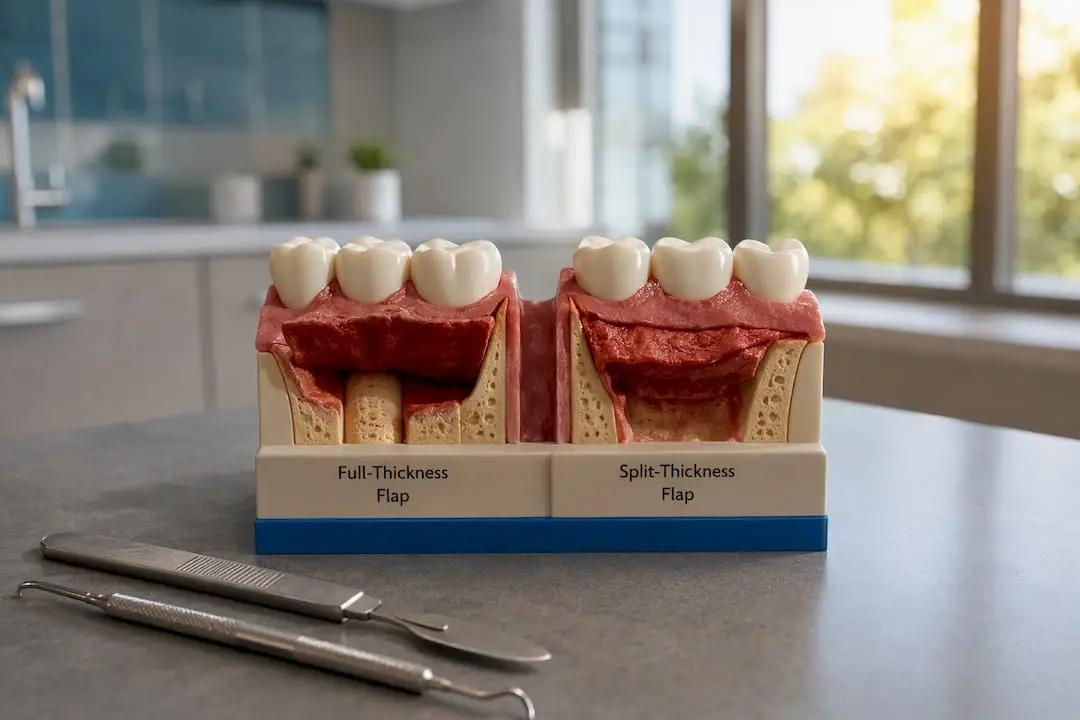
Full-thickness elevation is the default when you need to see and manipulate bone directly: ridge assessment, GBR, sinus lift access, or any case where you must evaluate the buccal plate for fenestrations or dehiscence before placing the implant. Split-thickness technique comes into play when the surgical goal is soft-tissue augmentation or when you want to preserve a periosteal bed for a connective tissue graft or apically positioned flap.
A split-mouth trial comparing the two techniques over three years found a meaningful divergence in soft-tissue outcomes. Keratinized tissue width increased from 0.6 mm to 5.1 mm on sites treated with partial-thickness flaps, compared with a rise from only 0.5 mm to 1.0 mm on the full-thickness side, according to the split-mouth study on flap thickness and keratinized tissue. Both techniques increased overall soft-tissue thickness, but the keratinized band gain was roughly four times larger with the split-thickness approach.
That single data point should reframe how you think about flap thickness in cases where long-term peri-implant tissue health, not just initial access, is the priority:
- Choose split-thickness when keratinized tissue width around the future implant is a known concern, particularly in thin-biotype patients.
- Choose full-thickness when you need unobstructed bone visualization for grafting or defect assessment.
- Handle split-thickness flaps with extra care. The thinner tissue plane has less inherent vascularity and tears more easily under retraction.
The takeaway is not that one technique is universally superior. It is that the decision should be made deliberately, based on whether your surgical priority that day is bone access or soft-tissue architecture.
When Flapless Implant Placement Makes Sense
Flapless surgery skips the incision entirely, placing the implant through a tissue punch guided by pre-operative imaging. It is not a shortcut for cases with ambiguous anatomy. It is a protocol that works only when the anatomy is already well known.
The prerequisites are non-negotiable: a recent CBCT confirming adequate buccal and lingual bone volume, a surgical guide fabricated from that scan, and an operator experienced enough to place accurately without direct visualization. Skip any one of those three and flapless placement becomes a guessing exercise with an implant drill.
The upside is real when the case is right. A randomized trial comparing flapless and flapped protocols for single implants found the flapless approach reduced soft-tissue recession in selected scenarios, though it did not prevent alveolar bone resorption compared with the flapped technique, per the flapless versus flapped RCT. Less tissue reflection also means less post-operative swelling and a faster soft-tissue recovery for patients.
The limitations matter just as much. Without a flap, you cannot inspect the buccal plate for a fenestration or dehiscence defect, and you cannot perform simultaneous guided bone regeneration if the site turns out to need it. If your pre-operative imaging suggests even borderline bone width, plan for a flap. A few practical checks before committing to flapless:
- Confirm at least 2 mm of buccal bone thickness on CBCT, not just adequate height
- Verify the surgical guide fits passively with no rocking before you drill
- Have a flap-based contingency plan ready if the guide reveals unexpected resistance or malposition
- Skip flapless when any augmentation is anticipated, even a minor buccal contour graft
Achieving Tension-Free Closure Through Flap Advancement
Tension-free closure is the single output every flap design decision is ultimately optimizing for, and it is also where surgeons most often cut corners. Stretching a flap to make edges meet is not the same as advancing it. Stretching pulls on already-limited blood vessels and sets up exactly the ischemia that causes dehiscence a week later. True advancement comes from releasing the periosteum so the flap gains length without added tension on its vasculature.
- Identify the need early. Estimate the gap between flap edges before you commit to a graft volume, not after you have already closed the defect.
- Place the horizontal periosteal releasing incision correctly. The incision goes through periosteum only, apical to the mucogingival junction, leaving the mucosal layer intact above it.
- Undermine bluntly, not forcefully. Use blunt dissection to separate the periosteum from the underlying connective tissue. Pulling or tearing at this stage is the most common cause of a compromised release, since a torn periosteal edge changes the entire perfusion pattern of the flap you just tried to save.
- Check advancement incrementally. Test how far the flap moves after each release rather than committing to one long cut and hoping it is enough.
- Combine techniques for larger gaps. Vertical releasing incisions or split-thickness scoring on the flap’s inner surface can add mobility when a periosteal release alone is not sufficient, particularly in guided bone regeneration cases requiring several millimeters of coverage.
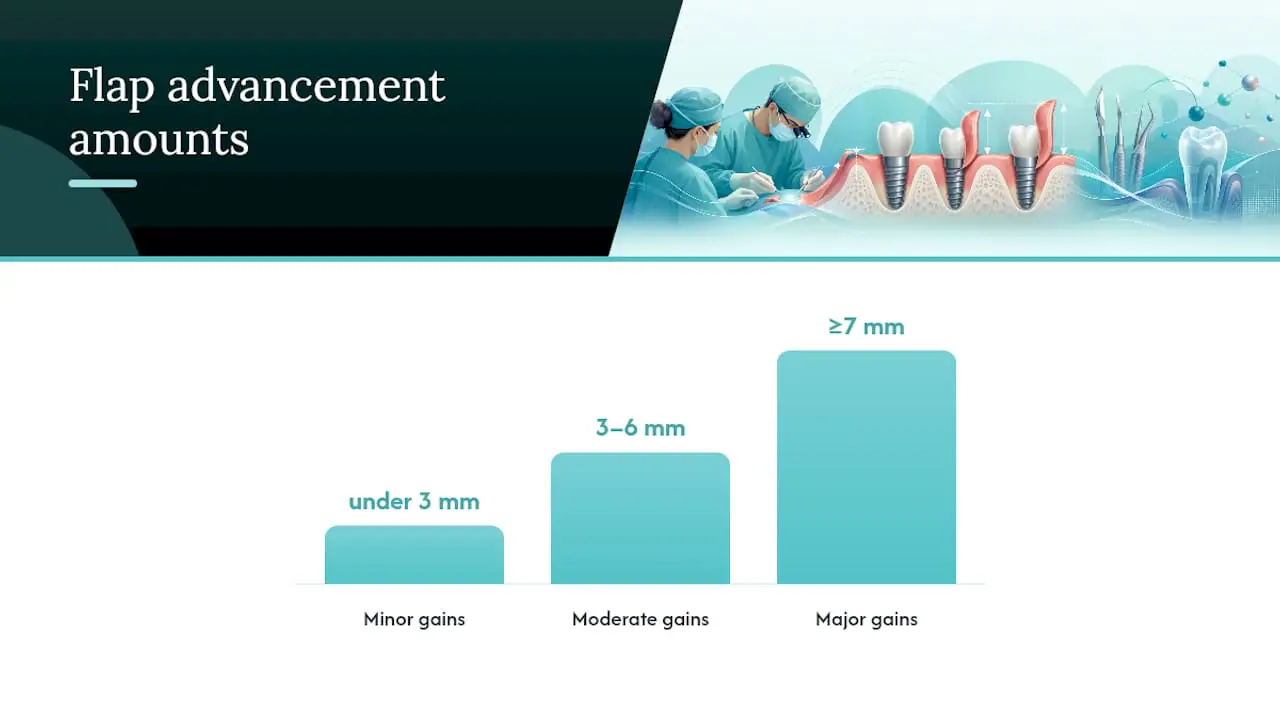
Achievable advancement scales with technique. A comprehensive review of flap advancement methods for implant therapy groups outcomes into minor gains under 3 mm, moderate gains of 3 to 6 mm, and major gains of 7 mm or more, based on which combination of releasing techniques is used, according to the review of flap designs for advancement during implant therapy. Planning a GBR case with a large horizontal defect means planning for a moderate-to-major advancement strategy from the start, not discovering mid-surgery that a single periosteal cut will not close the gap.
Pro Tip: Before placing a single suture, hold the flap edges together with tissue forceps and release your grip. If the edges spring apart, you do not have passive closure yet, and forcing a suture through under that spring-back tension is how a technically “closed” wound reopens on day five.
Prospective cohort data on periosteal and vertical releasing techniques confirms this incremental approach works. True advancement through periosteal release preserves perfusion far more reliably than stretching, according to a prospective cohort study on flap extension techniques, which is exactly why the sequence above emphasizes release before force at every step. If you want to see this technique performed rather than just described, a step-by-step guide on tension-free primary closure walks through the same sequence on an actual ridge augmentation case.
Esthetic Zone Flap Strategy: Protecting Papillae and Biotype
Anterior implants forgive fewer mistakes than posterior ones, because the cost of a lost papilla or a visible scar is a patient who sees it every time they smile. Incision design in the esthetic zone should follow biologic principles that preserve papillae and keratinized tissue, with smaller incisions favored whenever augmentation is not required, according to guidance on incision and flap design in the esthetic zone.
Papilla-sparing incisions work because they route around, not through, the interdental triangle. That triangle has a limited blood supply to begin with, and cutting directly through it removes the one thing holding its shape during healing. Once a papilla collapses, rebuilding it is far harder than preventing the collapse in the first place.
Gingival biotype changes how aggressive you can be with incision depth and flap size. Thin-biotype patients have less tissue to work with and a higher baseline recession risk, so incision depth should stay conservative and flap elevation should stay minimal. Thick-biotype tissue tolerates more manipulation without visible consequence, giving you more room to plan a larger flap if the case genuinely needs one.
A few practical rules follow from this:
- Hide vertical releasing incisions at least one tooth away from the implant site, following root concavities rather than crossing a papilla.
- Favor parapapillary or flapless approaches when bone volume is confirmed and no augmentation is planned.
- In thin-biotype cases, consider shifting the incision line palatally to preserve buccal tissue thickness, while watching for the avascular band that can form if the shift is too aggressive.
- Coordinate flap design with your provisional restoration plan. The soft-tissue emergence profile you want at final restoration should influence how much papilla and keratinized tissue you protect at the surgical stage, not the other way around.
Preventing Dehiscence, Necrosis, and Other Flap Complications
Most flap complications trace back to one of three causes: too much tension, too little blood supply, or too much smoking. Understanding which one is at play changes how you intervene, and in some cases, whether you should have proceeded with surgery at all.
Dehiscence, wound edges separating after apparent primary closure, usually results from tension the surgeon underestimated at the time of suturing, or from sutures placed too tightly in an attempt to compensate for a gap that should have been closed with an actual periosteal release. Necrosis develops when a flap’s pedicle was too narrow relative to its length, or when retraction instruments compressed the tissue for too long during the procedure. Hematoma forms when hemostasis was incomplete before closure, creating a fluid pocket that separates the flap from its bed and blocks the revascularization that closure depends on.
Smoking stands out as the modifiable risk factor with the most consistent evidence behind it. It is identified across wound-healing literature as the single most significant modifiable risk factor for complications including flap necrosis and dehiscence, according to a review of wound healing and risk factors. Nicotine’s vasoconstrictive effect directly undermines the perfusion that every flap design principle in this article is built around protecting, which makes pre-operative cessation counseling a genuine surgical intervention, not just a talking point.
Practical steps to reduce risk at each stage of care:
- Counsel smokers on cessation, or at minimum temporary abstinence, before scheduling surgery
- Keep flap size proportional to the defect. Larger flaps than necessary increase tension without adding benefit
- Achieve complete hemostasis before placing the first suture, not after noticing bleeding through the closure
- Schedule a follow-up within the first week specifically to check for early separation, when intervention can still prevent full dehiscence
Suturing Techniques That Support Primary Closure
Good suturing cannot fix a poorly designed flap, but bad suturing can ruin a well-designed one. The goal at closure is connective-tissue-to-connective-tissue adaptation with just enough tension to hold position, and not one gram more.
- Align edges precisely before the first knot. Mismatched wound edges heal by secondary intention along the mismatched section, even if the rest of the closure looks perfect.
- Use interrupted sutures for standard crestal closures. They allow you to adjust tension site by site rather than distributing one continuous thread’s tension unevenly across the whole incision.
- Reach for horizontal or vertical mattress sutures when you need eversion. Mattress patterns are particularly useful over a grafted site, where you want the flap edges rolled slightly outward rather than inverted into the wound.
- Consider a figure-of-eight pattern around the implant healing abutment or extraction socket. It secures tissue circumferentially without a single suture bearing all the tension.
- Check for dead space before closing the final layer. An underlying pocket of unclosed space is where hematomas form, so a layered closure that eliminates dead space matters more than how the surface suture pattern looks.
Suture material choice depends on how long you need tensile strength to hold. Monofilament sutures shed less plaque and cause less tissue reaction than braided material, which matters around a healing implant site where inflammation control affects long-term outcomes. Needle selection should match the tissue thickness you are passing through, a reverse-cutting needle for typical mucosal closures, and a finer needle for delicate papillary tissue where a standard needle would tear more than it sutures.
What the Clinical Evidence Actually Tells You
The strongest data point in implant flap literature remains the three-year split-mouth comparison of flap thickness: partial-thickness flaps produced keratinized tissue gains roughly four times larger than full-thickness flaps at the same sites, as detailed in the split-mouth flap thickness trial. That is not a marginal difference. It is strong enough evidence to make flap thickness a deliberate decision in any case where long-term soft-tissue health around the implant matters as much as initial surgical access.
Randomized comparisons of flapless versus flapped protocols tell a more nuanced story. Flapless placement reduced soft-tissue recession in selected single-implant cases but did not prevent the alveolar bone resorption seen with flapped approaches, according to the flapless versus flapped RCT. That distinction matters when you are counseling a patient: flapless is a soft-tissue advantage, not a guarantee against ridge remodeling.
On flap advancement, comprehensive reviews now categorize expected outcomes by technique combination rather than treating “release” as a single maneuver:
- Minor advancement, under 3 mm, from a simple periosteal release alone
- Moderate advancement, 3 to 6 mm, combining periosteal release with vertical incisions
- Major advancement, 7 mm or more, typically requiring split-thickness scoring or a double-flap approach, as outlined in the review of flap advancement techniques
A randomized trial on subcrestal incision design adds another data point worth tracking, evaluating margin approximation and healing outcomes with this alternative approach in the subcrestal incision clinical trial. Where evidence on a specific technique variant is limited, weigh soft-tissue endpoints against your actual surgical access needs for that case rather than defaulting to whichever flap design is most familiar.
Your Pre-Surgical Flap Design Checklist
- Confirm bone volume and thickness with CBCT before finalizing incision choice
- Assess gingival biotype and note whether it demands conservative tissue handling
- Decide staged versus simultaneous augmentation before you pick an incision pattern
- Select the incision type matched to access needs and esthetic zone risk
- Plan for a possible periosteal releasing incision rather than discovering the need mid-surgery
- Choose your suture pattern and material before you begin closure, not during it
- Verify passive edge approximation with the release-and-check test before suturing
- Document post-operative instructions specific to the flap type used that day
As a rule of thumb: match flap thickness to your priority (bone access favors full-thickness, keratinized tissue gain favors split-thickness), and never suture under visible tension.
Why Technique Mastery Separates Good Outcomes From Great Ones
The gap between knowing flap design principles and executing them under pressure is where most complications actually happen. Reading about a periosteal releasing incision and performing blunt subperiosteal dissection on a bleeding, moving surgical field are different skills entirely, and the difference shows up in dehiscence rates more than in any textbook description.
Procedural confidence, the kind that comes from having done a release before rather than reading about one, is what lets a surgeon recognize a stretch versus a true advancement in real time. Hands-on courses and supervised live-surgery training exist precisely to close that gap. Watching an experienced mentor place the horizontal release, feel for the correct dissection plane, and confirm passive closure teaches nuances that no diagram fully captures. For surgeons ready to build that muscle memory under supervision, detailed procedural training on implant surgical technique is worth reviewing before the next complex case lands on your schedule.
— Jake
Building Flap Design Skill Through Hands-On Training
Reading about periosteal release and performing it correctly under a bleeding flap are two different competencies, and the fastest way to close that gap is supervised repetition. Onewd’s hands-on dental implant training puts clinicians through live patient modules where flap elevation, releasing incisions, and tension-free closure are practiced with mentorship, not just observed.

The tiered pathway starts with foundational surgical principles and advances toward complex GBR and full-arch cases, so a general dentist building implant confidence and a specialist refining advanced releasing techniques both find a level that fits. The live surgery archives let you study real closures step by step, including moments where a surgeon adjusts mid-procedure when a flap does not advance as planned. Every course carries CE credit, and mentorship access continues past the classroom session. Review the full course catalog and find the next available hands-on session for the technique level you need.
Recommended