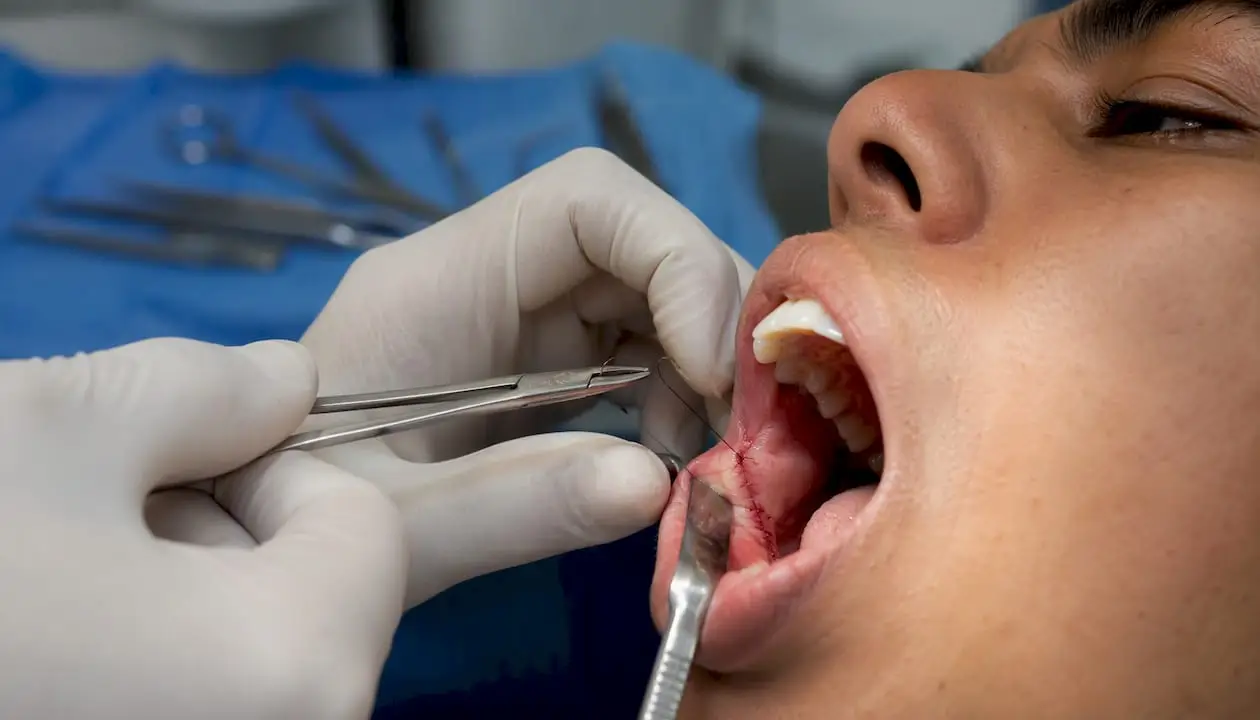
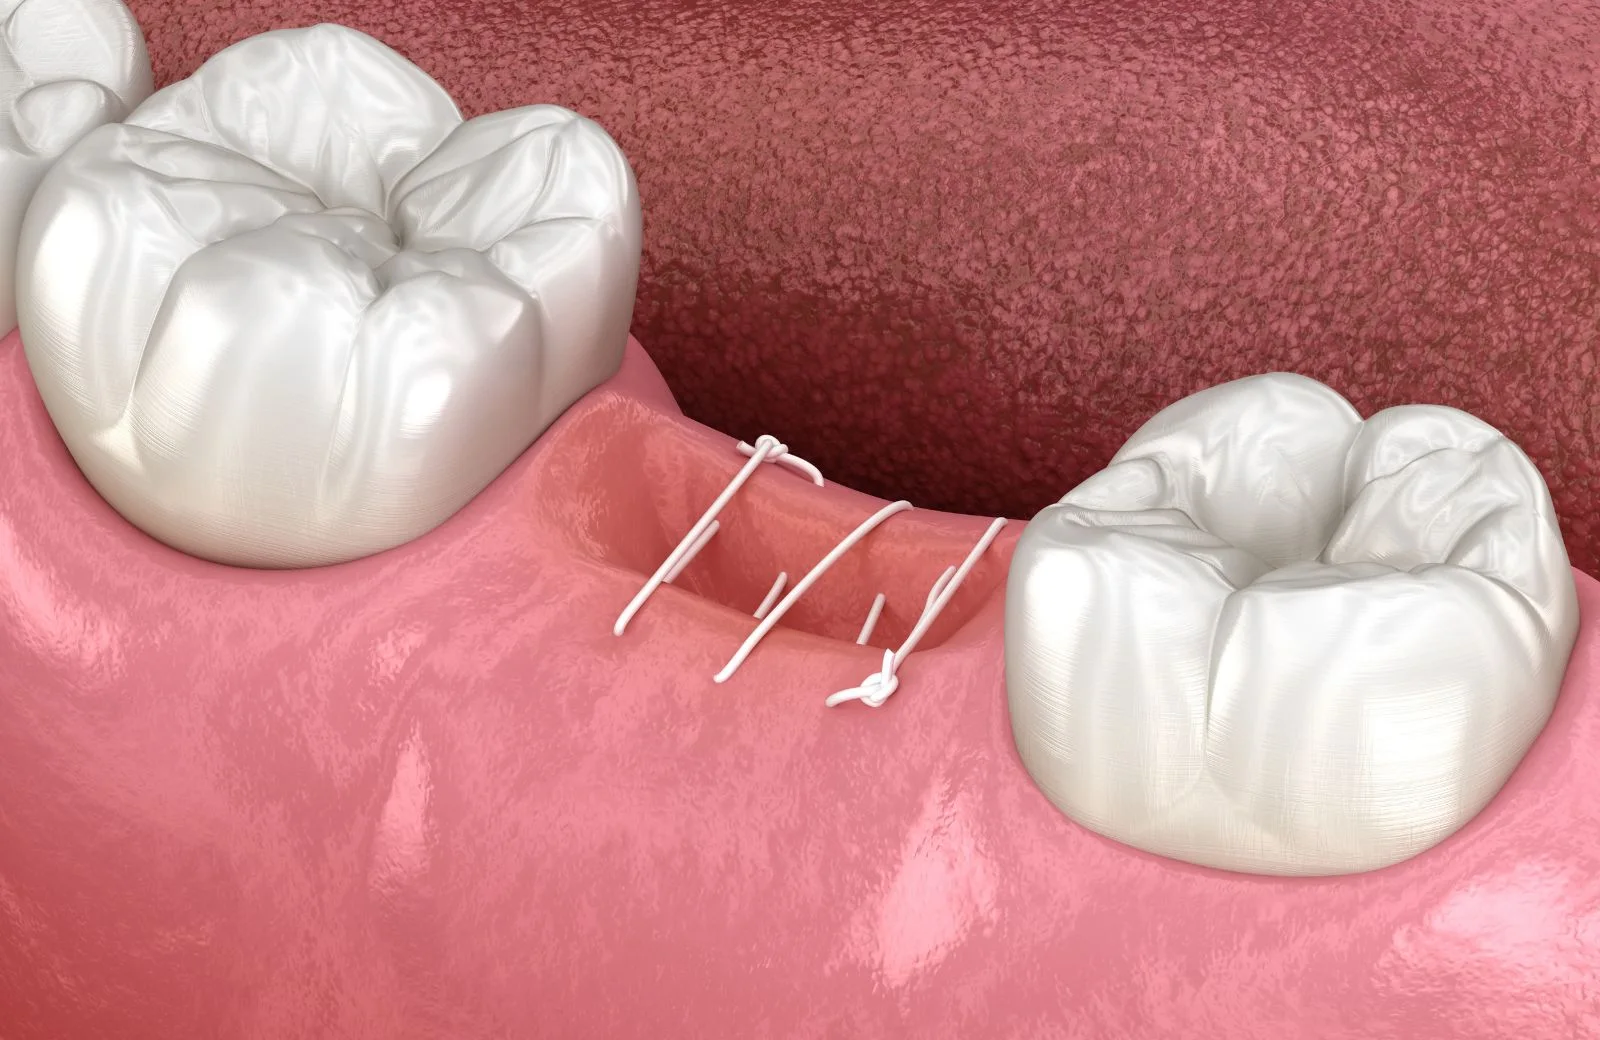
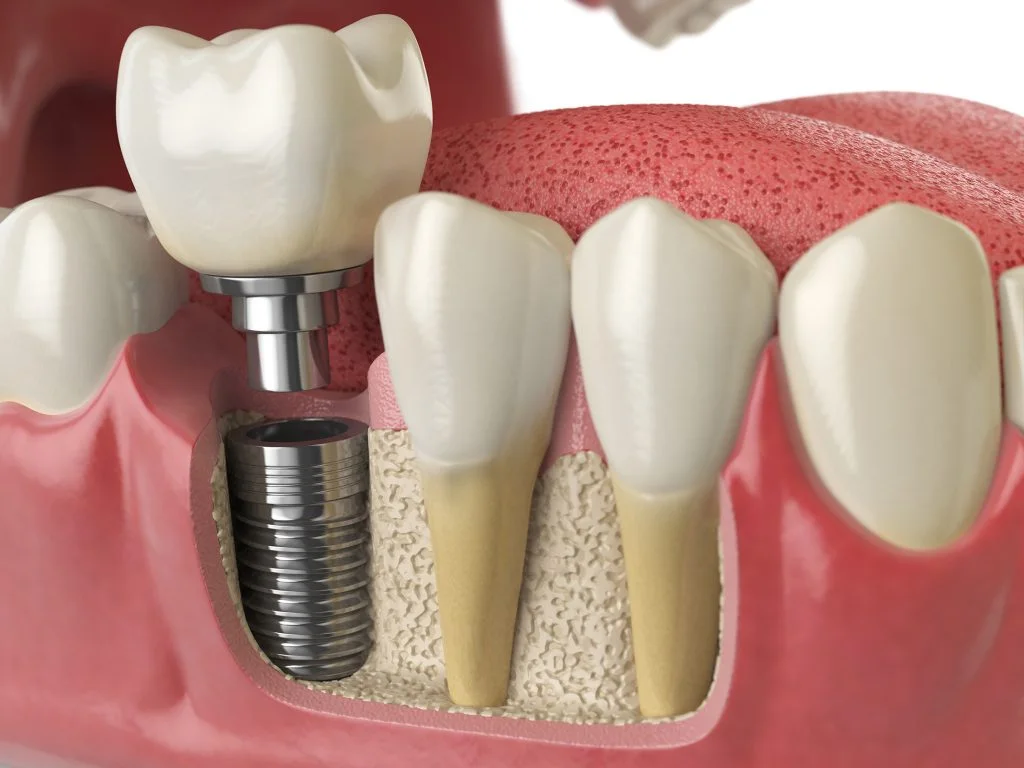
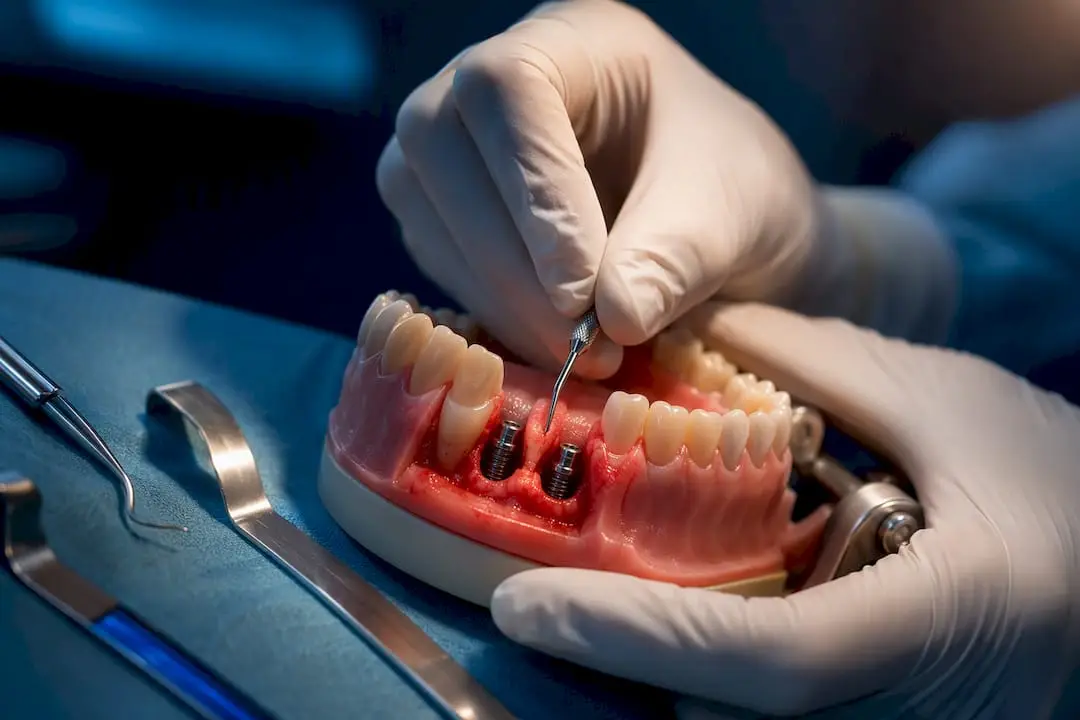
Master five suturing families and you cover the vast majority of oral surgery closures: interrupted (individual tension control, first-line for most wounds), continuous (speed and material economy, locked variant preferred in oral surgery), mattress (tension relief and flap eversion), anchored/specialized (socket stabilization, graft fixation), and buried multilayer (dead-space elimination in ridge augmentations and grafts). According to StatPearls’ oral surgery suturing reference, these categories map directly to the canonical technique families taught in US oral surgery training.
Quick-action rules before you pick up a needle holder:
- Use simple interrupted for short, irregular, or high-risk wounds where losing one stitch must not compromise the whole line.
- Use locked continuous for long maxillary ridge closures where speed matters and tissue quality is uniform.
- Use horizontal mattress when a flap sits under tension beyond the mucogingival junction.
- Use figure-of-eight or crisscross to stabilize extraction socket clots and to retain packing.
- Use buried absorbable sutures in any multilayer closure to close dead space before the surface layer goes in.
Technique selection is a clinical decision, not a preference. The wrong stitch in the right material still fails if the tissue is under tension, the bites are too shallow, or the knot is placed directly over the wound edge.
Key Takeaways
Locked continuous sutures saved measurable suturing time and produced higher day-7 wound healing scores than interrupted sutures in a split-mouth trial, but interrupted sutures remain the safer default for irregular, high-tension, or graft-adjacent wounds.
| Point |
Details |
| Match technique to wound type |
Use interrupted for irregular or high-risk wounds; locked continuous for long, uniform, low-tension closures. |
| Material defaults by site |
Absorbable monofilament for buried layers; nonabsorbable monofilament or PTFE for implant and periodontal sites. |
| Knot security with synthetics |
Use a surgeon’s knot (double first throw) with synthetic monofilament; minimum three throws total for monofilament, four for PTFE. |
| Suture removal timing |
Routine mucosal closures: 5–7 days; high-tension flaps and implant sites: 10–14 days; connective tissue grafts: 14–21 days. |
| Onewd hands-on training |
Onewd’s suturing lecture series and live surgical courses convert technique knowledge into reliable clinical execution with CE credit. |
What are the core principles behind good dental suturing techniques?
Four technical priorities determine whether a closure heals by primary intention or falls apart by day three: tension control, flap eversion, atraumatic needle technique, and appropriate material selection. Get all four right and the knot type becomes almost secondary.
Tension control means the wound edges approximate without blanching. If you have to pull the tissue to make the edges meet, the suture will cut through before healing begins. Releasing incisions or periosteal scoring is the fix, not a tighter knot.
Flap eversion keeps the epithelial edges slightly proud of each other so that as the wound contracts during healing, the edges meet flush rather than inverting. Inverted edges create a depression and delay re-epithelialization. Mattress sutures are the standard tool for achieving eversion; simple interrupted sutures placed with a slight outward angle also help.
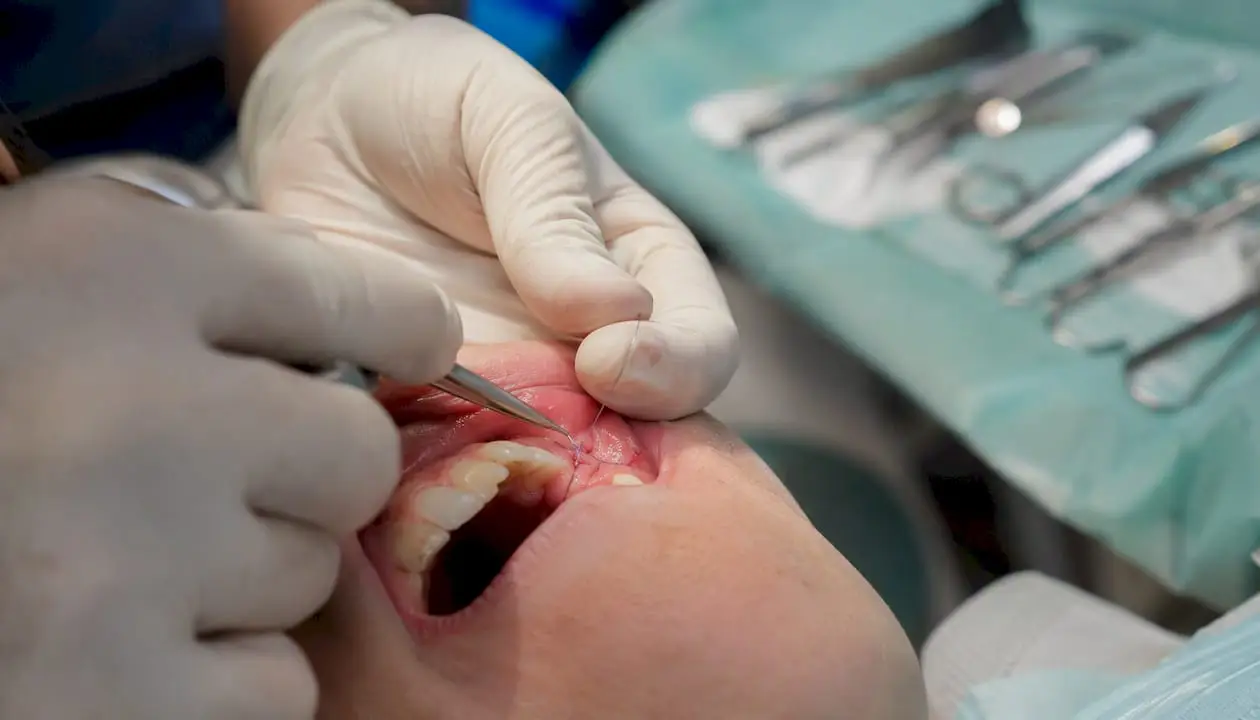
Atraumatic needle technique is where most learners lose ground. The needle should enter tissue perpendicular to the surface, rotate through its arc without lateral torque, and exit symmetrically on the other side. Dragging or redirecting a needle mid-pass tears tissue and widens the bite unpredictably. Bite size should be roughly equal on both sides of the wound, typically 2–3 mm from the wound edge for mucosal closures, with sutures spaced approximately 3–5 mm apart.
Material selection affects how long the closure holds, how much tissue reaction it provokes, and how easy removal will be. Matching absorption profile to healing timeline is the practical rule: absorbable for buried layers and routine mucosal closures, nonabsorbable monofilament for implant and periodontal sites where low wicking is critical.
Pro Tip: Enter the needle at 90 degrees to the tissue surface, not at an angle. An angled entry creates an asymmetric bite that tends to invert the wound edge on one side. If you find yourself tilting the needle holder to get purchase, reposition your hand rather than compensate with the needle angle.
How do you place interrupted sutures, and when are they the best choice?
Interrupted sutures remain first-line for most oral procedures because each stitch is independent. If one fails, the rest hold. That redundancy is especially valuable in fragile papillae, irregular wound margins, and any site where tissue quality is unpredictable.
The Journal of Oral and Maxillofacial Surgery technique guide details the instrument-tie sequence for routine interrupted placement:
- Load the needle in the needle holder at the junction of the middle and posterior thirds of the needle body.
- Enter the free (unattached) flap first, approximately 2–3 mm from the wound edge, needle perpendicular to the tissue surface.
- Rotate the needle through its arc, exiting the attached tissue at a symmetrically equal distance from the wound edge.
- Pull the suture through, leaving a 2–3 cm tail on the entry side.
- Wrap the long end of the suture around the needle holder twice for the first throw (surgeon’s knot), then once for each subsequent throw.
- Place the knot to one side of the wound, never directly over the incision line.
- Trim tails to 3–4 mm. Shorter tails risk untying; longer tails catch on adjacent tissue and irritate the patient.
- Space subsequent sutures 3–5 mm apart, or closer in thin papillary tissue.
The figure-of-eight crosses the wound in an X pattern, engaging both flaps in a single pass before tying. It distributes tension over a wider area and is the standard choice for extraction socket hemostasis and clot stabilization. The crisscross variant is functionally similar and is used to retain socket packing or membrane material.
Procedural checklist for figure-of-eight:
- Enter buccal flap 3–4 mm from the wound edge, exit lingual/palatal side.
- Cross back over the socket, enter lingual/palatal side again, exit buccal.
- Tie with a surgeon’s knot on the buccal surface.
- Confirm the suture engages both flaps firmly without blanching the tissue.
Common mistakes with interrupted sutures: bites that are too small in fragile papillae (less than 1.5 mm), knots placed directly over the wound, and tails trimmed too short. Tails under 2 mm can slip through the knot with synthetic monofilament materials.
Pro Tip: After tying, slide the knot laterally off the incision line with your instrument before releasing tension. A knot sitting directly over the wound edge concentrates pressure on the most vulnerable tissue and is a common cause of localized necrosis.
When should you use continuous sutures, and how does locking change the risk profile?
Locked continuous sutures combine the speed of a running stitch with meaningfully better security than the non-locking version. In oral surgery, that distinction matters because a single thread break in a non-locking continuous suture can open the entire wound.
Placing a running non-locking continuous suture:
- Begin with a simple interrupted stitch at one end of the wound; tie and cut only the short tail, leaving the long end active.
- Pass the needle through both flaps at the same angle and spacing as interrupted sutures, working along the wound.
- Keep consistent tension on the thread between passes to avoid puckering.
- At the end of the wound, tie the final loop to the last free strand with a surgeon’s knot.
Converting to a locked running suture: After each pass through the tissue, loop the needle through the previous suture loop before pulling it snug. This locks each bite independently. If the thread breaks at one point, only the segment between two locks opens rather than the entire line.
Advantages of continuous sutures: faster placement, less suture material used, and more even tension distribution along a long wound. The trade-off is that any thread failure is more consequential in the non-locking version, and removal requires cutting the suture in multiple places if the wound is long.
Pro Tip: For long continuous closures under any tension, place one or two spot mattress sutures at the midpoint before you start the continuous run. They act as independent anchors. If the continuous thread fails between them, you still have two segments rather than one long open wound.
Knot technique at the start and end of a continuous suture matters more than most students realize. The starting knot carries the entire line’s tension until the first few passes are placed. Use a surgeon’s knot (double first throw) at both ends, and confirm the final knot is tied to a loop, not to a free end that can pull through.
Mattress sutures are the right choice whenever tension or eversion is the primary concern. Horizontal mattress sutures handle lateral tension and evert wound edges; vertical mattress sutures approximate deep and superficial tissue planes simultaneously.
The StatPearls oral surgery reference identifies horizontal mattress as the standard recommendation for flaps under tension beyond the mucogingival junction, where a simple interrupted suture would cut through before the wound stabilizes.
Horizontal mattress placement:
- Enter the free flap 4–5 mm from the wound edge, exit the attached flap at the same depth.
- Move 4–5 mm along the wound and re-enter the attached flap, exiting the free flap.
- Tie on the free flap side. The suture now runs parallel to the wound on both sides.
- Confirm the wound edges evert slightly. If they invert, the bite is too close to the wound edge.
Vertical mattress placement:
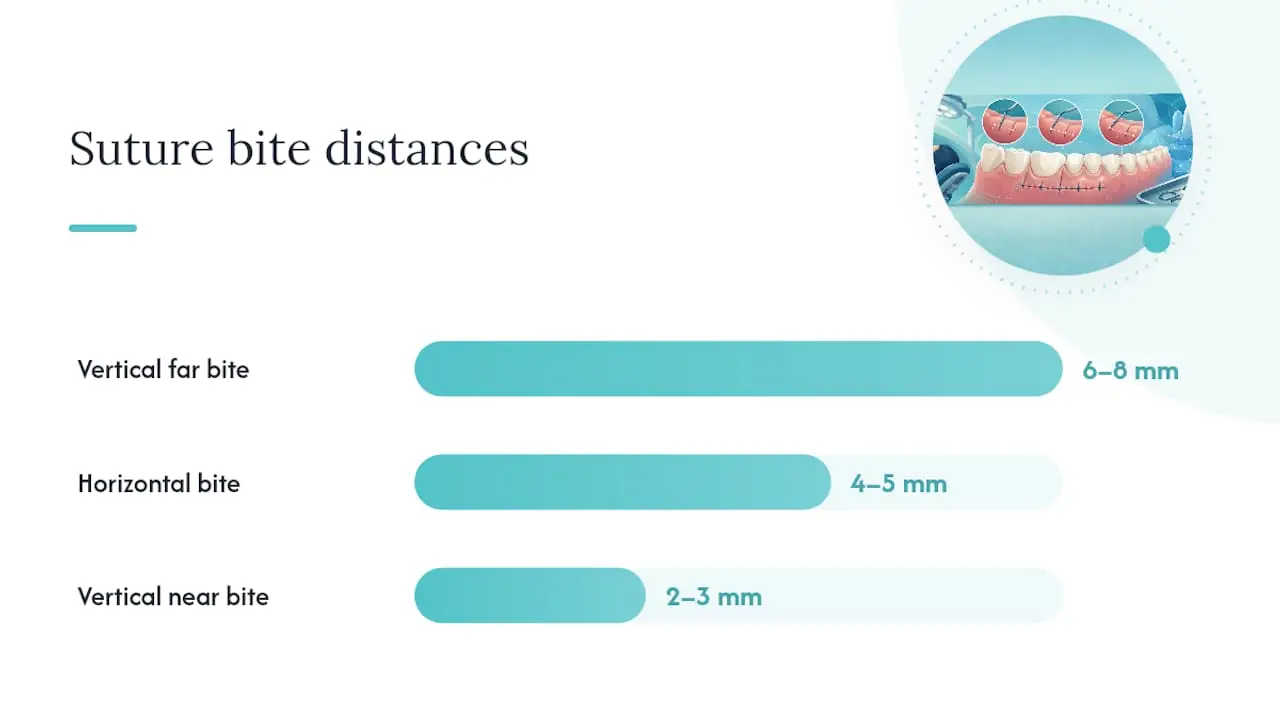
- Enter the free flap 6–8 mm from the wound edge (far bite), exit the attached flap at the same distance.
- Return through the tissue 2–3 mm from the wound edge (near bite), entering the attached flap and exiting the free flap.
- Tie on the free flap side. The suture now engages both deep and superficial tissue planes.
Buried mattress variants are placed with the knot tied deep, away from the surface. They are used in ridge augmentations and multilayer closures to close dead space before the surface layer is placed. Use absorbable monofilament for buried layers; nonabsorbable material buried deep can spit through the mucosa weeks later.
Key indications and cautions for mattress sutures:
- Horizontal mattress: flaps under tension, papilla preservation procedures, sites where eversion is critical.
- Vertical mattress: deep-to-superficial approximation, areas where dead space must be closed in a single pass.
- Buried mattress: ridge augmentation, graft stabilization, any multilayer closure.
- Use longer-lasting absorbable material (polydioxanone or polyglycolic acid) when prolonged tension support is expected.
- Avoid placing the suture too close to the wound edge in fragile papillae; engaging healthier tissue 4–5 mm back provides better stability without compromising vascular supply, as noted in Pocket Dentistry’s suturing materials guide.
Pro Tip: After tying a horizontal mattress suture, check the tissue color immediately. If the wound edge blanches white, the suture is too tight and ischemia is already beginning. Loosen the knot one throw and reassess before adding the next suture.
Which specialized and anchored sutures should you know, and when do you use them?
Four specialized techniques cover most of the situations where standard interrupted or continuous sutures fall short: figure-of-eight, sling/anchored, crisscross, and Gottlow-type (also called the modified sling or papilla-based anchored suture).
Figure-of-eight is best for extraction socket hemostasis and clot stabilization. Checklist:
- 3-0 or 4-0 resorbable or nonresorbable suture, reverse-cutting needle.
- Enter buccal 3–4 mm from wound edge, cross to lingual, re-enter lingual, exit buccal.
- Surgeon’s knot buccal. Confirm clot is covered and packing (if used) is retained.
Sling/anchored suture is the go-to for soft-tissue graft stabilization and circumferential stabilization around teeth or implants. It wraps around the tooth or implant collar rather than tying directly across the wound.
Checklist:
- 5-0 or 6-0 monofilament nonabsorbable (PTFE preferred for implant sites).
- Enter the papilla on one side, pass the suture around the tooth/implant, enter the papilla on the opposite side.
- Return around the tooth in the opposite direction and tie on the original entry side.
- Confirm the graft or flap is held firmly against the recipient bed without blanching.
Crisscross suture is used for socket packing retention and membrane stabilization. Procedural checklist:
- 3-0 resorbable, reverse-cutting needle.
- Enter buccal, cross to lingual, re-enter lingual at a different point, exit buccal.
- Tie buccal. The X pattern holds packing or membrane flat against the socket.
Gottlow-type (modified sling) is used in periodontal plastic surgery for papilla preservation and connective tissue graft fixation. It anchors to the contact point or interproximal area rather than crossing the wound directly.
Pro Tip: For sling sutures around implants, PTFE is the material of choice because it does not wick bacteria along the thread into the peri-implant sulcus. Braided silk around an implant collar is a documented risk factor for early peri-implant inflammation.
How do you place buried sutures and manage multilayer closures?
Buried sutures reduce tension on the surface closure and eliminate dead space, two factors that directly determine whether a ridge augmentation or graft site heals by primary intention. The knot goes deep; the surface layer sees almost no tension.
For a basic buried simple interrupted suture:
- Load absorbable monofilament (poliglecaprone 25 or polydioxanone) on a reverse-cutting or tapered needle.
- Enter the deep tissue from below, passing the needle upward through the dermis or periosteum, exiting just below the surface epithelium.
- Cross to the opposite side and enter just below the epithelium, passing downward through the deep tissue.
- Tie with the knot at the deepest point of the pass, not at the surface. The wound edges should approximate without any surface suture tension.
For multilayer closures in ridge augmentations, the sequence is: periosteal layer first (buried horizontal mattress or interrupted, polydioxanone), then connective tissue layer (buried interrupted, poliglecaprone), then surface mucosa (interrupted or continuous, 4-0 to 5-0). Each layer closes independently. The JOMS technique guide confirms that bite depth and purchase on each layer matter more than suture brand in achieving dead-space elimination.
Material recommendation: Use absorbable monofilament for all buried layers. Buried nonabsorbable sutures, including braided silk, are a known cause of suture spitting and foreign body granuloma formation weeks to months after surgery. If a nonabsorbable is needed for prolonged tension support, use monofilament PTFE and place it as superficially as the anatomy allows so it can be retrieved easily if it spits.
Pro Tip: When placing a buried knot, take three throws minimum with synthetic absorbable monofilament. The material’s memory will try to untie a two-throw knot before the tissue heals around it. Three throws with the knot buried deep is the minimum for reliable hold.
How do you choose the right suture material and needle for each procedure?
Match the material to the healing timeline and the site’s infection risk. The practical default: absorbable monofilament (poliglecaprone 25 or polydioxanone) for buried and routine mucosal closures; nonabsorbable monofilament or PTFE for implant and periodontal sites where bacterial wicking is a real risk. A survey of clinician preferences confirms that nonabsorbable sutures dominate in periodontal and implant surgery among experienced practitioners, with reverse-cutting and 3/8 circle needles as the most commonly selected needle configurations.
Braided silk handles well and knots easily, but its wicking behavior makes it a poor choice for implant sites. Pocket Dentistry’s suturing materials overview recommends monofilament nonabsorbable or PTFE specifically to reduce bacterial wicking and tissue reactivity compared with braided materials.
Suture size quick reference (USP convention: more zeros = finer):
- 3-0: Extraction sockets, figure-of-eight closures, high-tension flaps. Strong enough to hold under tension.
- 4-0: Periodontal flap closures, routine implant mucosal closures, third-molar sites. The most versatile size in general oral surgery.
- 5-0: Anterior esthetic zones, papilla preservation procedures, connective tissue grafts. Finer thread, less tissue reaction.
- 6-0: Microsurgical applications, delicate papillae, free gingival grafts. Requires magnification for reliable placement.
Needle selection:
| Needle Type |
Curvature |
Best For |
| Reverse-cutting |
3/8 circle |
Oral mucosa, periodontal flaps, most routine closures |
| Reverse-cutting |
1/2 circle |
Deeper pockets, restricted access areas |
| Tapered (round) |
3/8 or 1/2 circle |
Friable tissue, connective tissue grafts, buried layers |
| Conventional cutting |
3/8 circle |
Dense keratinized tissue, palatal closures |
The reverse-cutting needle is the standard for oral mucosa because its cutting edge faces outward, reducing the risk of the suture tearing through toward the wound edge. The 3/8 circle curvature fits most intraoral access situations without requiring extreme wrist rotation.
Monofilament vs. braided trade-offs:
- Monofilament: lower wicking, less tissue reaction, harder to handle, requires more throws to secure the knot.
- Braided: easier handling, better knot security with fewer throws, higher bacterial wicking, more tissue reaction.
- PTFE: lowest wicking of all, excellent for implant sites, slightly stiff handling, knot security requires careful technique.
What knot sequences actually hold with synthetic suture materials?
The surgeon’s knot is the correct starting point for synthetic monofilament. A square knot alone with polypropylene or PTFE will slip before the tissue heals. The double first throw of the surgeon’s knot locks the initial loop while you place subsequent throws.
Surgeon’s knot sequence for synthetic monofilament:
- Wrap the long end around the needle holder twice (double overhand throw). Pull snug. This is the locking first throw.
- Wrap the long end around the needle holder once in the opposite direction. Pull snug. This is the first square throw.
- Repeat step 2 once more. Three total throws minimum for monofilament; four for PTFE.
- Trim tails to 3–4 mm.
For braided silk or polyglactin in routine mucosal closures, a square knot (single-single-single) with three throws is generally sufficient because the braided texture resists slipping. Still, starting with a double first throw costs nothing and adds security.
The JOMS suturing technique guide details instrument-tie sequences and emphasizes that throw count should match material memory, not habit.
Pro Tip: After placing the final throw, slide the completed knot off the incision line with the tip of your needle holder before releasing tension. Synthetic materials have enough memory to spring the knot back toward the wound edge if you release tension before repositioning. One second of repositioning prevents a knot sitting directly over the most vulnerable tissue.
How do you manage flap tension and achieve eversion without causing ischemia?
Appropriate flap eversion and even tension distribution matter more than knot speed. A perfectly tied knot on an overtensioned flap will still produce ischemia and dehiscence. The sequence is: release tension first, then suture.
Clinical checklist before placing the first suture:
- Confirm the flap reaches the opposing tissue passively, without pulling. If it does not, score the periosteum.
- Bite depth should be approximately 1.5 times the tissue thickness for microsurgical closures; 2–3 mm for routine mucosal closures.
- Space sutures 3–5 mm apart. Closer spacing in thin papillary tissue; wider spacing in thick keratinized tissue.
- If the wound is long, place the first suture at the midpoint, then bisect each half. This distributes tension evenly rather than accumulating it at one end.
- Anchor to periosteum when the flap is mobile and the underlying bone provides a stable attachment point.
Warning signs of overtightening:
- Tissue blanches white immediately after tying. Loosen one throw.
- The wound edge inverts rather than everts. The bite is too close to the wound edge; reposition.
- The patient reports sharp pain during placement under local anesthesia. The suture is compressing a nerve or vessel.
When tension cannot be resolved with bite adjustment alone, convert to a horizontal mattress suture. It distributes load over a wider tissue area and actively everts the wound edge, as the StatPearls reference confirms for flaps beyond the mucogingival junction.
What are the most common suturing errors, and when should sutures be removed?
Most preventable complications trace back to three technical errors: poor bite depth, wrong material choice, and overtensioned knots. Fixing those three eliminates the majority of dehiscence and infection cases before they start.
Suture removal timing by tissue type:
| Tissue / Procedure |
Typical Removal Window |
Notes |
| Routine mucosal closure (extraction) |
5–7 days |
Earlier if absorbable used |
| Periodontal flap |
7–10 days |
Confirm re-epithelialization before removing |
| High-tension flap or ridge augmentation |
10–14 days |
Extend if healing is delayed |
| Implant mucosal closure |
10–14 days |
Nonabsorbable monofilament; remove when tissue is stable |
| Connective tissue graft |
14–21 days |
Graft integration must be confirmed |
| Buried absorbable layers |
Self-resorbing |
No removal needed; monitor for spitting |
Troubleshooting common complications:
- Dehiscence: Irrigate with saline, assess whether primary re-closure is possible. If the tissue is healthy and the gap is small, re-suture under tension-free conditions. If the tissue is compromised, allow secondary intention healing with chlorhexidine rinse support.
- Infection: Culture if purulent exudate is present. Irrigate, consider removing sutures to allow drainage, and prescribe antibiotics based on clinical presentation. Amoxicillin remains a common first-line choice in US practice for odontogenic infections without allergy.
- Retained suture pain: A suture buried under regenerating epithelium causes localized tenderness. Probe gently, locate the suture, and remove it. Braided sutures are more prone to this than monofilament.
- Suture spitting: A buried nonabsorbable suture migrating to the surface. Remove the exposed end, irrigate, and monitor. Prevent by using only absorbable material for buried layers.
Patient aftercare:
- Avoid vigorous rinsing for 24 hours post-surgery.
- Begin 0.12% chlorhexidine gluconate rinse at 24 hours, twice daily, until suture removal.
- Soft diet for the duration of suture retention.
- No smoking; nicotine impairs wound healing and increases dehiscence risk.
- Return for suture removal at the interval appropriate for the procedure (see table above).
Step-by-step suturing approaches for common dental procedures
The right default combination for each procedure saves time and reduces complications. Here is the practical breakdown by clinical scenario.
1. Simple extraction socket (figure-of-eight or crisscross)
- Suture: 3-0 resorbable (polyglactin 910 or chromic gut), reverse-cutting, 3/8 circle.
- Place figure-of-eight across the socket, engaging both buccal and lingual flaps 3–4 mm from the wound edge.
- Tie with surgeon’s knot buccal. Confirm clot is covered.
- Removal: 5–7 days, or allow to resorb if chromic gut used.
- See the complete surgical extraction guide for detailed post-extraction closure protocols.
2. Third-molar / soft-tissue impaction
- Suture: 3-0 or 4-0 resorbable, reverse-cutting, 3/8 circle.
- Close the distal flap first with one or two interrupted sutures, then close the buccal releasing incision with interrupted sutures spaced 4–5 mm.
- Confirm the distal papilla is approximated without tension.
- Removal: 7–10 days.
3. Periodontal flap closure
- Suture: 4-0 or 5-0 nonabsorbable monofilament (polypropylene or PTFE), reverse-cutting, 3/8 circle.
- Interrupted sutures at each papilla, sling sutures around teeth if graft is present.
- Confirm eversion at each papilla before moving to the next.
- Removal: 7–10 days.
4. Implant mucosal closure
- Suture: 4-0 or 5-0 PTFE or polypropylene, reverse-cutting, 3/8 circle.
- Interrupted or simple continuous depending on flap length.
- For implant placement courses that include mucosal closure modules, PTFE 5-0 is the most commonly recommended material.
- Removal: 10–14 days.
5. Ridge augmentation (buried layers + external mattress)
- Deep layer: 4-0 polydioxanone, tapered needle, buried interrupted or horizontal mattress.
- Surface layer: 4-0 or 5-0 PTFE or polypropylene, reverse-cutting, horizontal mattress for tension relief, then interrupted to close remaining gaps.
- Confirm passive closure at every point before tying.
- Removal: 10–14 days for surface sutures; buried layer self-resorbs.
- The surgical site development masterclass covers multilayer closure technique in a hands-on format.
What does the evidence actually show about interrupted vs. locked continuous sutures?
The best available comparative data comes from a prospective split-mouth clinical trial comparing interrupted and locked continuous sutures in maxillary edentulous alveolar ridge procedures. Pain scores and suture removal difficulty were similar between groups.
The day-7 wound healing advantage for locked continuous sutures in this trial is real but context-specific. The study examined a uniform, low-tension maxillary ridge closure, not a posterior flap under tension, a graft site, or a papilla-preservation case. Extrapolating the result to every oral surgery closure overstates what the data supports.
The practical takeaway: locked continuous is a legitimate choice for long, uniform, low-tension closures where time efficiency matters. For irregular wounds, high-tension sites, or cases where individual stitch failure would be catastrophic, interrupted sutures remain the safer default. The evidence base is still limited by small sample sizes and procedure-specific endpoints, so clinical judgment remains the deciding factor.
What instructors see learners get wrong, and how hands-on practice fixes it
The three errors that appear most consistently in learners are wrong needle entry angle, inconsistent bite depth, and inadequate tail length after tying. Needle angle is the one that causes the most tissue damage because it compounds across every stitch in the closure.
Correcting needle angle first is the right priority. A student who enters at 45 degrees instead of 90 will tear tissue on every pass, and no amount of knot practice compensates for that. Once perpendicular entry is consistent, bite depth and spacing become easier to standardize because the tissue is no longer distorted by the entry wound.
Practice sequence that actually builds skill: suture boards first (foam or silicone), then pig jaw or fresh cadaver tissue, then supervised live cases. Suture boards build muscle memory for the instrument-tie sequence. Pig jaw adds realistic tissue resistance and shows how different materials handle differently. Neither replaces supervised live cases, but they shorten the learning curve significantly before a patient is in the chair.
Microscope-assisted practice on pig jaw is particularly useful for 5-0 and 6-0 work. The magnification reveals bite asymmetry and knot placement errors that are invisible to the naked eye at those sizes.
Supervised hands-on training shortens the time between knowing the technique and executing it reliably. Entry-level surgical courses that include live patient modules or cadaver labs compress that gap in a way that lecture-only formats cannot.
Advance your suturing skills with Onewd’s hands-on training
Knowing the technique is step one. Executing it reliably under clinical conditions is a different skill, and it only develops through repetition on real tissue with expert feedback.
Onewd’s suturing techniques on-demand lecture series covers the full range of methods in this guide, from simple interrupted to multilayer ridge augmentation closures, with video demonstrations and CE credit upon completion. For clinicians ready to move from lecture to hands-on, the implants and surgery course catalog includes live patient modules and cadaver labs where suturing is practiced under direct instructor supervision.

Both formats are available through Onewd’s training course catalog, where you can filter by skill level, format (online or in-person), and CE credit range. If you are building toward a specific CE requirement, the online dental CE guide maps suturing-focused courses to your state’s requirements. Browse current offerings and register directly at the training catalog.
Selected further reading and primary sources
Recommended