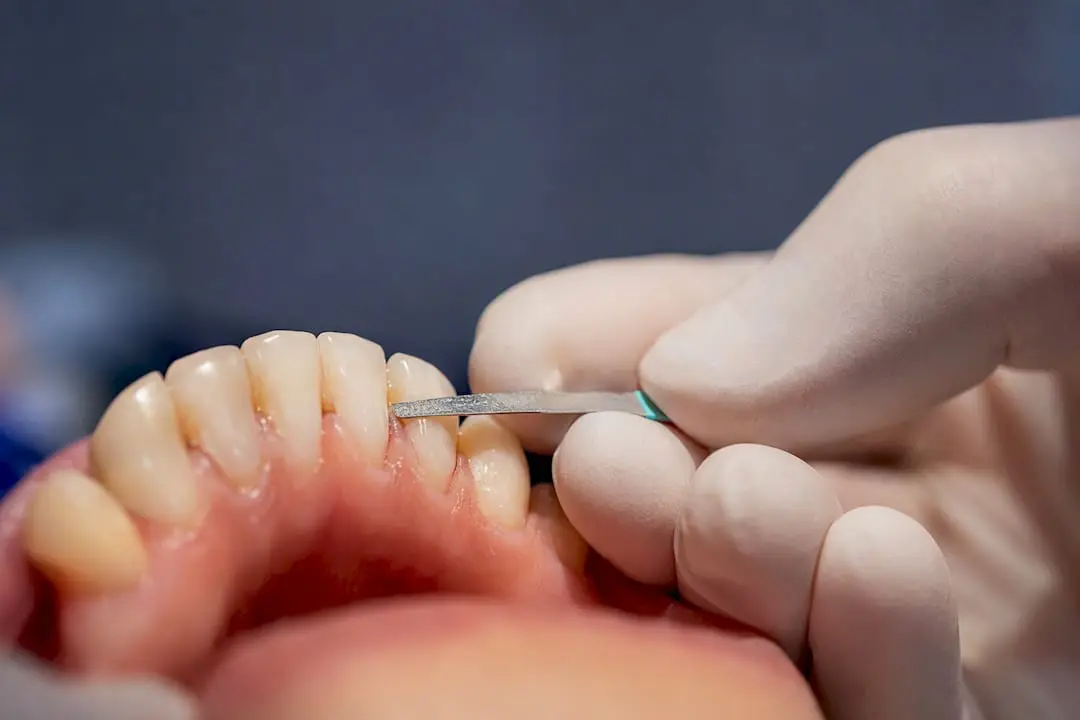
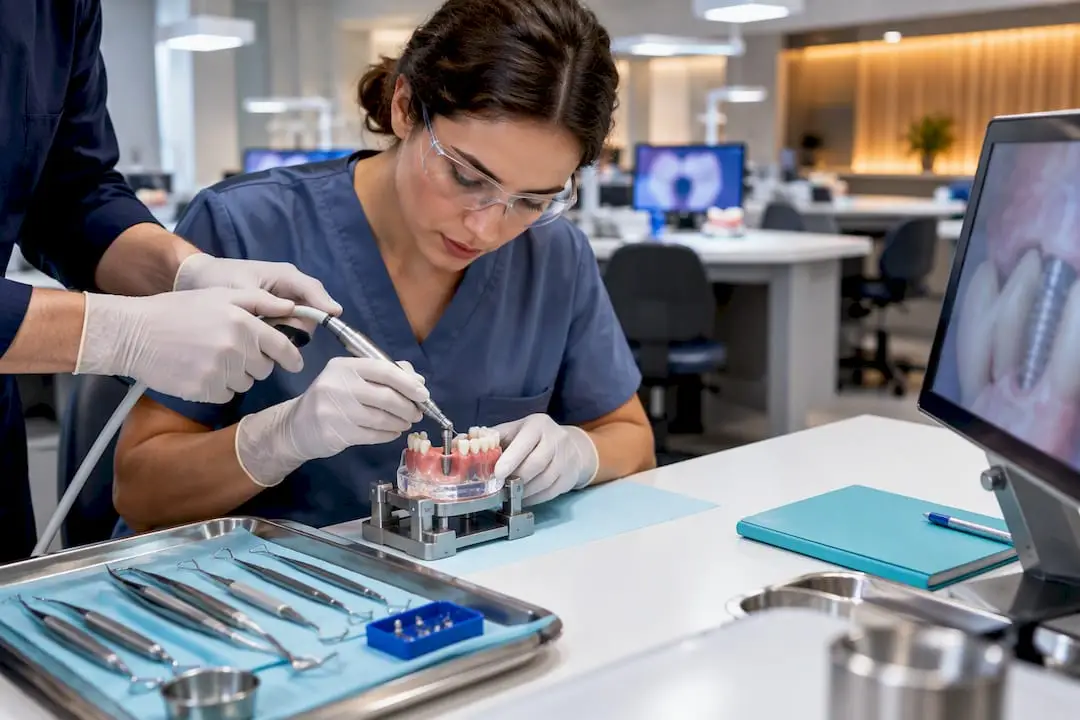
IPR is appropriate for mild-to-moderate crowding, Bolton discrepancies, and black-triangle correction, generally up to about 6 mm of arch length deficiency before extraction should get serious consideration. The working sequence is align, gain access, remove enamel in staged increments while measuring after each pass, then polish and remineralize. Per-surface removal guidelines run in small increments on mandibular centrals up to larger increments on buccal segment contacts, always adjusted to the patient’s actual enamel thickness.
What Does an Interproximal Reduction Protocol Actually Involve?
A working interproximal reduction protocol is really three linked decisions: how much space you need, how you’re going to remove enamel to get it, and how you confirm you stopped in time. Skip any one of those and the procedure stops being conservative and starts being a gamble with irreversible tissue damage.
Primary indications for IPR include:
- Mild-to-moderate crowding where extraction feels like overtreatment
- Bolton tooth-size discrepancies between upper and lower arches
- Black triangle and papilla management after alignment closes contacts unevenly
- Fine-tuning interproximal contacts during finishing to improve stability
The magnitude of crowding matters more than most clinicians treat it. IPR works well as a non-extraction strategy up to roughly 6 mm of total space deficiency; beyond about 10 mm, extraction usually becomes the more predictable path. In aligner workflows, IPR is often programmed directly into the digital treatment plan and staged across multiple aligner sets, whereas in fixed-appliance cases it’s typically performed chairside once brackets have brought teeth into a workable position. Either way, the goal is the same: create space without compromising enamel integrity or long-term periodontal health.
Who Should You Screen Out Before Starting IPR?
Not every crowded case is a candidate, and some patients need a firm “no” before you pick up a strip. Screening takes ten minutes and prevents problems that take years to unwind.
Absolute and relative contraindications:
- Active caries or high caries risk without a stabilized hygiene routine
- Enamel hypoplasia, fluorosis, or thin enamel visible on radiographs
- Immature teeth with large pulp chambers (common in younger adolescent patients)
- Poor oral hygiene or uncontrolled periodontal disease
- Tooth morphology with minimal enamel width at the contact point, which limits how much can be safely removed while keeping a stable contact
Document the conversation, not just the procedure. Your consent record should note the estimated space needed, the tooth surfaces involved, alternatives discussed (including extraction and expansion), expected sensitivity, and the patient’s acknowledgment that enamel removed is permanent. A brief caries risk note using something like an ADA caries risk assessment belongs in the chart before any bur or strip touches the tooth.
How Do You Convert Crowding Into a Per-Surface Removal Plan?
The math here is where most errors start, not at the handpiece. Get the number wrong at the planning stage and no amount of chairside care fixes it.
- Run an arch-length analysis. Measure available arch length against the space required to align all teeth, using models, digital scans, or a Bolton analysis when tooth-size ratios look off between arches.
- Set a total IPR budget. Decide how much of the total space deficiency will come from IPR versus expansion, proclination, or distalization. IPR is rarely the sole space source in cases needing more than a few millimeters.
- Apportion the budget across contacts. Spread the total across the specific interproximal surfaces you’ll treat, weighting toward posterior contacts where enamel is typically thicker and less visible.
- Apply per-tooth ceilings. A commonly cited guideline puts safe removal per surface at small fractions of a millimeter for mandibular centrals, slightly larger for laterals and canines, and larger increments for proximal surfaces in buccal segments. Treat these as starting ceilings, not targets to hit on every case.
- Confirm enamel thickness where uncertain. Bitewing or periapical radiographs can flag unusually thin enamel before you commit to a removal plan.
- Build in a safety margin. Plan to remove slightly less than the ceiling on the first pass, then reassess. It’s far easier to take a second small increment than to undo an over-reduced contact.
This staged approach, measuring after each increment rather than removing the full planned amount in one pass, is the same principle behind chairside protocols like the IPR for aligners technique that One World Dental teaches in its hands-on courses.
Manual Strips vs. Oscillating Systems vs. Disks: Which One Should You Use?
Instrument choice changes accuracy, speed, and how the finished surface behaves under a toothbrush for years afterward. There’s no single right answer for every contact, but there is a clear evidence lean.
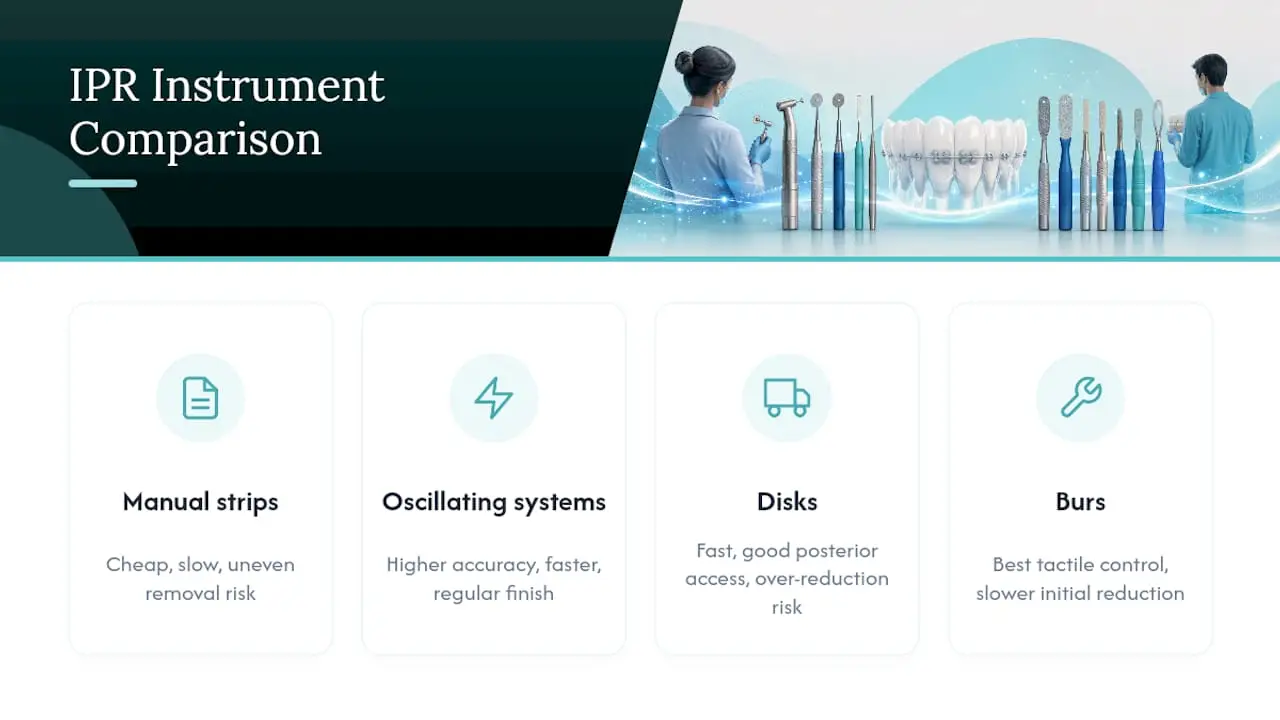
Manual abrasive strips are cheap, widely available, and forgiving for very small corrections. They’re slow for anything beyond fine adjustment, and manual control makes it easy to remove enamel unevenly across the surface, especially in tight posterior contacts where visibility is limited.
Oscillating mechanical strip systems are the evidence-preferred option where available. Systematic review data shows oscillating mechanical systems achieve higher accuracy and more regular enamel surfaces than manual methods, largely because the motion is consistent and operator-dependent variability drops. They’re faster than manual strips for larger corrections and tend to produce a more predictable finish, though the equipment cost is higher and access in very tight contacts can still be tricky.
Diamond disks offer strong access to posterior segments and cut quickly, which makes them useful when you need to move real volume. The tradeoff is control. Disks are easier to over-reduce with and carry more risk of nicking adjacent soft tissue or gouging an uneven surface if the handpiece isn’t stabilized.
Tungsten carbide or diamond burs give the most tactile control in a handpiece clinicians already know well, useful for reshaping contact point anatomy after bulk reduction. They’re slower for the initial reduction and less suited as a primary removal tool across multiple contacts in one visit.
A practical selection rule: use disks or oscillating strips for the bulk of planned reduction, switch to fine manual strips or burs for final contact shaping, and reserve disks for posterior access where a strip won’t reach. Whichever tool you pick, oscillating systems generally offer better control, but operator skill and a disciplined finishing protocol matter just as much as the instrument itself.
How Do You Run IPR Chairside Without Overheating or Over-Reducing?
This is the part clinicians actually want when they search for an interproximal reduction protocol: the step-by-step sequence you can run at the chair with a patient in the seat.
Before you start:
- Confirm teeth are aligned enough to give clean access to the contact you’re treating. IPR on rotated or overlapped teeth risks uneven, unpredictable removal.
- Place separators or use floss to confirm contact tightness and identify exactly where the contact point sits before introducing any instrument.
- Mark your planned removal amount on the chart for that specific surface, referencing the per-tooth ceiling you set during preoperative planning.
During the procedure:
- Remove enamel in small increments, generally 0.1 to 0.25 mm per pass, rather than attempting the full planned amount in one continuous stroke.
- Measure after every increment using a calibrated diamond disk, a feeler gauge, or a purpose-built IPR gauge compared against your pre-marked reference. Never estimate by feel alone on a surface approaching its ceiling.
- Use continuous water cooling with adequate airflow throughout active reduction. Clinical data shows pulp temperature does rise during enamel abrasion, but it typically stays below the 5.5°C threshold associated with pulpal injury when water cooling and light, intermittent pressure are used consistently.
- Work with four-handed technique whenever the segment allows it. A second set of hands to manage suction, retraction, and irrigation lets you keep constant light pressure instead of pausing and restarting the stroke, which itself generates more frictional heat.
- Reassess total space gained after every one or two contacts rather than completing an entire quadrant before checking. Cumulative small increments are far easier to correct than a large one-shot removal that goes past target.
- Recreate natural contact point anatomy as you finish each surface. Flat, over-broadened contacts trap plaque and look artificial; a slightly convex, tapered profile mimics natural anatomy and cleans better.
- Check occlusion and contact tightness with articulating paper and floss before moving to the next contact or ending the visit.
Per-visit limits. Cap total enamel removal per visit across multiple contacts, especially in patients with any borderline caries risk factors. Spreading reduction across two or three shorter visits rather than one long session gives you more measurement checkpoints and reduces cumulative heat exposure on any single tooth.
Pro Tip: Keep a small paper template of the arch with each planned surface and its target mm noted before you start. Cross off each increment as you measure it. It sounds low-tech, but it’s the single easiest way to prevent “just a little more” creep on a contact that’s already at its ceiling.
How Should You Finish and Remineralize Enamel After IPR?
Reduction without finishing is an incomplete interproximal reduction protocol; the polishing and remineralization phase is what determines whether the surface you created is biologically stable long-term.
Progressive polishing sequence:
- Start with a medium-grit finishing disk to smooth the coarsest surface irregularities left by the reduction instrument.
- Move to fine and superfine disks or strips to eliminate visible scratches.
- Finish with rubber cups or silicone polishers and a polishing paste for a final smooth pass.
Polishing matters more than most clinicians assume. Research confirms that proper finishing significantly reduces enamel surface roughness, and rough, unpolished enamel accumulates plaque faster and feels different to the patient’s tongue for months afterward.
Remineralization protocol. Apply topical fluoride varnish immediately after polishing, and consider a CPP-ACP paste (casein phosphopeptide, amorphous calcium phosphate) for patients with elevated caries risk or any sensitivity history. The same systematic review evidence supporting fluoride’s remineralizing effect on abraded surfaces backs a simple rule: never skip this step, even when the reduction felt minor.
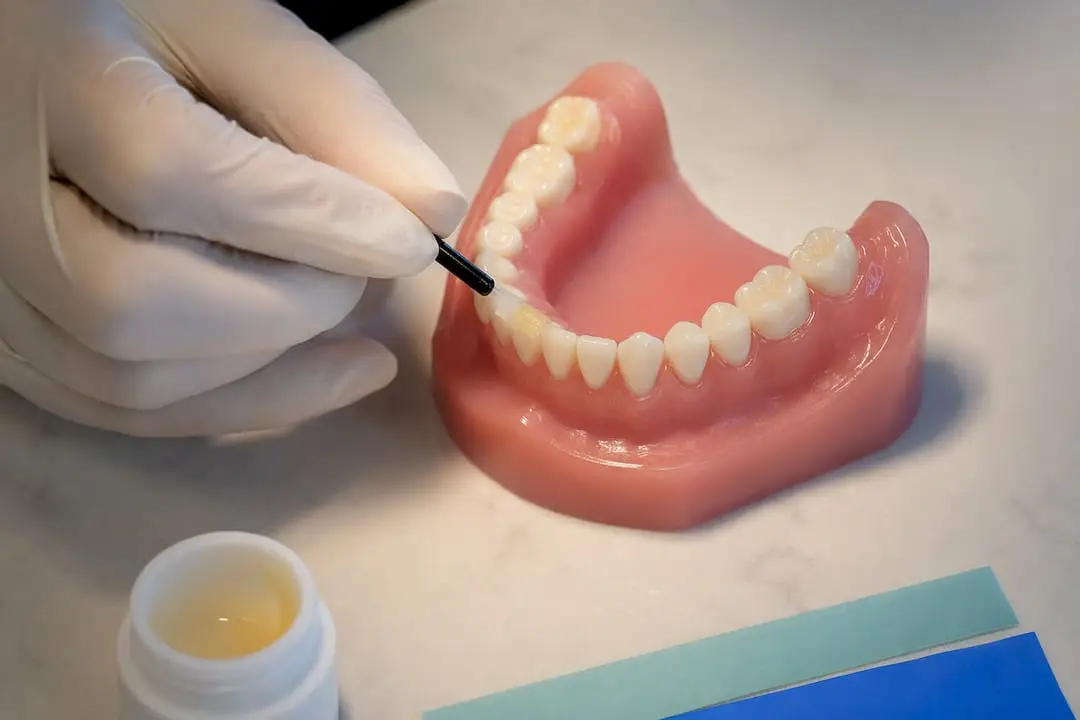
Post-op instructions and monitoring. Advise a fluoride rinse for the following two weeks, flag that transient cold sensitivity is common and usually resolves within days, and schedule a check at the next routine visit to confirm contacts remain stable and hygiene is adequate. If retention is a concern after finishing, pair this conversation with the patient’s long-term appliance retention plan so expectations are set from day one.
What Are the Real Risks of IPR, and How Do You Manage Them?
The honest answer clinicians want when they search for downsides: the risk profile is low when protocol is followed, but the failure modes are specific and worth naming directly.
Systematic review evidence shows no long-term increase in caries incidence or periodontal breakdown after IPR performed to standardized protocols. Transient sensitivity happens, and permanent pulpal damage from IPR itself is rare when cooling and staged removal are used correctly.
The complications that do occur, and how to prevent each one:
- Over-reduction. Prevented by measuring after every increment against a pre-marked reference, never estimating by feel.
- Increased surface roughness. Prevented with a complete progressive polishing sequence, never skipped even on small corrections.
- Pulp temperature rise. Managed with continuous water cooling, light intermittent pressure, and staged rather than continuous strokes.
- Ledges or open contacts from uneven removal. Prevented by reshaping contact anatomy actively during finishing, not just smoothing whatever shape the reduction instrument left behind.
Stop and refer when you see spontaneous pain, lingering thermal sensitivity beyond a couple of weeks, radiographic signs of pulpal involvement, or when your measurements show you’ve approached the outer edge of the safe per-surface ceiling before achieving the planned space. At that point, the remaining space needs to come from a different mechanism, not from pushing one contact further.
What Does the Evidence Actually Show, and Where Are the Gaps?
The evidence base for IPR has matured substantially, but it still leans on smaller clinical trials rather than large multi-center studies. Here’s the honest state of it:
- Systematic reviews consistently find IPR safe when performed with standardized protocols, with no long-term increase in caries or periodontal disease reported.
- Pulp temperature studies show measurable heat generation during reduction, but temperatures typically remain below the 5.5°C threshold linked to pulpal injury when water cooling is used.
- Comparative studies favor oscillating mechanical systems over manual strips for accuracy and surface regularity, though sample sizes in individual trials are often small.
- Quality limitations across the literature include short follow-up periods and variation in how “roughness” and “safety” get measured between studies, which limits direct comparison.
The consensus points clinicians can act on with confidence: polishing and cooling are non-negotiable steps, and oscillating systems produce more predictable outcomes than freehand manual strips when equipment access allows.
Chairside Nuances for IPR in Aligner Cases
Textbook numbers only get you so far. The gap between knowing the 0.2 to 0.5 mm guidelines and applying them confidently on a real patient is exactly where most clinicians hesitate, and it’s where supervised practice earns its keep.
The IPR for aligners protocol that One World Dental teaches emphasizes staging reduction in 0.1 to 0.25 mm increments, using calibrated diamond disks or feeler gauges against a pre-marked reference rather than estimating by feel, and building the finishing pass into the same visit rather than deferring it.
What separates confident execution from hesitant execution:
- Tactile calibration: knowing what 0.1 mm of resistance feels like on a strip versus a disk only comes from repetition
- Recognizing when a contact’s anatomy limits how much can be safely removed before it happens on a live patient
- Sequencing IPR within a broader aligner staging plan so space creation lines up with tooth movement, not against it
Supervised, hands-on mentoring reduces exactly the kind of iatrogenic error that reading alone can’t prevent, because tactile feedback doesn’t transfer through a paper protocol. Practicing on typodonts under direct supervision before working chairside on patients is the difference between reciting the numbers and trusting your hands with them.
Author Perspective: IPR as a Surgical Adjunct, Not a Shortcut
Enamel removed is enamel gone permanently, which is why IPR deserves the same discipline as any surgical procedure: precise indication, a measured plan, and a stopping point you respect. Treat it as a shortcut around extraction and you’ll eventually over-reduce a contact you can’t undo. The clinicians who get the best long-term results are the ones balancing esthetics against periodontal stability and function on every single contact, not just chasing the total millimeters needed. If you’re building this skill, supervised practice on complex cases beats reading protocols alone every time.
— Jake
Where to Build Hands-On IPR Skill Beyond This Protocol
Reading a chairside sequence is one thing. Running it confidently on a patient with a tight posterior contact and thin enamel is another, and that gap is exactly what mentorship-based training closes. Onewd’s IPR & Attachment CE course walks through space creation, staging, and attachment placement with live demonstration and supervised practice, so the tactile calibration this article can only describe gets built under a mentor’s eye instead of trial and error on your own patients.

The course reinforces every checkpoint covered above: measurement discipline, cooling technique, and finishing sequence, with direct feedback on your technique rather than a video you watch alone. If you’re weighing where to invest your next CE hours, this is the course that maps most directly onto the protocol you just read. Browse the full training course catalog to see current dates and format options, and get started on the specific skill gap that’s holding your IPR cases back.
Recommended